How to request roles for Stack Dask on My DataLake Services
Dask is a Python library for parallel and distributed computing, especially well-suited for handling large Earth Observation datasets like EODATA. It enables scalable, chunked, out-of-core computation on data that doesn’t fit in memory — perfect for satellite imagery, time series, and EO pipelines.
Within DEDL, you can run DASK on JupyterLab environment.
Roles determine which features of the Destination Earth Cloud platform you can access. This article explains how to request roles for the stack-dask service on My DataLake Services.
What we are going to cover
Prerequisites
No. 1 Account
You need a profile on My DataLake Services: How to create a profile on My DataLake Services.
No. 2 Administrative privileges within a project
You need to be a member of a project and have administrative privileges in it. That project must be accepted by an operator of My DataLake Services.
To learn how to create a project, check How to create a project on My DataLake Services.
Alternatively, you can join an existing project. In that case, the project administrator can grant you administrative privileges.
Choosing which role to request
Sign in to My DataLake Services https://application.data.destination-earth.eu/.
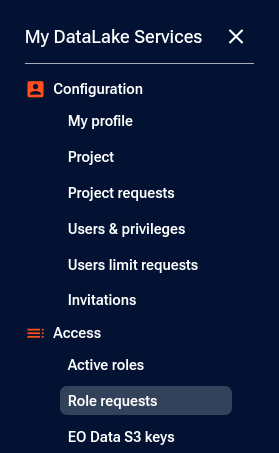
Navigate to Role requests:
You should see a page similar to this:
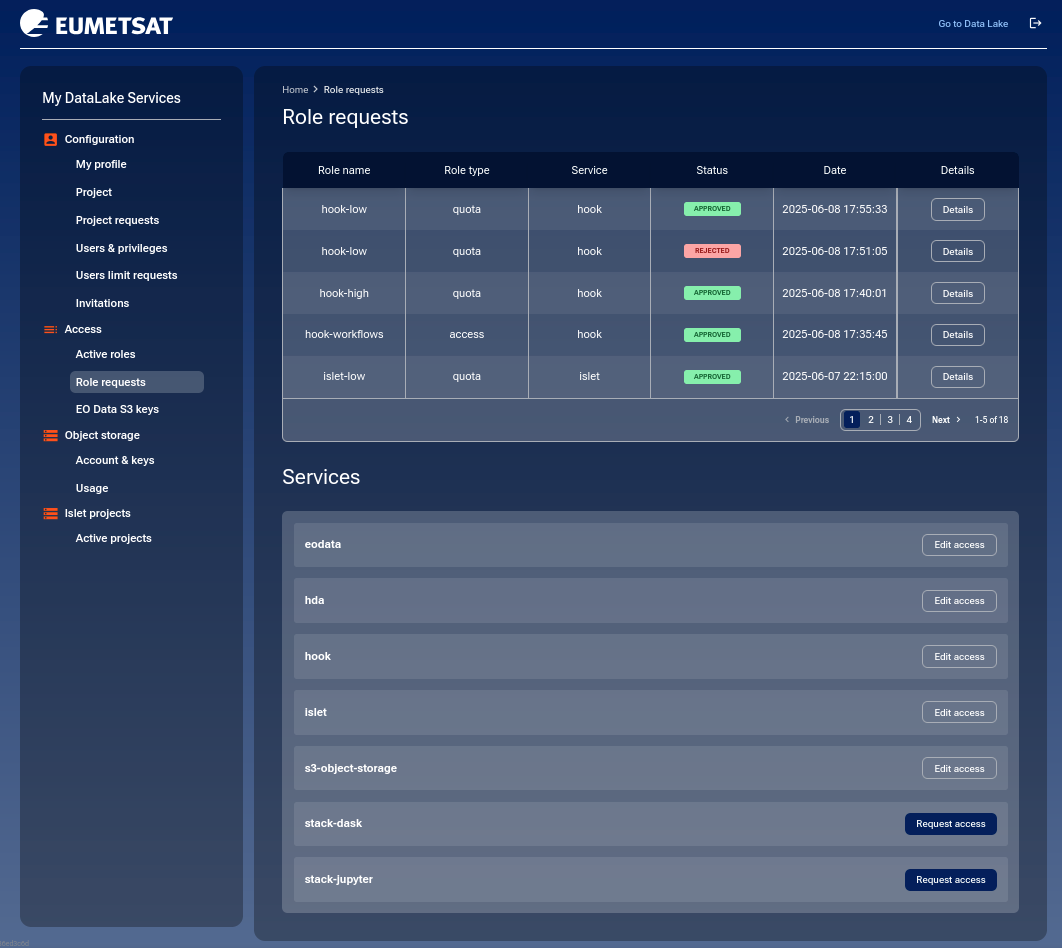
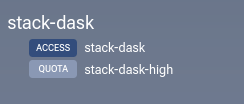
Assuming you do not already have access to stack-dask, click the Request access button for service stack-dask.
Tip
If the service does not appear, verify that your project has been approved by the operator.
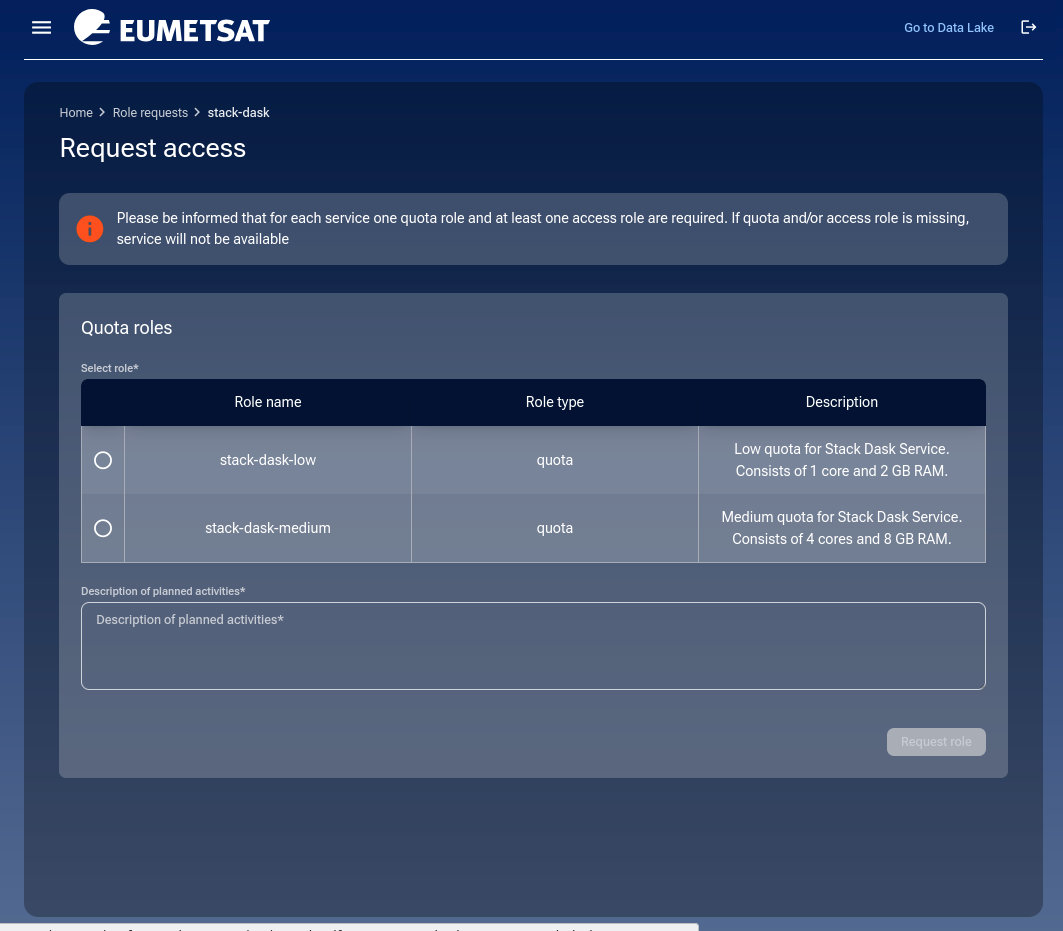
You’ll be taken to a page titled Request access, divided into two sections: Access roles and Quota roles. You will need to fill both of these forms.
Access roles
For stack-dask service, there is only one access role:
- stack-dask
Access to Stack Dask Service (SaaS)
Even though only one access role exists, you must explicitly select it to proceed.
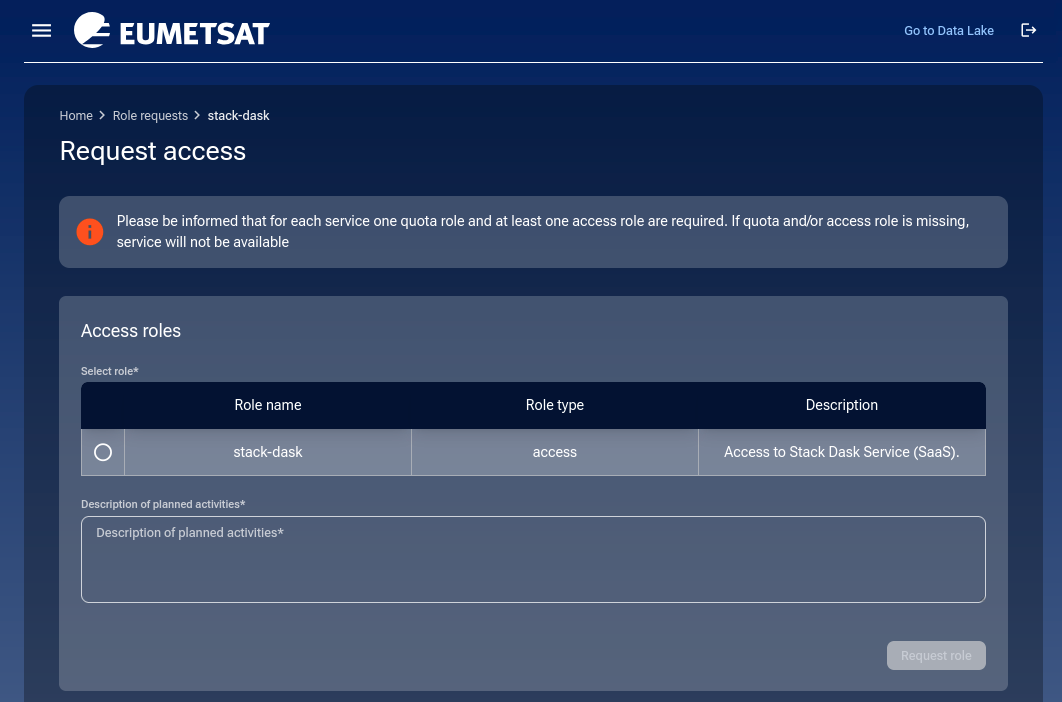
It is mandatory to enter text into field Description of planned activities.
Once you click on button Request role, another part of the screen scrolls up, this time to request quota role.
Quota roles
For stack-dask service, there are three quota roles:
- stack-dask-low
Low quota for Stack Dask Service. Consists of 1 core and 2 GB RAM.
- stack-dask-medium
Medium quota for Stack Dask Service. Consists of 4 cores and 8 GB RAM.
- stack-dask-high
High quota for Stack Dask Service. Consists of 12 cores and 24 GB RAM.
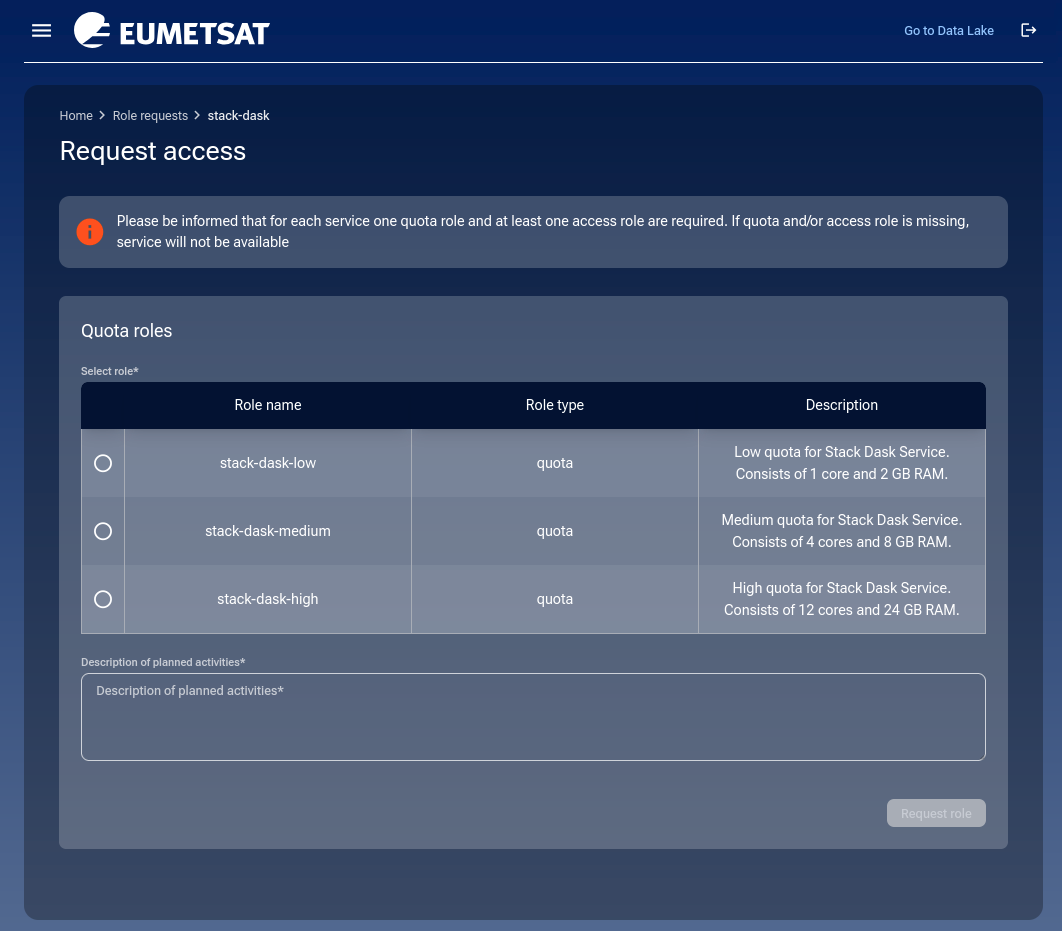
Click on Select role circle to choose.
It is mandatory to enter text into field Description of planned activities.
Finish with clicking on Request role and you will see a list of your requests.
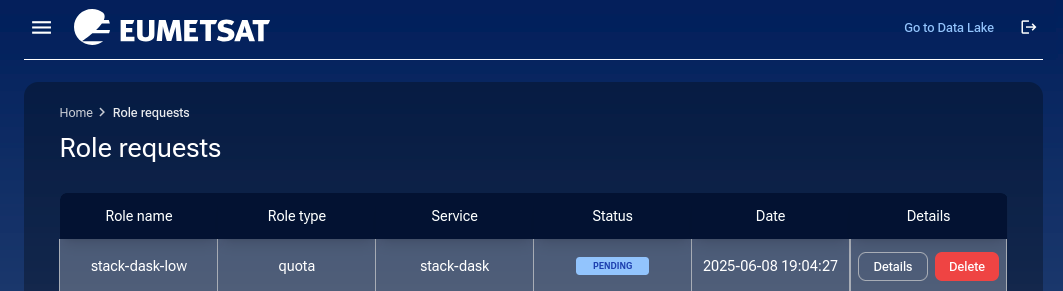
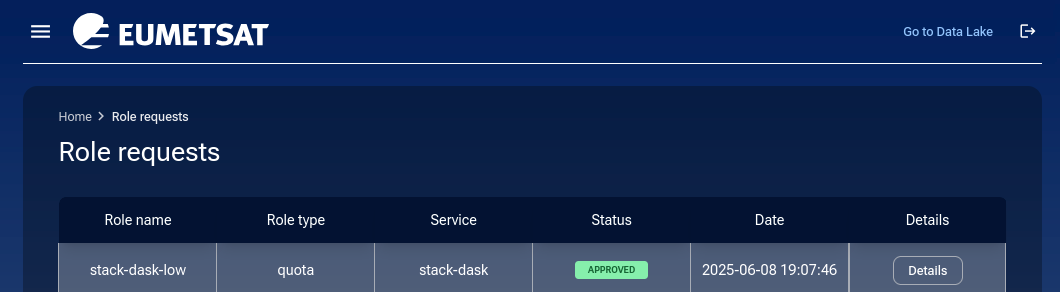
List of role requests
Once submitted, your request appears in the Role requests section. Here are the latest two, for stack-dask service:
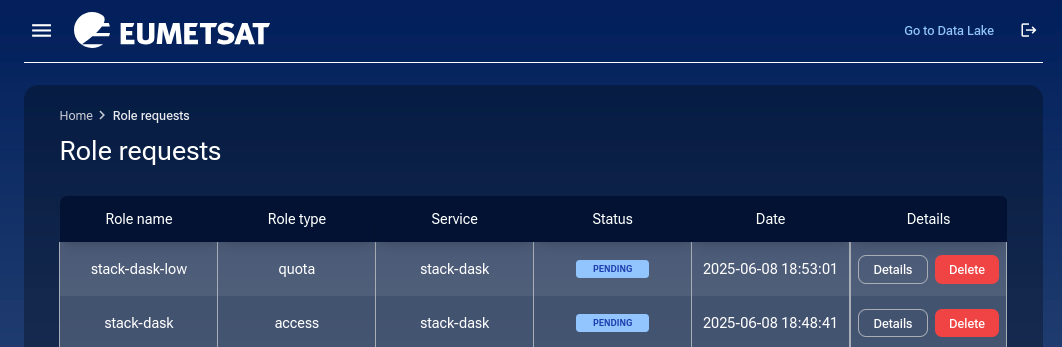
Buttons Details and Delete are described in detail in the later part of this article.
Operator approval
The next phase is waiting for the DEDL operator to approve (or disapprove) your requests. When approved, you will see it in the list of Active roles.
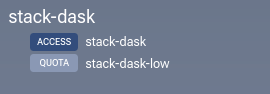
List active roles
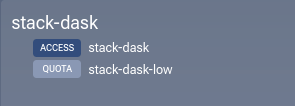
With option Access -> Active roles from the left side menu, you can see the existing active roles:
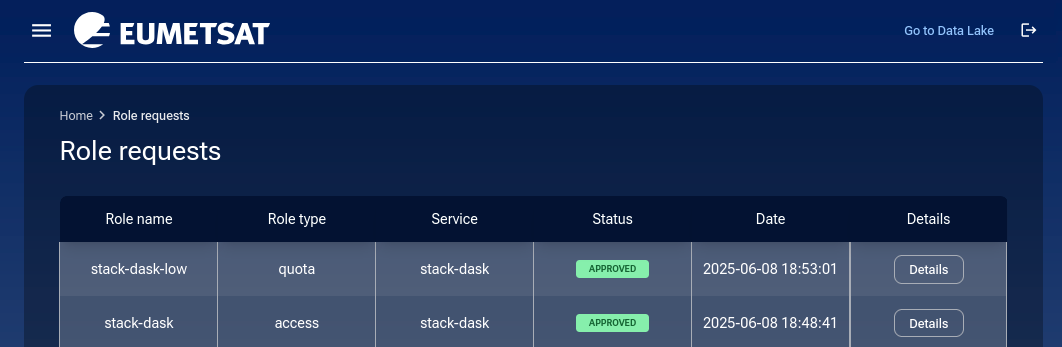
List role requests
Another option, Role requests shows the history of requested roles:
Click on Details button to see the exact details of, say, stack-dask role:
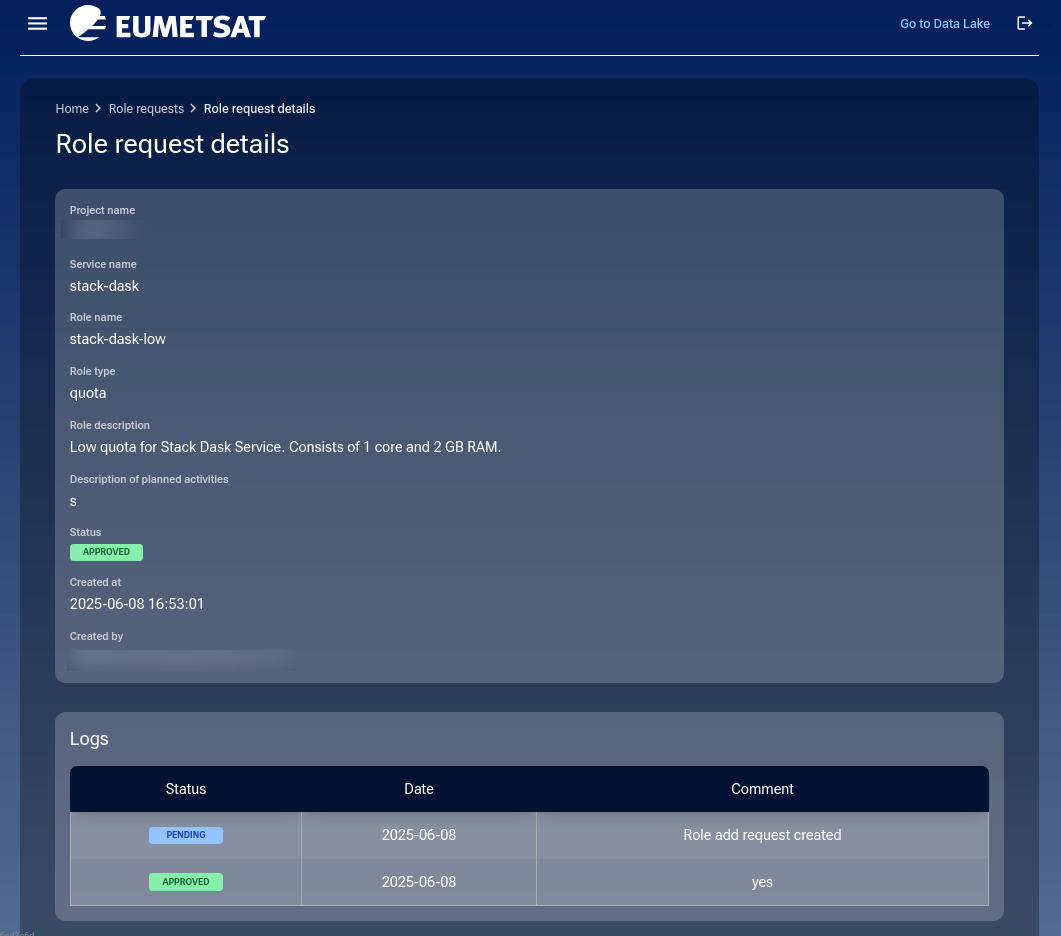
This shows the submitted form, quota selection, and any comments from the operator.
How to change roles for stack-dask service
It is possible to change the role you already have for another one that is available for the service. If there was only one role to start with, it is not possible to change it for something else. Concretely, there is only one access role for stack-dask service, so you cannot change it. However, there are three quota roles and there you can request for a change.
Users often downgrade their quota if their usage is light or for cost control. So, if you initially selected stack-dask-high and this is what you see in Active roles:
Now that you want to lower your quota to stack-dask-low, click on Role requests to see all active services and click on the Edit access button next to stack-dask:
There is a total of three quota roles and you already have the high one, so you can now choose from the other two, for stack-dask-low and stack-dask-medium access.
Click on the Select role column and enter some text into field Description of planned activities. Once the form is filled, the Request role button becomes active. Click it to continue. In the list of role requests, a new request to the operator will appear as PENDING:
There are two options now available for that request:
- Details
This is the standard option for all requests.
- Delete
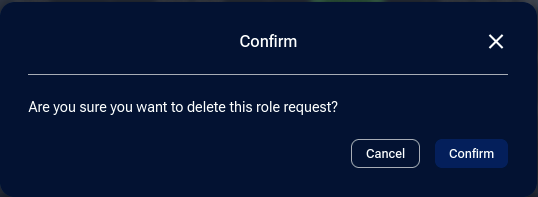
This is the new option, with which you can delete the request before the operator sees it.
You will have a chance to cancel or confirm:
If you confirm, a message will appear in the bottom right corner of the browser window:
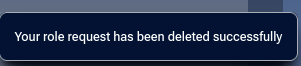
The request status will be marked as REJECTED, which in this case means that it was user-deleted — not rejected by the operator.
If not deleted by the user, the request will in due time appear before the operator, who will approve it or reject it.
In case of approval, the role request will become APPROVED:
Click on Active roles to verify that the quota has changed to low:
If rejected, you will, under Details, see the message that the operator sent you.
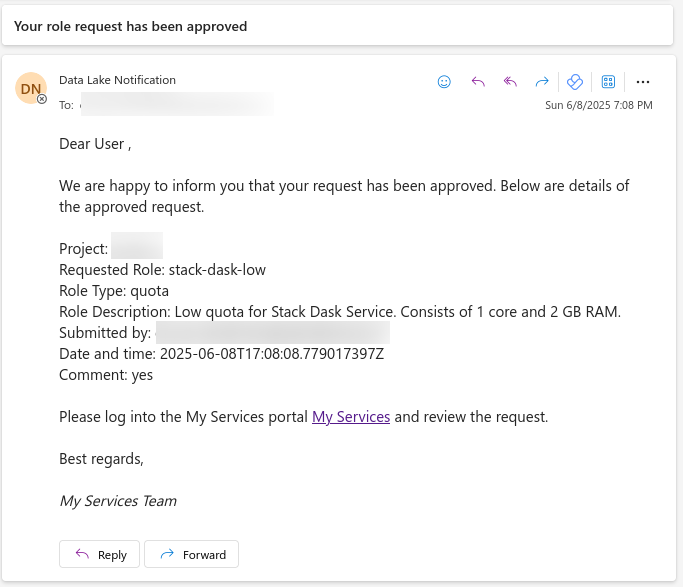
Email messages
For each change in status of a service, you will get an email message to the email address you are using to log in. It looks like this:
Using the search mechanism in your email client, you should be able to register every change in quota status for any service in My DataLake Services.
How to remove access to a service on My DataLake Services
Currently, there is no way to remove your access via the interface. Please contact Support to request role removal or account deletion.
Similarly, if you want to stop being an owner of a My DataLake Services account, ask the same Support to delete it for you.
What To Do Next
Your approved roles enable you to begin working with Stack Dask on DEDL. Start using the Stack Dask service by visiting the dedicated setup page with the allocated quotas.
Also of interest:
How to invite a user to a project on My DataLake Services
How to manage users within a project on My DataLake Services
See status page for Destination Earth Data Lake stack dask services.