Introduction to IPv6
- IPv6 Use Cases
Private networks
Public networks
Single/Dual stack
Security groups
Address assignment
- Load balancers
Dual stack
Configuring External Network Access for IPv6
- Creation of IPv6 network with router
Prerequisites
Step 1 Network Creation
Step 2 Subnet Creation
Step 3 Router Deployment
Step 4 Configuring External Gateway for Router
Step 5 Subnet Integration with Router
Important Considerations
IPv6 is the latest version of the Internet Protocol that provides a vastly expanded number of IP addresses compared to the current IPv4 system. This expansion is crucial for accommodating the exponential increase in devices connecting to the Internet.
IPv6 Use Cases
Any network, including pre-created tenant networks, can have an IPv6 subnet attached just as an IPv4 subnet would be.
Private networks
The private IPv6 address range spans from fc00::/7, making any /64 subnet within this range not only an excellent choice but also the most recommended option for local network prefixes.
For example, a network can be configured with a mnemonic address like fc00:abcd:1234:1::/64. Typically, the network gateway is located at the first address of the subnet, (at :1), and it is crucial to keep this gateway active to support any form of automatic address assignment, such as SLAAC.
Although it is possible to use other IPv6 prefixes, including publicly routable ones, within private networks, these addresses will not be visible from the Internet. As a result, a private IPv6 network will not have any internet access.
Public networks
To establish a public IPv6 network, utilize addresses from the provided subnet pool, which can be selected either through the Horizon interface or via the --subnet-pool option in the command-line interface (CLI).
After selecting the appropriate subnet, create a tenant network and connect it to a router that has a gateway in one of our external networks.
It is important to note that all IPv6 networks with internet access are publicly visible. Therefore, avoid connecting servers with permissive access groups to public networks unless necessary.
Single/Dual stack
Although single stack IPv6 is supported, it is recommended to attach an IPv4 network during the setup and throughout the lifecycle of a virtual machine.
This ensures compatibility and allows services like cloud-init to function correctly.
Security groups
IPv6 security groups are fully supported but require additional rules compared to IPv4, including the “Any host” rule set to ::/0 to encompass all IPv6 addresses.
When adding interfaces to a server, be mindful of the security groups assigned to each port, as a new port may not inherit all the security groups from the server.
Address assignment
The recommended setting for address assignment is SLAAC using the EUI-64 format. This setting MUST be explicitly configured otherwise, it will default to “None”.
There are following modes available:
- SLAAC (eui-64) RECOMMENDED
The gateway router sends RA containing network prefix so the VMs can statelessly compute their addresses with eui-64 algorithm.
It is important to note that any other algorithm or a privacy extension of eui-64 will break the functionality - it needs to be exactly eui-64 no privacy.
- SLAAC(external)
Exists for specific use cases outside the scope of this document.
- DHCPv6 stateful
Classic DHCP, unsupported in many images as a default option.
- DHCPv6 stateless
A mix of SLAAC and DHCP - router provides prefix, DHCP provides extended options like DNS.
Load balancers
Dual stack
Load balancers in OpenStack, cannot support dual-stack Virtual IPs on a single instance. If IPv4 and IPv6 frontends are needed, two separate load balancers are required, each connected to its respective subnet. Additionally, in dual-stack networks, load balancers can handle pool members using both IPv4 and IPv6. They can also include pool members from external networks that are routable.
Configuring External Network Access for IPv6
Below is a step-by-step guide on how to configure external access for IPv6 networks using OpenStack:
- Step 1.
Verify that the neutron-server has all the necessary patches applied to support IPv6 functionalities.
- Step 2.
Establish the IPv6 subnet as the primary subnet in the external network range. This subnet will handle the external IPv6 traffic, providing a gateway to the internet. Use the following command to create the subnet:
openstack subnet create \
--network external \
--tag external \
--subnet-pool external-ipv6-pool \
--gateway "<addr>::1" \
--dhcp --ip-version 6 \
--ipv6-ra-mode slaac \
--ipv6-address-mode \
slaac external-ipv6
- Step 3.
Add an IPv6 Subnet Pool. Setting up a subnet pool is essential for managing the allocation of IPv6 addresses within your external network.
openstack subnet pool create \
--pool-prefix "<addr>::/48" \
--min-prefix-length 64 \
--max-prefix-length 64 \
--default --share \
--description "GUA public IPv6 adresses" \
external-ipv6-pool
Creation of IPv6 network with router
Prerequisites
No. 1 Account
You need a valid account with access to the Horizon interface:
DEDL CENTRAL: https://cloud.central.data.destination-earth.eu/project/
DEDL LUMI: https://cloud.lumi.data.destination-earth.eu/project/
DEDL LEONARDO: https://cloud.leonardo.data.destination-earth.eu/project/
DEDL MARENOSTRUM: https://cloud.marenostrum.data.destination-earth.eu/project/
DEDL EUMETSAT: https://cloud.eumetsat.data.destination-earth.eu/project/
No. 2 RC File
Download the corresponding RC file. That file can be executed using a source command in Linux/UNIX environments. Once executed, it will ask you for the password and will authenticate you with it.
No. 3 Linux instance
Ensure you have a station with a Linux bash shell and the latest python-openstackclient installed, along with Internet access.
Step 1 Network Creation
Initiate the creation of a network by executing the following command:
openstack network create ipv6-network
Step 2 Subnet Creation
Set the subnet configuration to determine the address allocation for your network.
openstack subnet create \
--ip-version 6 \
--ipv6-ra-mode slaac \
--ipv6-address-mode slaac \
--use-default-subnet-pool \
--network ipv6-network \
ipv6-subnet
Step 3 Router Deployment
Enable routing capabilities within your network infrastructure to foster communication between subnets.
openstack router create router1
Step 4 Configuring External Gateway for Router
Configure the router to connect to an external network, granting access beyond your local environment.
openstack router set router1 --external-gateway external
Step 5 Subnet Integration with Router
Integrate the newly created subnet with the router to ensure seamless device communication across the network.
openstack router add subnet router1 ipv6-subnet
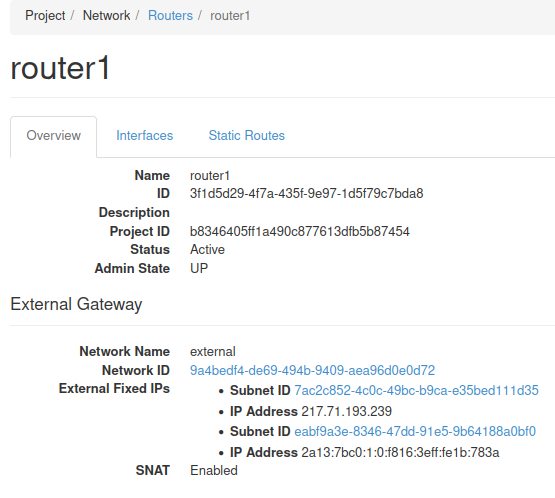
After finishing the outlined steps, the results can now be viewed using the Horizon interface.
Important Considerations
Before proceeding with the implementation, it is crucial to note the following:
HTTP(s) Addresses: Ensure that IPv6 addresses used in URLs are enclosed in square brackets to distinguish between the address and the port number.
http://[fd00:dead:beef:64:34::2]:80
Link-Local Addresses: Every interface in an IPv6 network is automatically assigned a link-local address. These addresses are crucial for local communication, and it’s important to specify the interface when using them to ensure clear and targeted network interactions. Example:
fe80::a9fe:a9fe%eth0
Private Range: The private range for IPv6 is fc00::/7.
Link-Local Address: The link-local address (fe80::) is crucial for IPv6 protocol functionality and is always present on network interfaces.
Network Subnetting: Use /64 networks for your subnets unless you have a compelling reason not to do so. This standardization ensures proper IPv6 functionality and compatibility.
SLAAC Configuration: EUI64 without privacy extensions is endorsed in our SLAAC. Any other method would not work, as the address must be the same as the one Openstack shows in server show. This is due to port security.
Port Security and Metadata6 Service: Disabling port security can disrupt the Metadata6 service. This service listens on the link-local address fe80::a9fe:a9fe%interface, requiring a specific interface pointing. It is essential for cloud-init OpenStack source compatibility, although it does not function for EC2 source.
DNS Configuration: In single-stack IPv6 implementations, manual DNS configuration for instances is necessary to ensure proper name resolution.
Dual-Stack Recommendation: We highly recommend dual-stack implementations, even with a stub IPv4 private subnet. Dual-stack offers simplicity in configuration and ensures compatibility with various image types.
Default Security Groups: At present, default security groups do not allow incoming IPv6 traffic. Ensure proper to accommodate IPv6 traffic requirements.