Request access to Edge Services
The Destination Earth Core Platform (DESP) is the main public entry point to the DestinE system. You can browse available services without registering, but access requires a registered account, as mandated by the European Commission. Only registered users are permitted to request and use DestinE services.
What we are going to cover
Edge Services
Edge services refer to near-data processing services:
These services run processing workloads close to the data and require allocated infrastructure. Access must therefore be requested through an approved project in My DataLake Services. The platform operator reviews project and role requests before the requested service becomes available.
The shared access path consists of a DestinE account, a My DataLake Services profile, an approved My DataLake Services project, and the required service access and quota roles. After those roles become active, complete the setup required by the selected service. Islet users, for example, must still create an Islet project before opening OpenStack Horizon.
Prerequisites
No. 1 Active DestinE Platform account
You need a valid account that can sign in to the Destination Earth Core Platform. Create an account by following How to create a DestinE Platform account; use Managing an existing account on DestinE Platform to update an existing account. Confirm that you can sign in before creating the My DataLake Services profile.
No. 2 Active My DataLake Services profile
Create and activate your profile by following How to create a profile on My DataLake Services. The My DataLake Services overview explains how profiles, projects, users, and service resources are related. Finish with an active profile that can sign in to My DataLake Services.
No. 3 Approved My DataLake Services project and administrative privileges
Role requests belong to a My DataLake Services project. Create a project and wait for operator approval by following How to create a project on My DataLake Services, or join an existing approved project through How to invite a user to a project on My DataLake Services. Project administrators submit service and quota requests; if you joined the project as a regular member, ask an administrator to grant the required privileges as described in How to manage users within a project on My DataLake Services. Have the approved project selected in My DataLake Services.
No. 4 Target Edge service and required roles
Choose the service required by the project and estimate the resources needed for the planned workload. Project types in My DataLake Services explains the eligible project types. Review the role guide for the selected service before submitting the request:
How to request roles for Islet service on My DataLake Services
How to request roles for hook service on My DataLake Services
Have the service name, required access role, quota role, and a short workload description ready for the request form.
Request roles for an Edge service
Step 1 – Sign in and select the project
Sign in to My DataLake Services and select the approved project from Prerequisite No. 3. Confirm that you have administrative privileges in that project.
Step 2 – Open Role requests
Open Access → Role requests. The page lists the services for which the selected project can request or change roles:
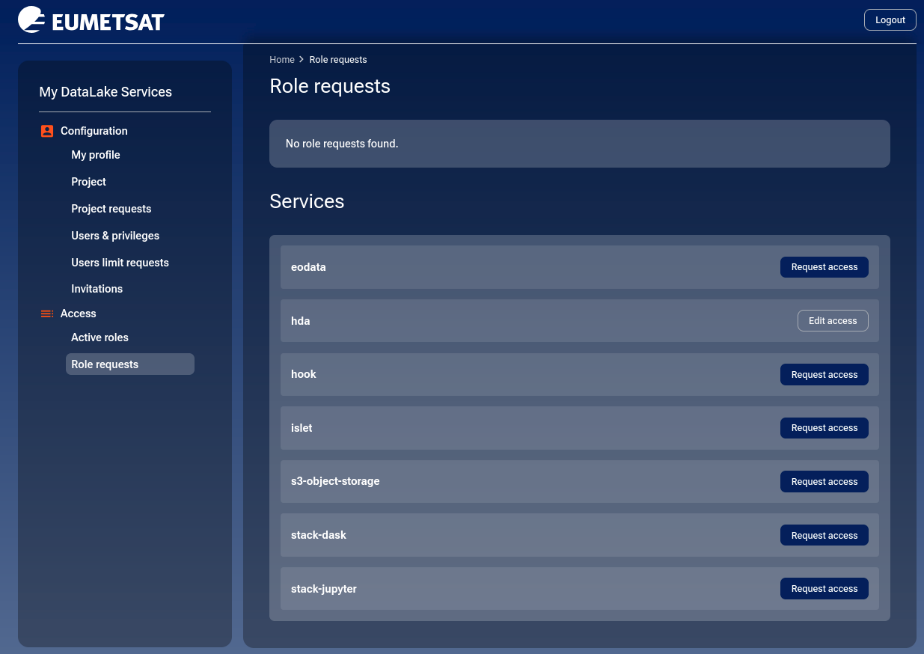
Services available under Role requests for the selected project.
Use the Services section to:
click Request access for a service that is not yet active;
click Edit access to request a different available role for an active service.
Step 3 – Select and request roles
The Request access page separates the available roles into:
Access roles, which authorize use of the service;
Quota roles, which allocate service resources.
Select the access and quota roles identified in Prerequisite No. 4. Some services have only one access role but several quota levels. Complete each required role request and provide a short, specific justification based on the planned workload.
For example:
We process around 10 TB of satellite imagery per month. Higher quotas are needed to support concurrent workflows efficiently.
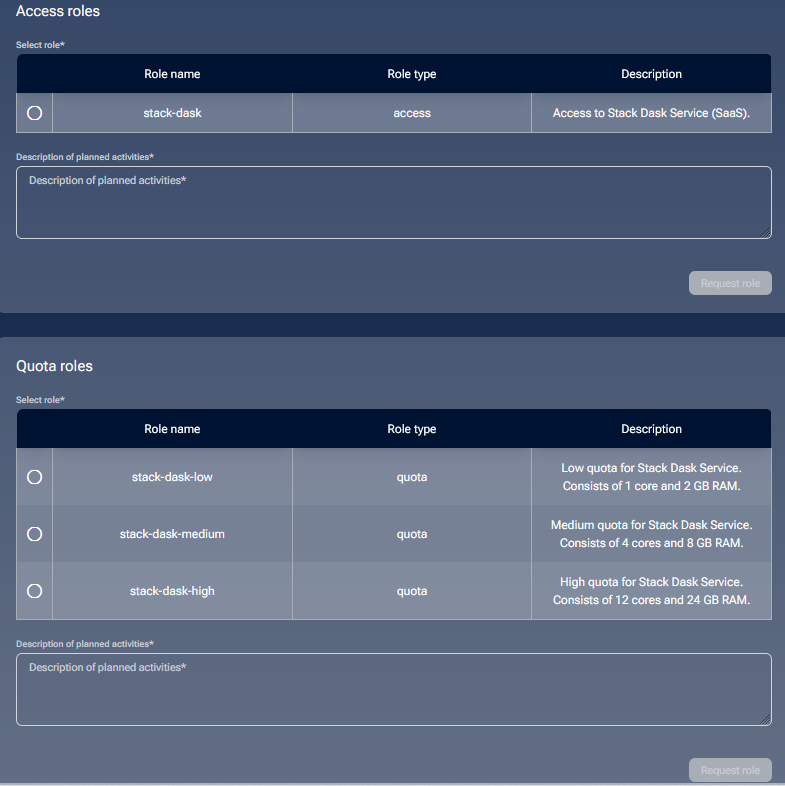
Access and quota role sections for the Stack Dask service.
Step 4 – Review submitted requests
Submitted access and quota requests appear as separate entries under Role requests:
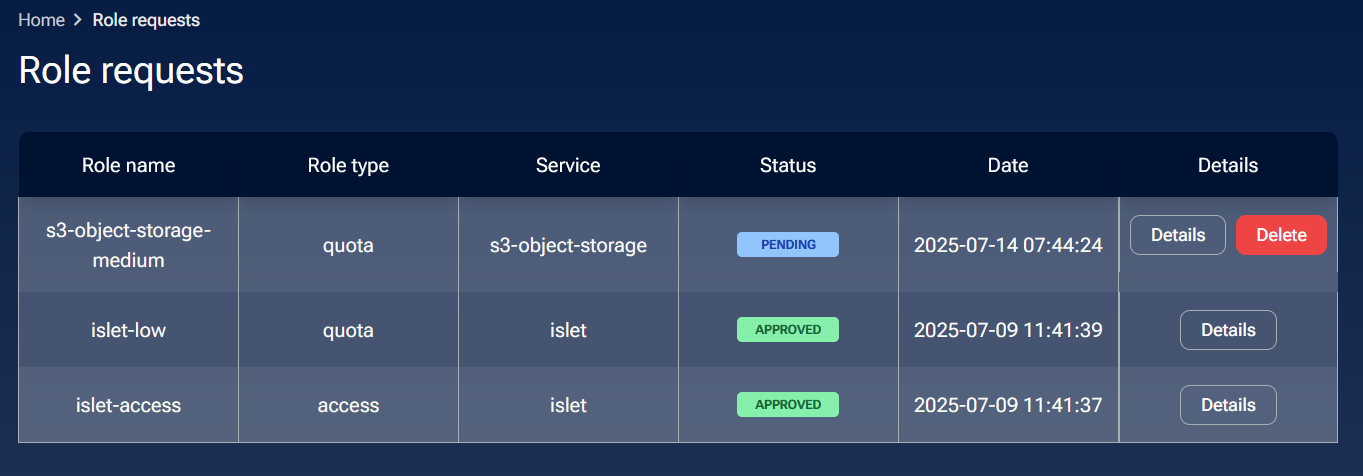
Submitted role requests and their current statuses.
Two options are available:
- Details
Shows the submitted form, selected role, status, and operator comments.
- Delete
Cancels a PENDING request. After confirmation, its status changes to REJECTED (user-deleted).
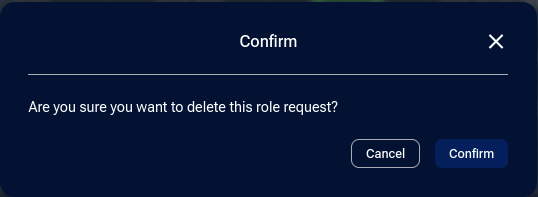
Confirmation before cancelling a pending role request.
Step 5 – Wait for operator review
The platform operator reviews role requests manually. Track each request under Role requests:
If a request is REJECTED, open Details and read the operator comment before submitting a revised request.
When a request is APPROVED, the role becomes visible under Active roles.
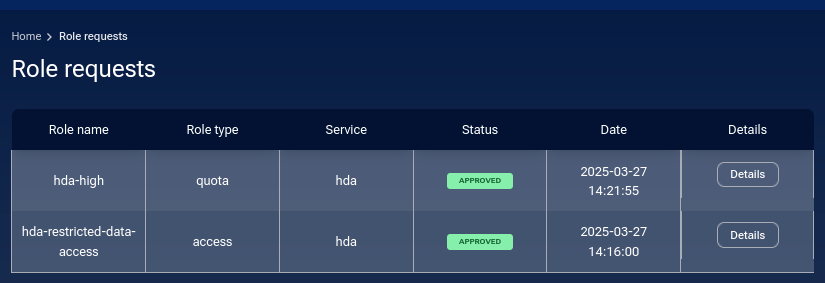
Approved role request in the request history.
Step 6 – Verify active roles
Open Access → Active roles and confirm that the required access and quota roles are active for the selected service.
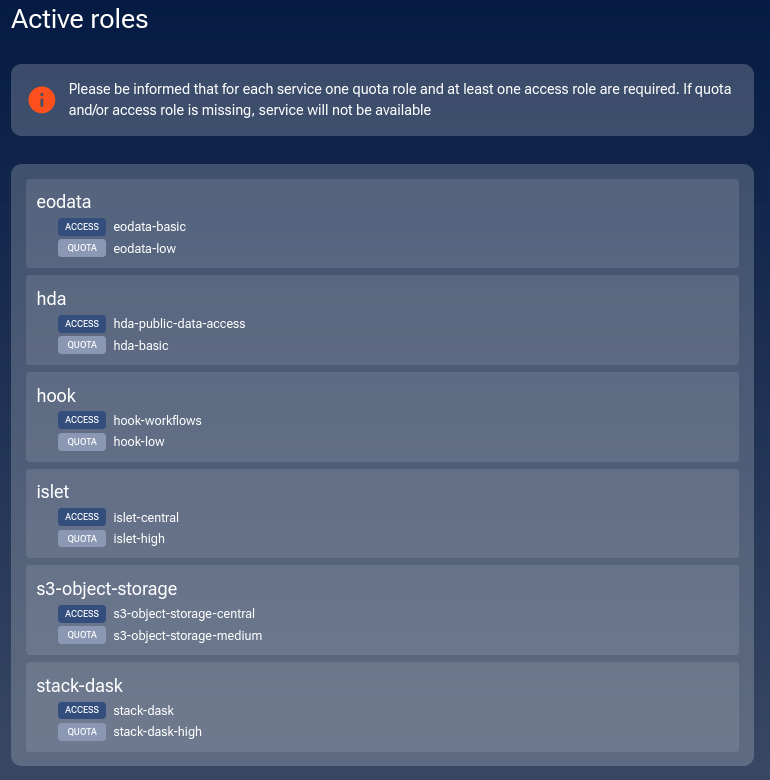
Active service access and quota roles for the selected project.
Change approved roles
To request another available quota or access role, open Access → Role requests and click Edit access next to the service. Submit the new selection and wait for operator review. If the service provides only one access role, that role cannot be exchanged for another; the quota role may still offer several levels.
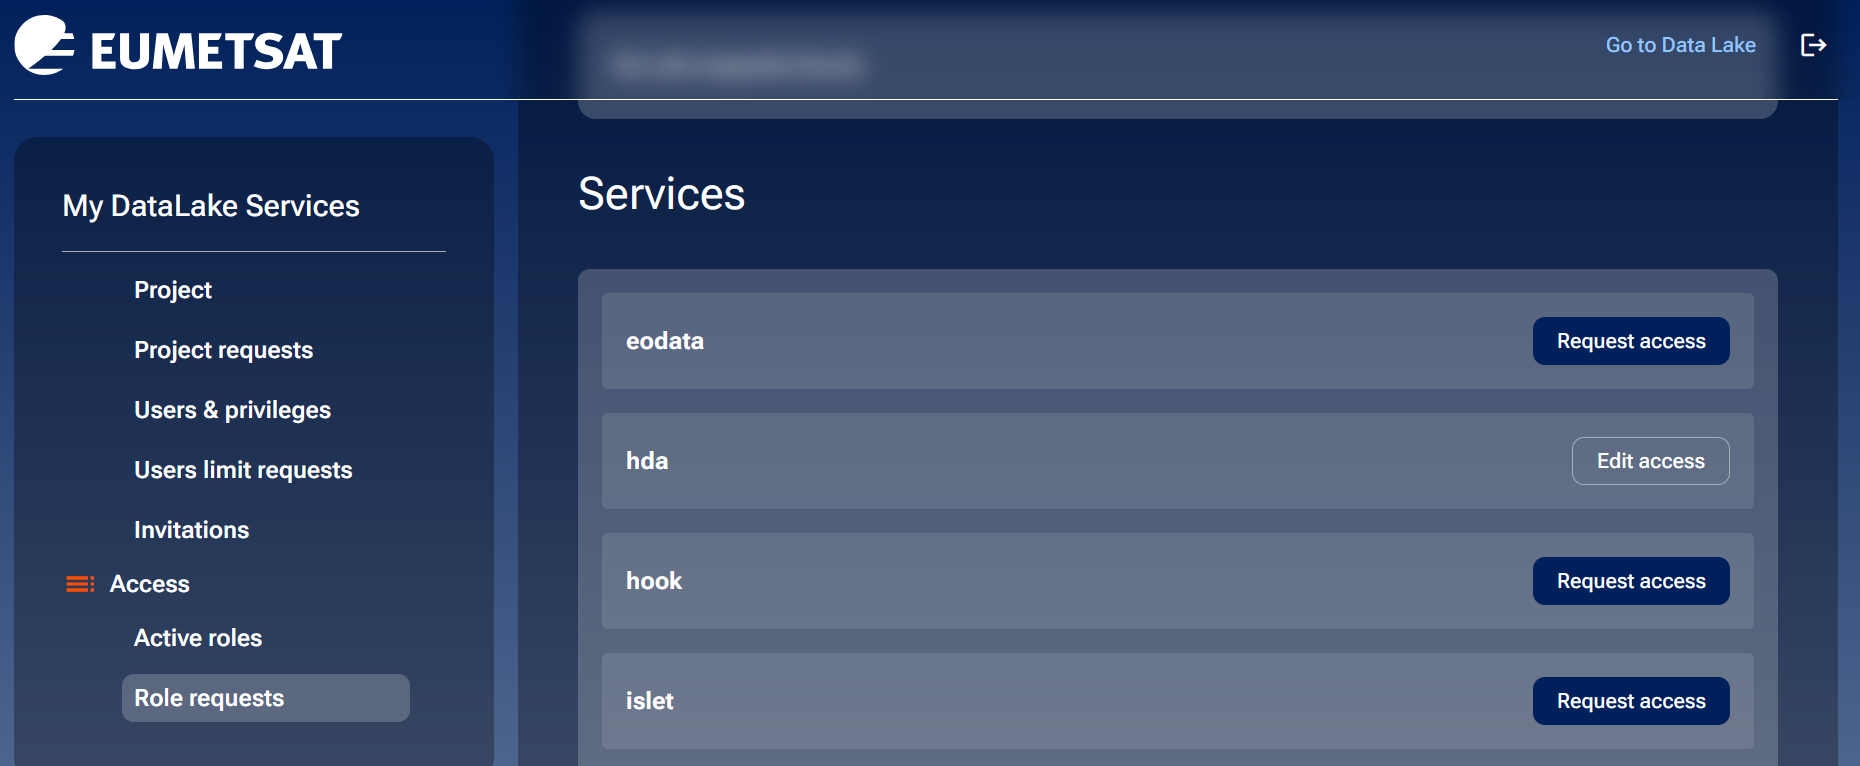
Edit access option for changing available service roles.
Continue to the selected Edge service
Active roles authorize the project to use a service. Some services require an additional environment or resource to be provisioned before work can begin.
Continue from Islet to OpenStack Horizon
Approved Islet access and quota roles make the selected site available, but they do not create a separate Horizon account or an OpenStack project. Follow How to create Islet projects on My DataLake Services to create an Islet project and wait until its status becomes ACTIVE. My DataLake Services then provisions the corresponding OpenStack project and grants access through your existing DestinE identity.
Open Islet projects → Active Islet projects and confirm that the required project is active:
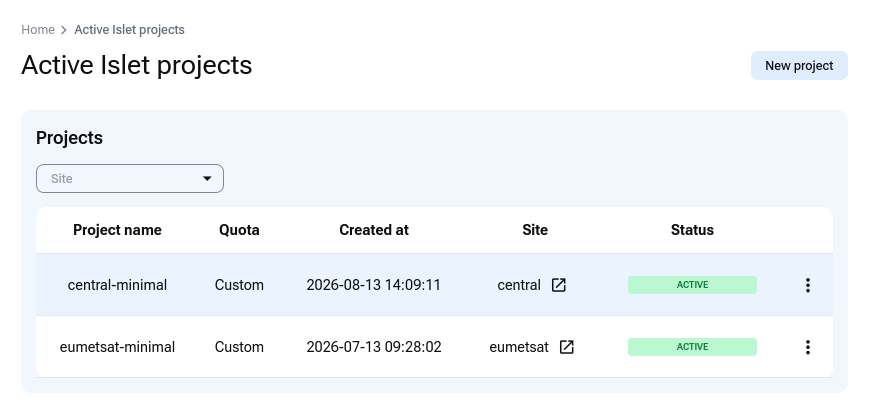
Active Islet projects and their hosting sites.
Click the site name in the Site column. If the sign-in page appears, click Sign In using the DestinE identity associated with the active project.
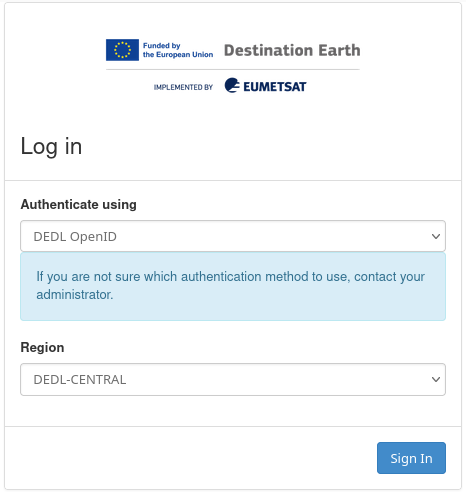
Sign-in page for the DEDL CENTRAL OpenStack deployment.
Horizon opens with the provisioned OpenStack project available. Confirm that the expected project is selected and review its limits under Compute → Overview before creating resources.
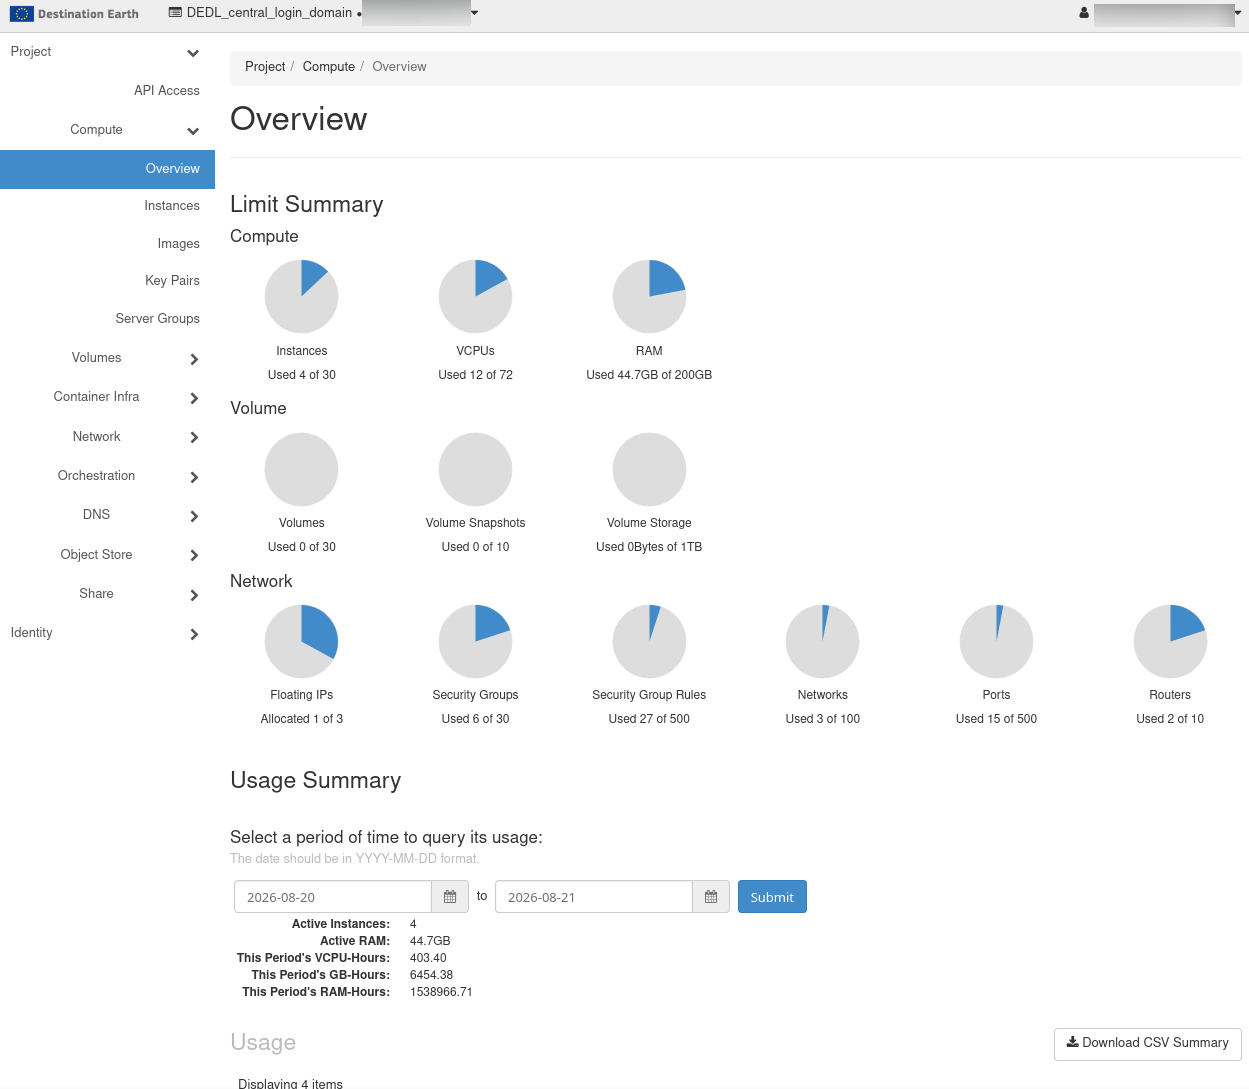
Active OpenStack project in Horizon on DEDL CENTRAL.
After opening the project successfully through My DataLake Services, you can return directly to Horizon for its site. An active Islet project on that site is still required:
Continue to Stack or Hook
For Stack workloads, continue with Stack Service. For event-driven processing, use Hook Service. The active service roles authorize access; follow the selected service guide to create or open its working environment.
Troubleshooting
A request remains PENDING – Open Details and review its history. Contact Support if the request remains pending longer than expected.
A request was REJECTED – Read the operator comment in Details, correct the role selection or justification, and submit a new request.
Role requests is not available – Confirm that you are signed in to My DataLake Services, an approved project is selected, and you have administrative privileges in that project.
A quota request was rejected – Request a quota that matches the workload and available project capacity, and explain the expected resource use.
Islet projects is not visible – Verify that the site-specific Islet access and quota roles are both active for the selected project.
Horizon has no usable project context – Return to Active Islet projects and wait until the Islet project status is ACTIVE.
For unresolved access or provisioning problems, contact DestinE Support.
Remove a user’s access to a service
A project administrator can change which active service access roles are assigned to an individual project member. This does not remove the service or its quota role from the project. The following example removes the stack-dask access role from one user.
Open Configuration → Users & privileges, locate the user, and open the role assignment controls.
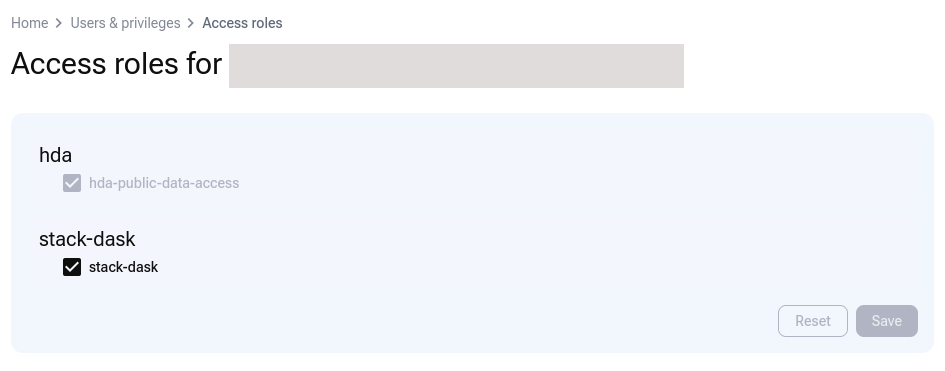
Active Stack Dask access role assigned to a project user.
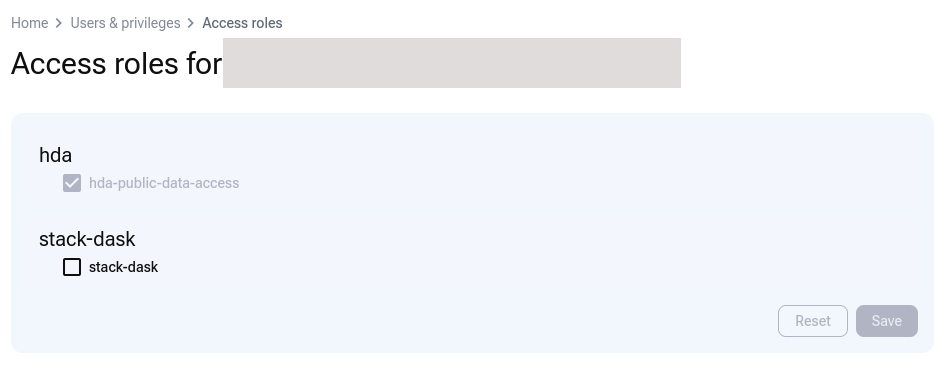
Clear the checkbox next to stack-dask. The Save button becomes active.
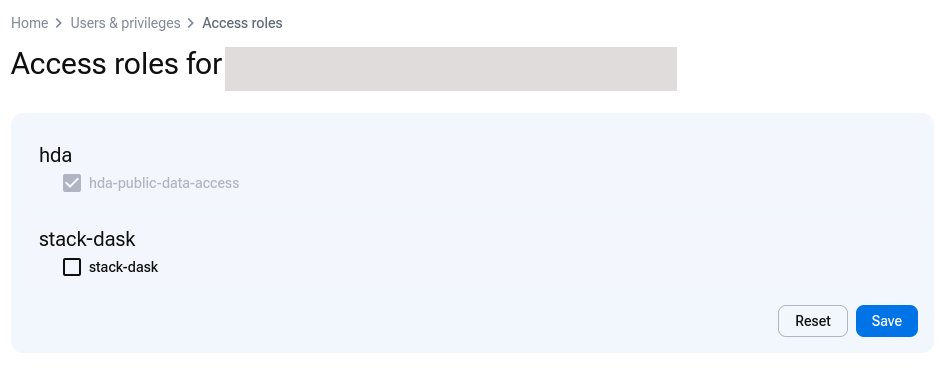
Stack Dask access role cleared before saving the assignment.
Click Save. A confirmation message appears in the lower-right corner.
Confirmation that the user’s access-role assignments were updated.
The affected user can no longer use Stack Dask through this project. The project quota remains allocated. Review the user’s assignments or have the user open Access → Active roles to verify that the stack-dask access role is no longer active for that user.

Stack Dask quota without an active access role for the affected user.
What to do next
Use How to manage users within a project on My DataLake Services to manage project membership, administrative privileges, and user role assignments. To delete your My DataLake Services account, follow the account-deletion procedure in How to create a profile on My DataLake Services. Account deletion is permanent and is different from leaving one project or removing one service role.
Report unresolved project setup, role assignment, or access delays to DestinE Support.