Islet DNSaaS - DNS as a Service for Data Lake tenants
This document describes implementation of DNSaaS records in Data Lake.
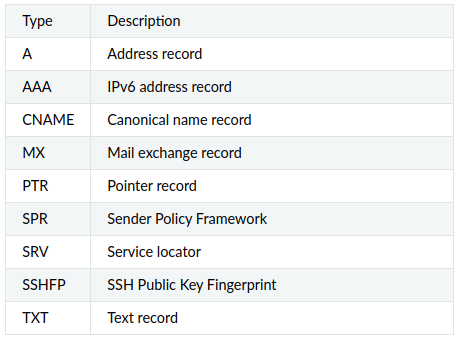
DNS as a Service (DNSaaS) provides functionality of managing configuration of user’s domains. Managing configuration means that the user is capable of creating, updating and deleting the following DNS records:
The end user can only access DNS configuration management on Data Lake via OpenStack web dashboard – Horizon.
DNS records management is performed on the level of an OpenStack project.
Since the purpose of DNSaaS is to deal with external domain names, the internal name resolution (name resolution for private IP addresses within user’s projects) is not covered by this documentation.
What Are We Going To Cover
The concept of DNS as a Service on Destination Earth Data Lake
How to form a name of a new record within a DNS zone
General steps to create a new DNS record
Understanding the parameters used to create a new record
Managing records
How to update a record
How to delete a record
Known limitations
The concept of DNS as a Service on DEDL
Every bridge has a domain under data.destination-earth.eu of form: bridge_name.data.destination-earth.eu
Central bridge also has data.destination-earth.eu itself. All of the requirements and functions apply to it.
This is the only allowed domain for zones to be created. Other DNS zones outside of data.destination-earth.eu are not supported.
Zones and sub-zones are created only through a request to DestinE Help Desk.
Possible formats of the names are
tenant_name.bridge.data.destination-earth.eu and
tenant_name.data.destination-earth.eu.
DEDL users can create, modify, and delete records in their zones.
How to form a name of a new record within a DNS zone
You only can create records in the current DNS Zone assigned to your tenant (project). To form a name of the record set, add its name in front of the zone name:
<your_record_name>.<tenant_name>.<bridge_name>.destination-earth.eu.
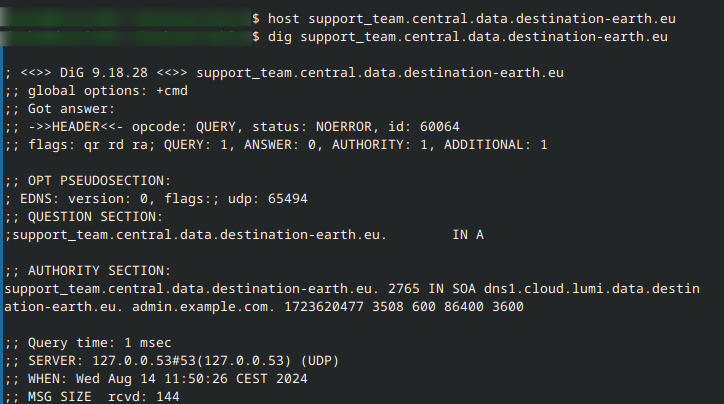
If your account were support_team, the complete name on CENTRAL cloud could be
support_team.central.data.destination-earth.eu
Note that since we are using the CENTRAL cloud, the name of the bridge may be omitted.
General steps to create a new DNS record
The steps are:
Login in your tenant with your web browser
Select DNS in left section
Select Zones
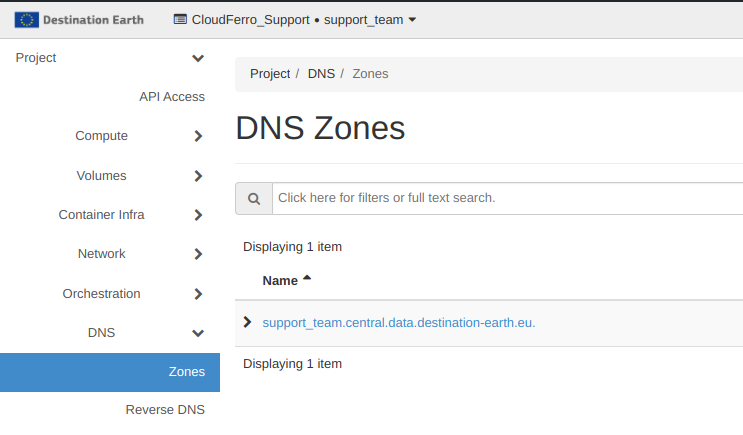
Click on your tenant Zone.

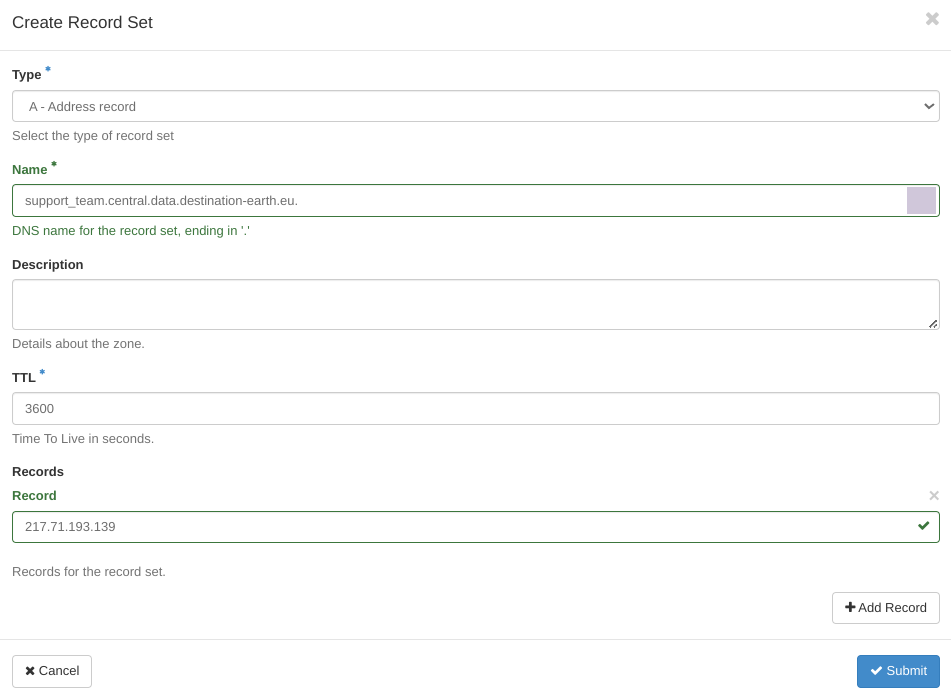
Select your zone and tap on “Records Sets”.
Click on “Create Record Set” button and provide the needed information to create the new record in the Zone. As an example:
The records you define for the existing subdomains propagate through the Internet within a few seconds.
Understanding the parameters used
We assumed that the Floating IP address of your server is 217.71.193.139.
The types of other parameters are:
- Type
Type of record (for example A, MX, etc.)
- Name
Name of the record
Each time a name of domain or a server is added or edited, add dot ‘.’ at the end of the entry. For example:
exampledomain.com.
mail.exampledomain.com.
- Description
Free text description
- TTL
Time To Live in seconds - a period of time between refreshing cache in DNS serves.
- Records
Desired record value (there may be more than one - one per line):
for records of Type A put IP address
for records of Type MX put name of a mail server which hosts e-mails for the domain
for records of Type CNAME put original name which is to be aliased
Managing records
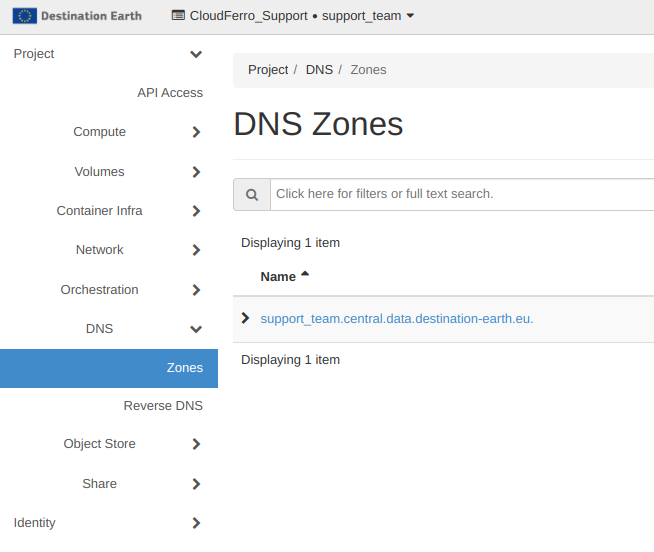
Anytime you want to review, edit or delete records in your domain, visit OpenStack dashboard, Project → DNS → Zones.
After clicking the domain name of your interest, choose Record Sets tab and see the list of all records.
For a chosen entry, you will be able to choose two options from the right side:
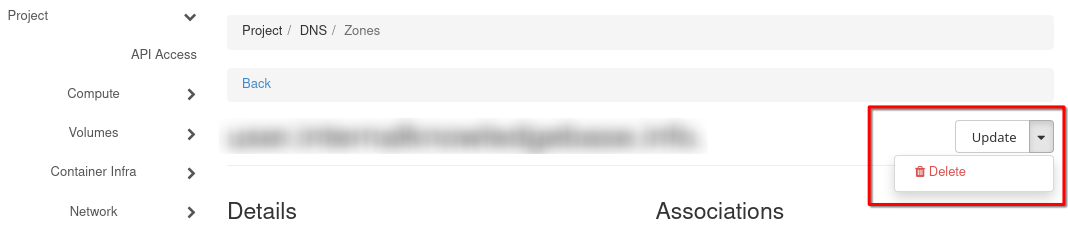
- Update
You will be able to update the TTL and/or IP of the record.
- Delete
Will eliminate that record.
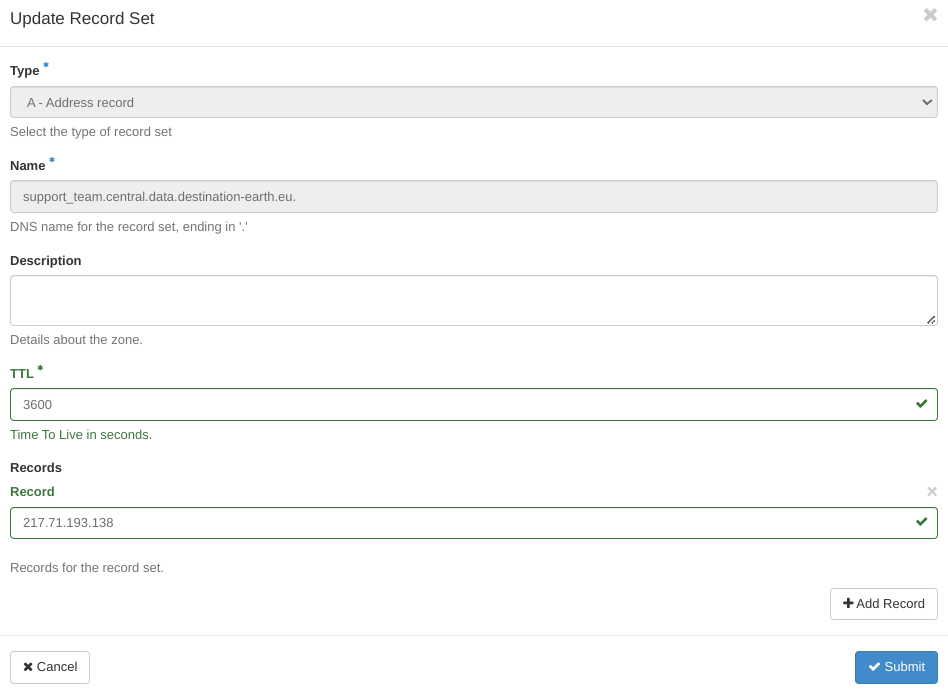
How to update a record
This is quite similar to the entry screen, but you can change only two options, TTL and the IP of the record.
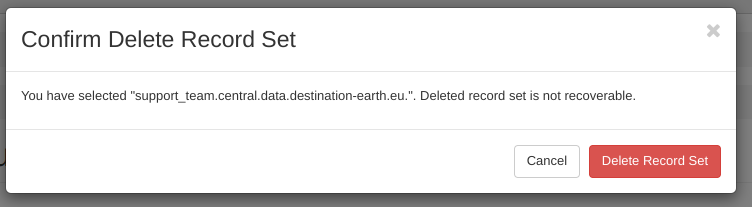
How to delete a record
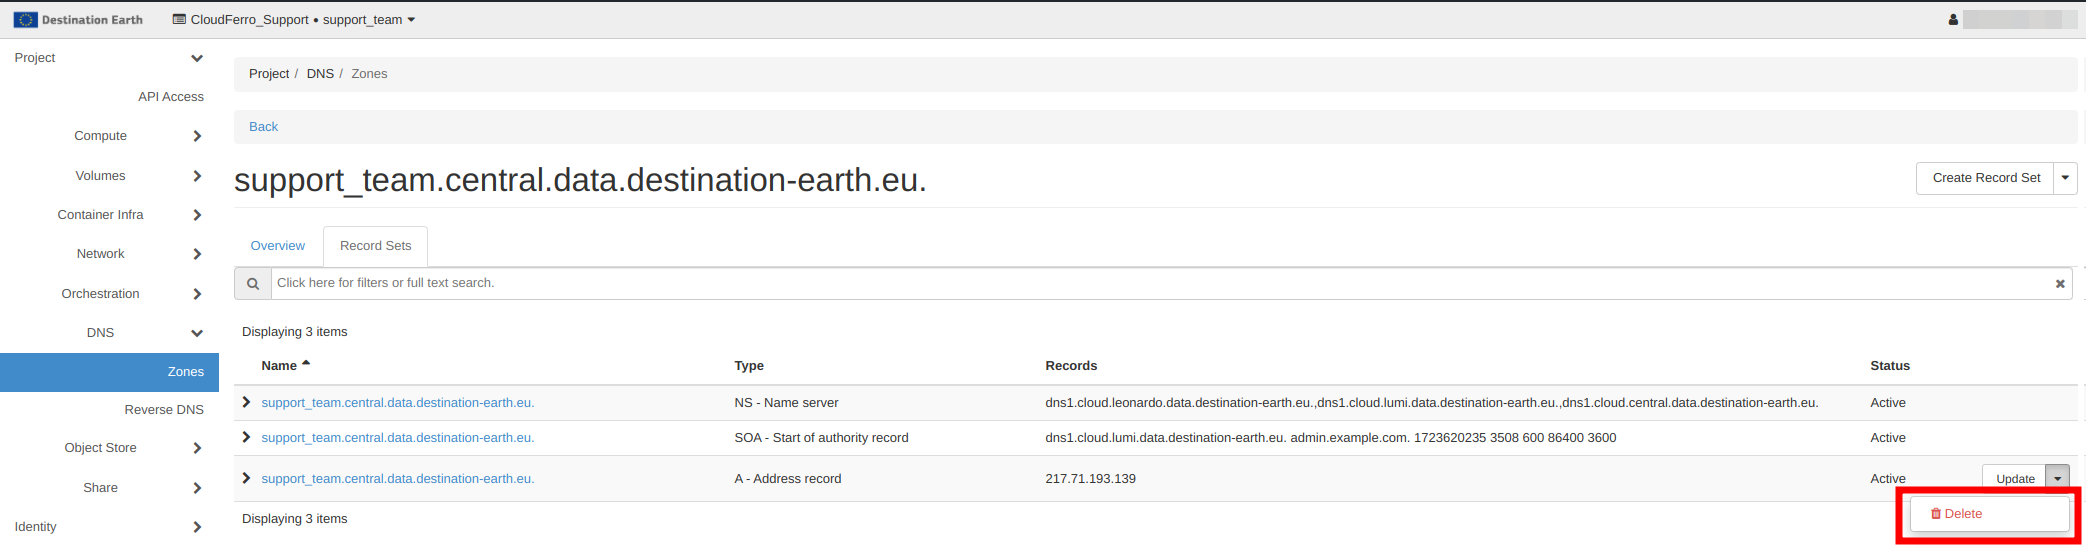
Select Delete Record Set and get the following screen:
As a result, you will see one record less:

You can check it from the Terminal as well:
Limitations
There are the following limitations in OpenStack DNSaaS:
You cannot manage NS records for your domain. Therefore
you cannot add additional secondary name servers
you are unable to delegate subdomains to external servers
Even though you are able to configure reverse DNS for your domain, this configuration will have no effect since reverse DNS for IP pools are managed on DNS servers other than OpenStack DNSaaS.