Install and run Argo Workflows on CENTRAL Magnum Kubernetes
Argo Workflows enable running complex job workflows on Kubernetes. It can
provide custom logic for managing dependencies between jobs,
manage situations where certain steps of the workflow fail,
run jobs in parallel for data processing or machine learning,
run CI/CD pipelines,
create workflows with directed acyclic graphs (DAG) etc.
Argo Workflows applies a microservice-oriented, container-native approach, where each step of a workflow runs as a container.
This article explains how to install, configure, and run Argo Workflows on a Magnum-provisioned Kubernetes cluster on DEDL CENTRAL cloud and bridges.
What we are going to cover
Prerequisites
- No. 1 Account
You need a DESP OpenID hosting account with access to the Horizon interface:
- No. 2 kubectl pointed to the Kubernetes cluster
If you are creating a new cluster, for the purposes of this article, call it argo-cluster. See
How To Access Kubernetes Cluster Post Deployment Using Kubectl OpenStack Magnum
After working through that article, you should be able to run openstack command locally and thus issue commands to the cloud.
- No. 3 Matching releases of Argo Workflows and Kubernetes
You need to a compatible version of Kubernetes for Argo Workflows to run on. This article uses Argo 3.4.4, which requires Kubernetes v1.23 or newer.
See latest releases of Argo Workflows here.
Must have to start
Working openstack command tied to the cloud or bridge of your choice
Working kubectl command to connect to the cluster
Step 1 Authenticate to the cluster
Let us authenticate to argo-cluster. Run from your local machine the following command to create a config file in the present working directory:
openstack coe cluster config argo-cluster
This will output the command to set the KUBECONFIG env. variable pointing to the location of your cluster e.g.
export KUBECONFIG=/home/eouser/config
Run this command.
Note
You can merge KUBECONFIG with ~/.kube/config rather than always replacing it.
Step 2 Apply preliminary configuration
OpenStack Magnum by default applies certain security restrictions for pods running on the cluster, in line with the “least privileges” principle. Argo Workflows will require some additional privileges in order to run correctly.
First, create a dedicated namespace for Argo Workflows artifacts:
kubectl create namespace argo
Next, grant the default ServiceAccount in this namespace the necessary permissions to manage workflows:
kubectl create rolebinding default-admin \
  --clusterrole=admin \
  --serviceaccount=argo:default \
  --namespace=argo
Now that the namespace and permissions are in place, you can proceed with the installation of Argo Workflows.
Install Argo Workflows to the cluster
In order to deploy Argo Workflows on the cluster, run the following command:
kubectl apply -n argo -f https://github.com/argoproj/argo-workflows/releases/download/v3.4.4/install.yaml
There is also an Argo Workflows CLI available for running jobs from command line. Installing it is outside of scope of this article.
Step 3 Run Argo Workflows from the cloud
Normally, you would need to authenticate to the server via a UI login. Here, we are going to switch authentication mode by applying the following patch to the deployment. (For production, you might need to incorporate a proper authentication mechanism.) Submit the following command:
kubectl patch deployment \
  argo-server \
  --namespace argo \
  --type='json' \
  -p='[{"op": "replace", "path": "/spec/template/spec/containers/0/args", "value": [
  "server",
  "--auth-mode=server"
]}]'
Argo Workflows service by default gets exposed as a Kubernetes service of ClusterIp type, which can be verified by typing the following command:
kubectl get services -n argo
NAME          TYPE           CLUSTER-IP       EXTERNAL-IP      PORT(S)          AGE
argo-server   ClusterIP   10.254.132.118      <none>         2746:31294/TCP   1d
In order to expose this service to the Internet, convert type ClusterIP to LoadBalancer by patching the service with the following command:
kubectl -n argo patch service argo-server -p '{"spec": {"type": "LoadBalancer"}}'
After a couple of minutes a cloud LoadBalancer will be generated and the External IP gets populated:
kubectl get services -n argo
NAME          TYPE           CLUSTER-IP       EXTERNAL-IP      PORT(S)          AGE
argo-server   LoadBalancer   10.254.132.118   64.225.134.153   2746:31294/TCP   1d
The IP in our case is 64.225.134.153.
Tip
Use
kubectl describe svc argo-server -n argo
for troubleshooting if the IP does not populate after some 1-3 minutes of waiting.
Argo Workflows is by default served on HTTPS with a self-signed certificate, on port 2746. So, by typing
https://<your-service-external-ip>:2746
Since we are working with self-signed certificate, your browser may show warning Potential Security Risk Ahead or similar. Continue and you should be able to access the service:
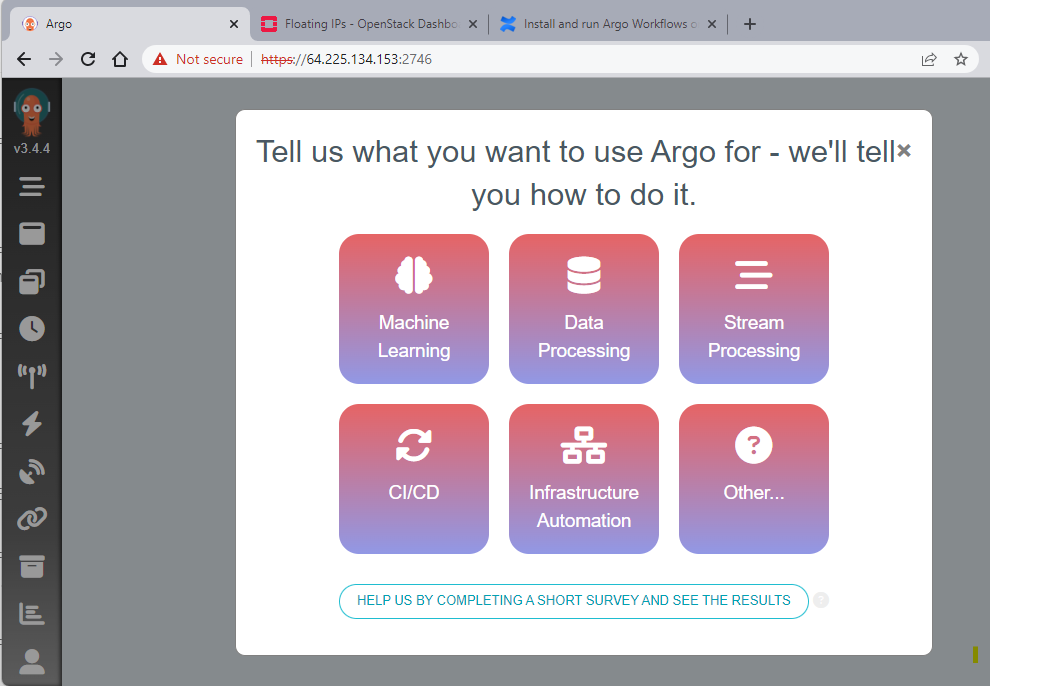
Security concerns
- --auth-mode=server
Parameter –auth-mode=server used above is a testing shortcut and is not production ready. It is convenient in testing but using it in production means that anyone on the Internet can run workflows on your cluster.
- LoadBalancer without authentication
Using LoadBalancer without authentication essentially exposes the Argo UI to the world.
The alternative solutions (Ingress + Keycloak, OIDC, or Argo’s SSO integration) are out of scope of this article.
Step 4 Run sample workflow with two tasks
In order to run a sample workflow, first close the initial pop-ups in the UI. Then go to the top-left icon “Workflows” and click on it, then you might need to press “Continue” in the following pop-up.
The next step is to click “Submit New Workflow” button in the top left part of the screen, which displays a screen similar to the one below:
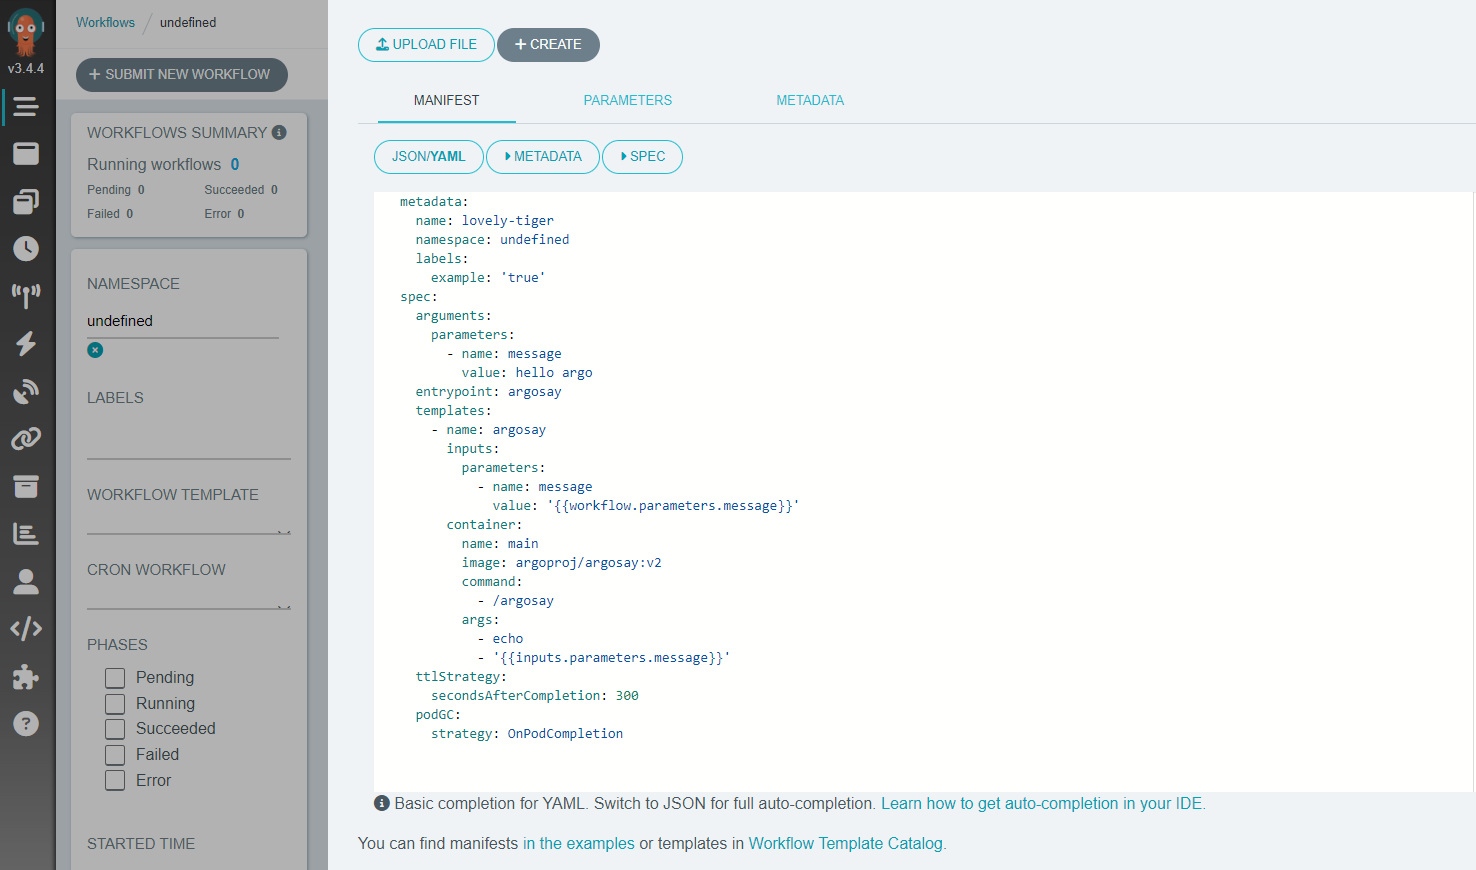
Although you can run the workflow provided by Argo Workflows as a start, we provide here an alternative minimal example. In order to run it, create a file, which we can call argo-article.yaml and copy in place of the example YAML manifest:
argo-article.yaml
apiVersion: argoproj.io/v1alpha1
kind: Workflow
metadata:
  generateName: workflow-
  namespace: argo
spec:
  entrypoint: my-workflow
  serviceAccountName: argo
  templates:
  - name: my-workflow
    dag:
      tasks:
      - name: downloader
        template: downloader-tmpl
      - name: processor
        template: processor-tmpl
        dependencies: [downloader]
  - name: downloader-tmpl
    script:
      image: python:alpine3.9
      command: [python]
      source: |
        print("Files downloaded")
  - name: processor-tmpl
    script:
      image: python:alpine3.9
      command: [python]
      source: |
        print("Files processed")
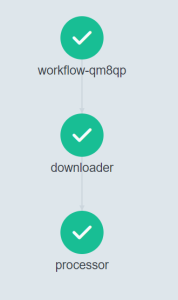
This sample mocks a workflow with 2 tasks/jobs. First the downloader task runs, once it finished the processor task does its part. Some highlights about this workflow definition:
Both tasks run as containers. So for each task, the python:alpine3.9 container is first pulled from DockerHub registry. Then this container does a simple work of printing a text. In a production workflow, rather than using a script, the code with your logic would be pulled of your container registry as a custom Docker image.
The order of executing the script is here defined using DAG (Directed Acyclic Graph). This allows for specifying the task dependencies in the dependencies section. In our case the dependency is placed on the Processor, so it will only start after the Downloader finishes. If we skipped the dependencies on the Processor, it would run in parallel with the Downloader.
Each task in this sequence runs as a Kubernetes pod. When a task is done the pod completes, which frees the resources on the cluster.
You can run this sample by clicking the “+Create” button. Once the workflow completes you should see an outcome as per below:
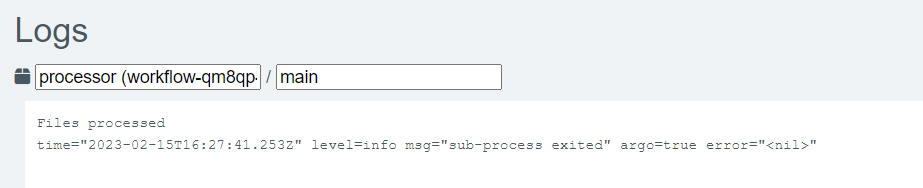
Also, when clicking on each step, on the right side of the screen there is more information displayed. E.g. when clicking on the Processor step, we can see its logs in the bottom right part of the screen.
The results show that indeed the message “Files processed” was printed in the container:
Tips for troubleshooting
- Pods stuck in Pending
The likely cause is insufficient resources.
- No External IP
This may be a problem with cloud LB quotas.
- UI not accessible
Check security groups in OpenStack Horizon.
- Pods fail with ImagePullBackOff
The problem is with the container registry, be it DockerHub registry or your organization’s internal registry for Docker images.
- Workflows stay “Running” indefinitely
Use this command to check Argo Workflows controller pod logs:
kubectl logs -n argo deploy/argo-workflow-controller
Cleaning up
To remove this version of argo-cluster, use the following command:
kubectl delete namespace argo
In Horizon, check cluster name in list Container Infra –> Clusters and click on Delete Clusters.
What To Do Next
For production, consider alternative authentication mechanism and replacing self-signed HTTPS certificates with the ones generated by a Certificate Authority.
You could have installed Argo Workflows with helm:
helm repo add argo https://argoproj.github.io/argo-helm
helm install argo argo/argo-workflows --namespace argo