Create and manage a MLOps Studio namespace
A namespace is an isolated work area inside the shared MLOps Platform. It is used to organize workloads, users, resource limits, and access permissions.
When starting a new project or a new area of work, you create a namespace by assigning a portion of the organization’s available resource budget to it.
Overview
The MLOps Platform uses quota-based resource allocation. Instead of selecting predefined machine flavors, users assign CPU, memory, storage, and GPU resources to namespaces according to the limits available to their organization.
A namespace allows users to work in an isolated environment while still using the shared platform infrastructure.
The namespace is also the place where workloads, storage, and access permissions are managed. Users who need to work in a namespace must be added to it and assigned an appropriate role.
Prerequisites
Before starting, make sure that the following requirements are met.
No. 1 Access to the MLOps Studio workspace
You can sign in to the MLOps Platform and open the My Workspace page.
See Access the MLOps Studio workspace.
The My Workspace page is where you review allocated resources, create namespaces, manage existing namespaces, and open the MLOps Studio dashboard for the selected site.
No. 2 Approved MLOps Studio service access
Your project has approved access to the mlops-kubeflow-leonardo service.
See Request access to MLOps Studio in My DataLake Services.
No. 3 Available quota
Your organization or project has enough available CPU, memory, storage, and GPU quota for the namespace that you want to create.
No. 4 Permission to create and manage namespaces
Your account has permission to create namespaces and manage namespace members in the MLOps Platform.
No. 5 Users from the same organization
The users that you want to add to the namespace must belong to the same organization.
Create a namespace
Namespace creation is done from the My Workspace page.
Open the My Workspace page:
https://ui.managed-kubeflow.staging.cloudferro.com/kubeflow/my-workspace
The page shows the resource allocation available to your workspace and the list of namespaces that already exist.
If no namespace has been created yet, the Namespaces section shows an empty state.
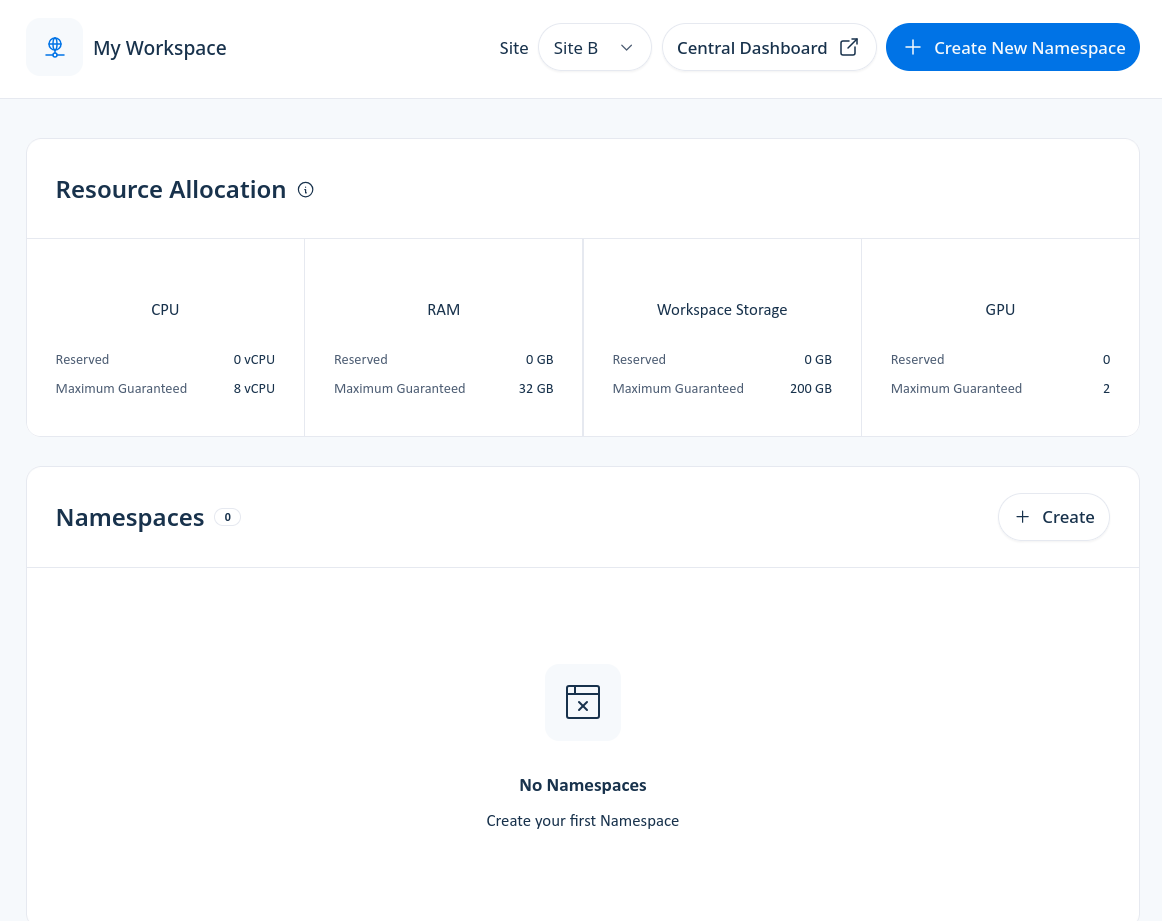
My Workspace page before any namespaces have been created
If more than one site is available, select the required site from the Site menu at the top of the page.
To start creating a namespace, use one of the following options:
click Create New Namespace in the top-right corner of the page,
or click Create in the Namespaces section.
Both options open the namespace creation form.
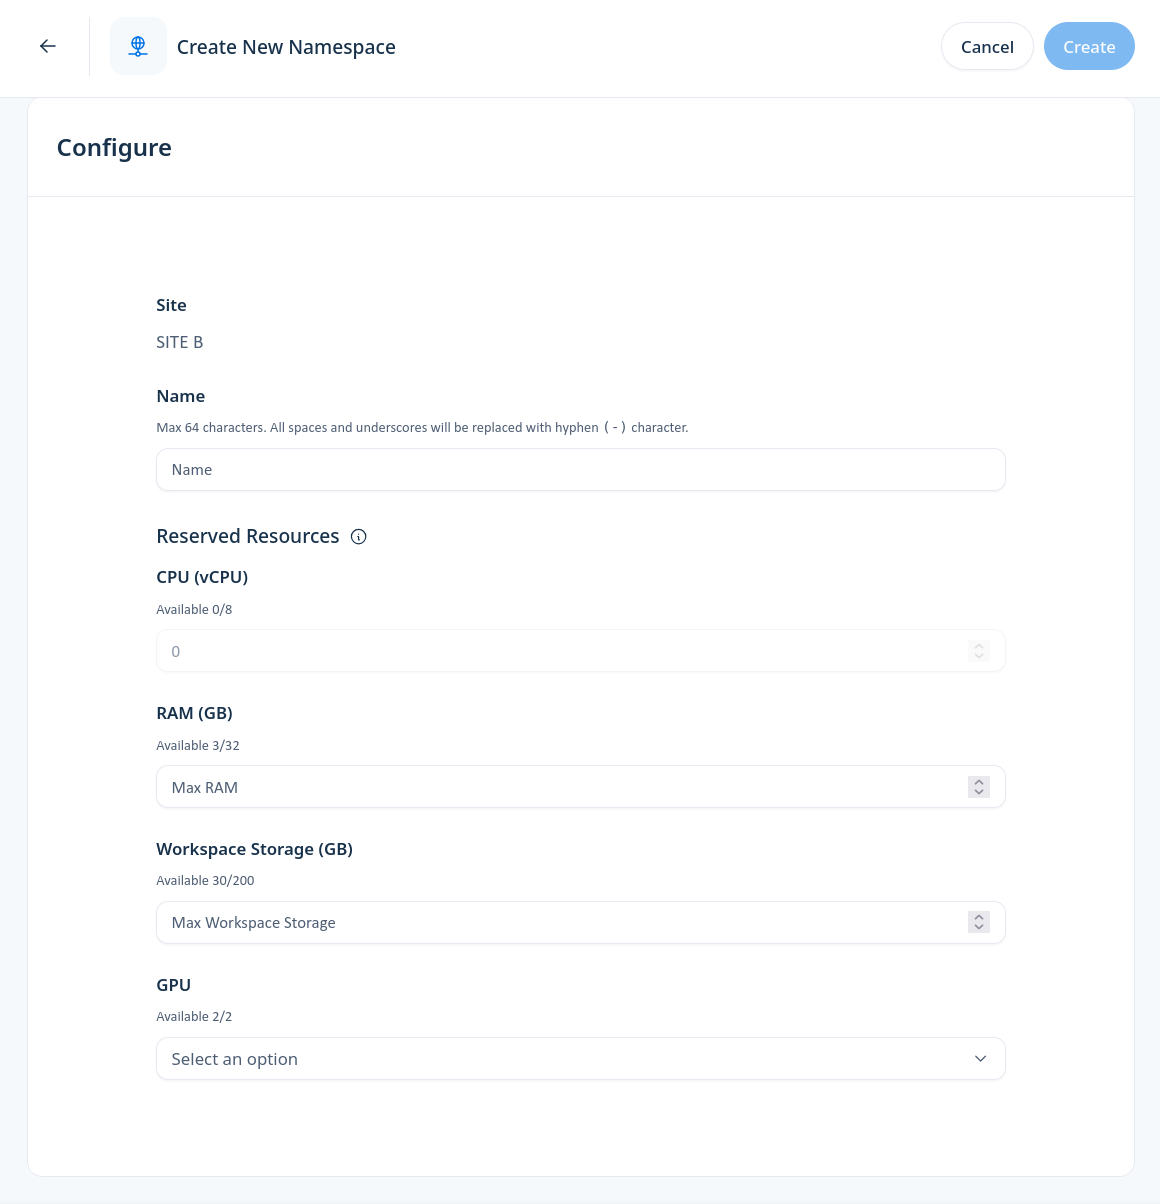
Create New Namespace form with namespace name and reserved resource fields
The namespace creation form lets you define the namespace name and assign reserved resources.
Name the namespace
The namespace name must follow the platform naming rules.
The namespace name:
must be between 3 and 64 characters long,
must start with a lowercase letter,
can contain only lowercase letters, numbers, and hyphens.
Any spaces or underscores entered by the user are automatically replaced with hyphens.
Assign reserved resources
In the Reserved Resources section, configure the amount of resources that should be assigned to the namespace.
You can allocate:
CPU,
memory,
workspace storage,
GPU resources, if available in your quota.
The platform validates these inputs against the organization’s available resources. The Available value shown under each resource field tells you how much quota can still be assigned on the selected site.
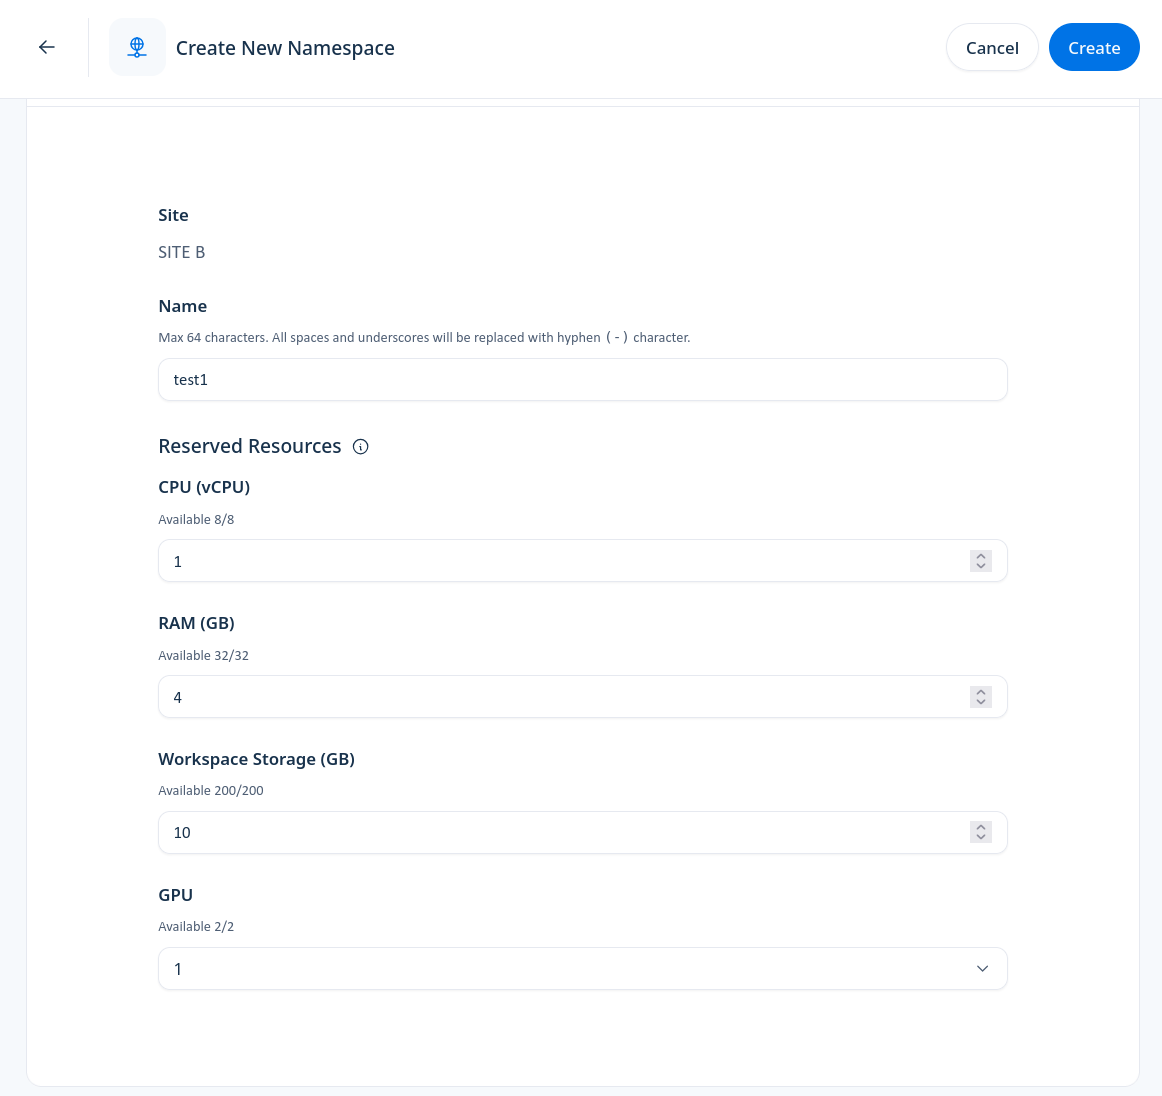
Example namespace configuration with reserved CPU, RAM, workspace storage, and GPU resources
Reserved resources provide guaranteed capacity for the namespace. Workloads may also use best-effort resources when additional capacity is available, but best-effort usage depends on current platform demand.
After entering the namespace name and resource values, click Create.
Review the namespace list
After the namespace is created, it appears in the Namespaces list on My Workspace.
My Workspace page after a namespace has been created
The namespace list shows the namespace name and the resources reserved for it. Use this list to check whether the namespace was created with the expected CPU, RAM, workspace storage, and GPU values.
Open namespace details
To open the namespace details page, click the namespace name in the list.
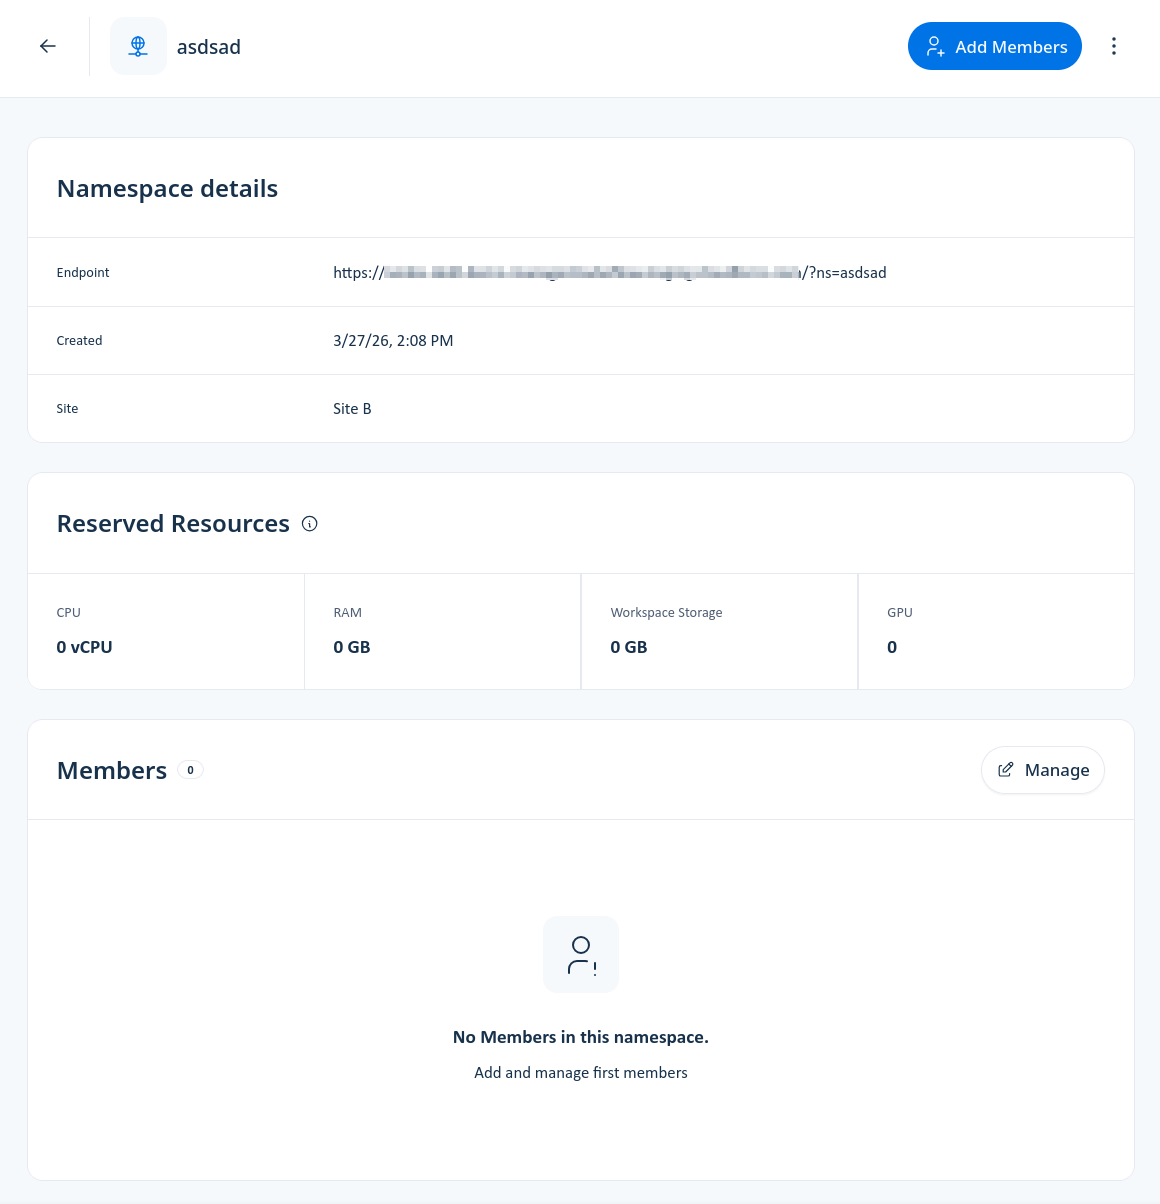
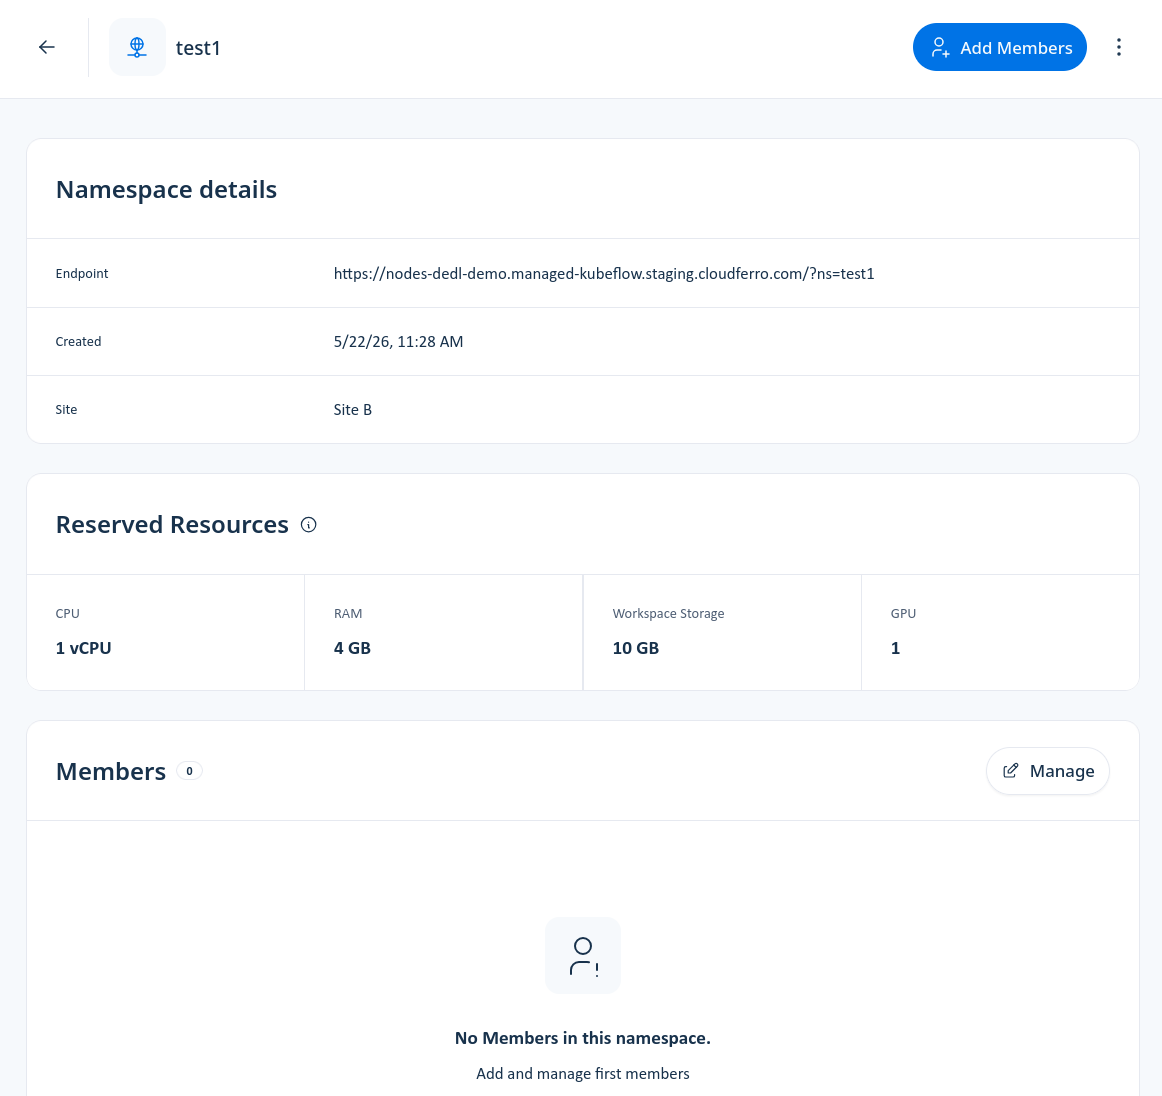
Namespace details page with endpoint, creation time, site, reserved resources, and members
This page is the main control point for the namespace.
It shows:
Namespace details – the namespace endpoint, creation time, and the site where the namespace exists.
Reserved Resources – CPU, memory, workspace storage, and GPU resources assigned to the namespace.
Members – users who have access to the namespace.
Namespace actions – actions such as managing members or using the options menu.
Use this page to confirm that the namespace has been created in the correct site and with the expected resource allocation.
Review reserved resources
The Reserved Resources panel shows the resources currently assigned to the namespace.
These values determine the guaranteed capacity available to workloads in the namespace. If all values are set to zero, the namespace exists, but it does not yet have reserved CPU, memory, storage, or GPU capacity assigned.
Review these values before starting workloads, especially if you plan to run resource-intensive jobs or GPU workloads.
Manage namespace members
The Members panel shows which users currently have access to the namespace.
If no users have been added yet, the panel shows that there are no members in the namespace.
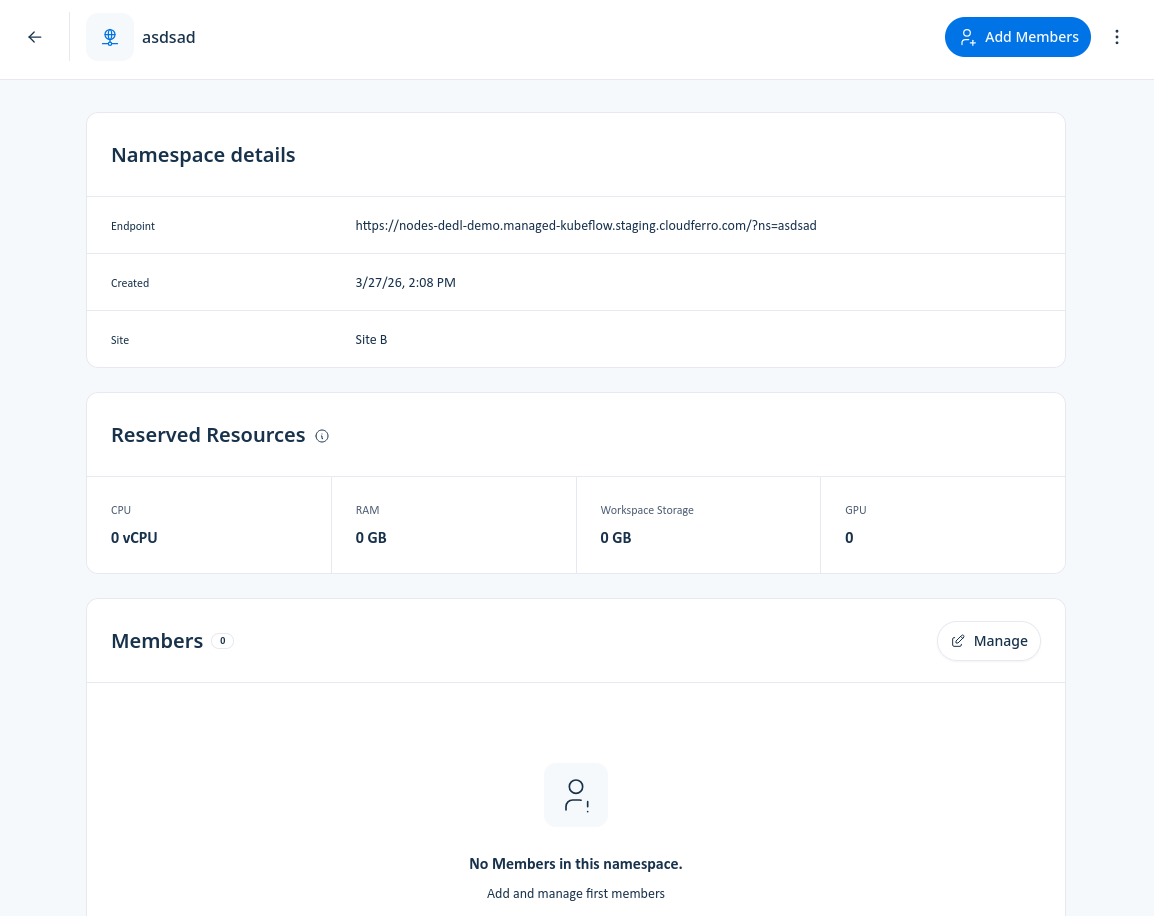
Namespace details page with no members added yet
To add a member, click Add Members in the upper-right corner or click Manage in the Members panel.
The Manage Members dialog lets you search for users, filter the list, enable membership, and assign a MLOps Studio role.
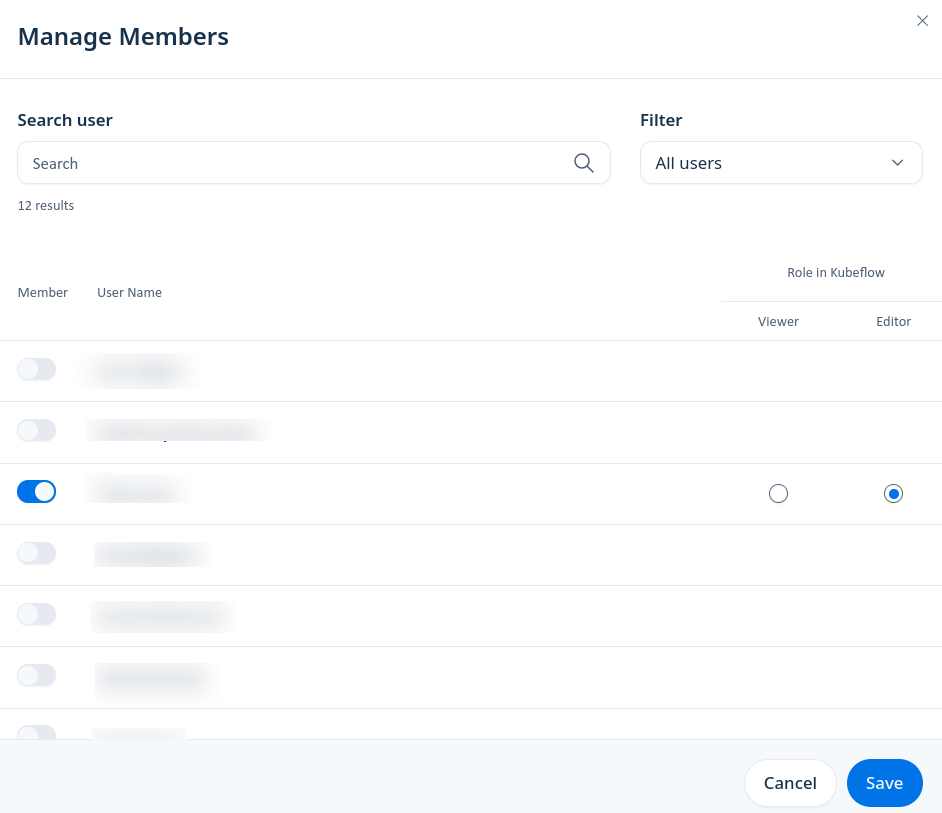
Selecting a user and assigning a MLOps Studio role
The user must belong to the same organization. To add a user:
Search for the user in the Search user field.
Enable membership for the user.
Select the appropriate role: Viewer or Editor.
Click Save.
Assign a namespace role
Assign one of the available namespace roles.
- Viewer
The Viewer role grants read-only access to the namespace and its resources.
Use this role when a user only needs visibility into the namespace.
- Editor
The Editor role grants full access to create, modify, and delete resources within the namespace.
Use this role only for users who need to actively work with resources in the namespace.
Review current members
After adding users and assigning roles, return to the namespace details page and review the Members panel.
Make sure that:
every required user has been added,
each user has the correct role,
users who no longer need access have been removed.
Keeping namespace membership up to date helps prevent accidental changes and keeps the workspace easier to manage.
Delete a namespace
If a namespace is no longer needed, open the namespace actions menu and select the delete option.
The namespace actions menu is available from the three-dot menu next to the namespace. Depending on where you are in the interface, the menu may appear in the namespace list or on the namespace details page.
Warning
Deleting a namespace permanently removes all resources within it, including running workloads, development environments, and stored data associated with the namespace. This action cannot be undone.
Before deleting a namespace, make sure that all important data has been saved outside the namespace or moved to persistent storage that will not be removed with the namespace.
What to do next
After creating a namespace, assigning resources, and adding users, click Central Dashboard on the My Workspace page to open the MLOps Studio dashboard for the selected site.
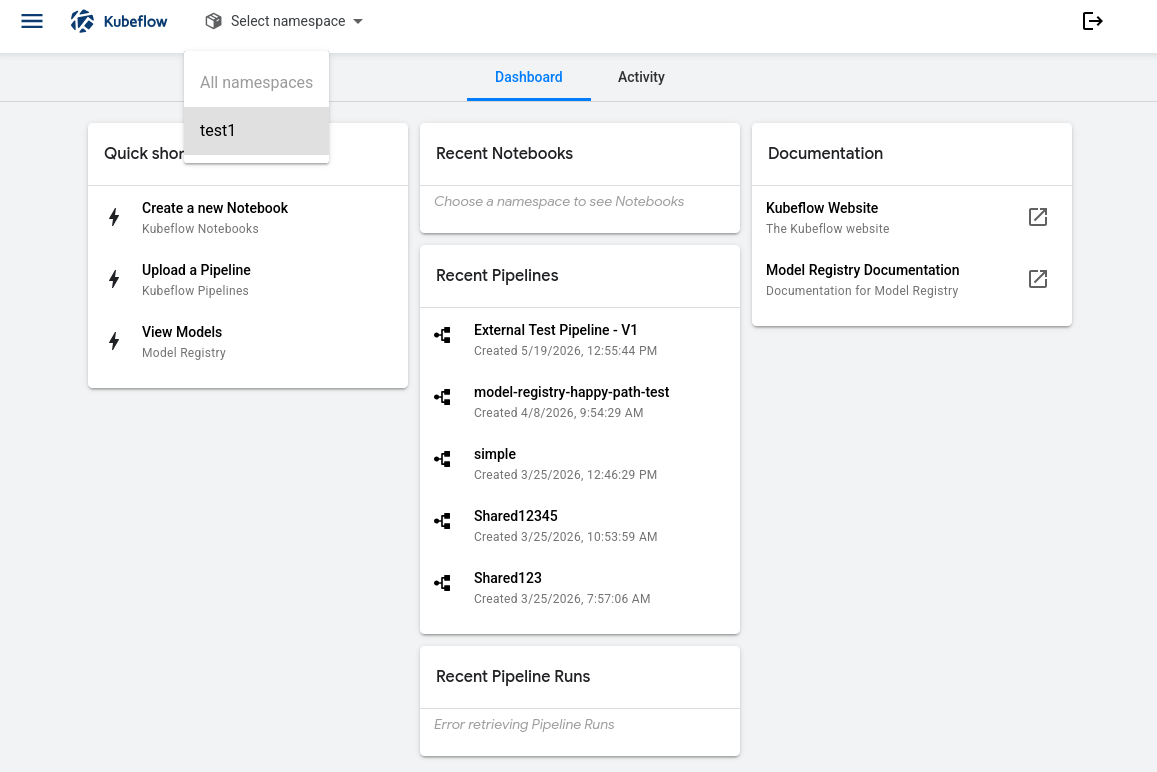
Start working with notebooks, pipelines, volumes, and other MLOps Studio resources
Then select the namespace from the namespace selector and start working with notebooks, pipelines, volumes, and other MLOps Studio resources.