Run Python code in a MLOps Studio notebook environment
This guide explains how to create a MLOps Studio notebook environment, assign resources, connect to it, and run Python code interactively.
Introduction
If you want to run Python code interactively, a MLOps Studio notebook environment may be a better fit than a training job.
Use this workflow when you want to write, test, and debug code directly in the browser before turning it into a more repeatable workload.
Overview
A notebook environment gives you an interactive browser-based development environment.
You can use it to:
write and execute Python code,
test required libraries,
use the terminal inside the container,
install additional Python packages,
check whether your workload can run with the selected CPU, memory, storage, and GPU resources.
Anything executed in the terminal runs inside the notebook container.
Prerequisites
Before starting, make sure that the following requirements are met.
No. 1 Access to the MLOps Studio workspace
You can sign in to the MLOps Platform and open your workspace.
See Access the MLOps Studio workspace.
No. 2 Existing namespace
A namespace has already been created.
See Create and manage a MLOps Studio namespace.
No. 3 Namespace access
Your user has access to the namespace where you want to create the notebook environment.
No. 4 Available quota
Your namespace has enough CPU, memory, storage, and GPU quota for the environment you want to run.
No. 5 Required dependencies
You know which Python and system libraries your workload requires.
Create a notebook environment
Open the MLOps Studio dashboard and go to the notebook section.
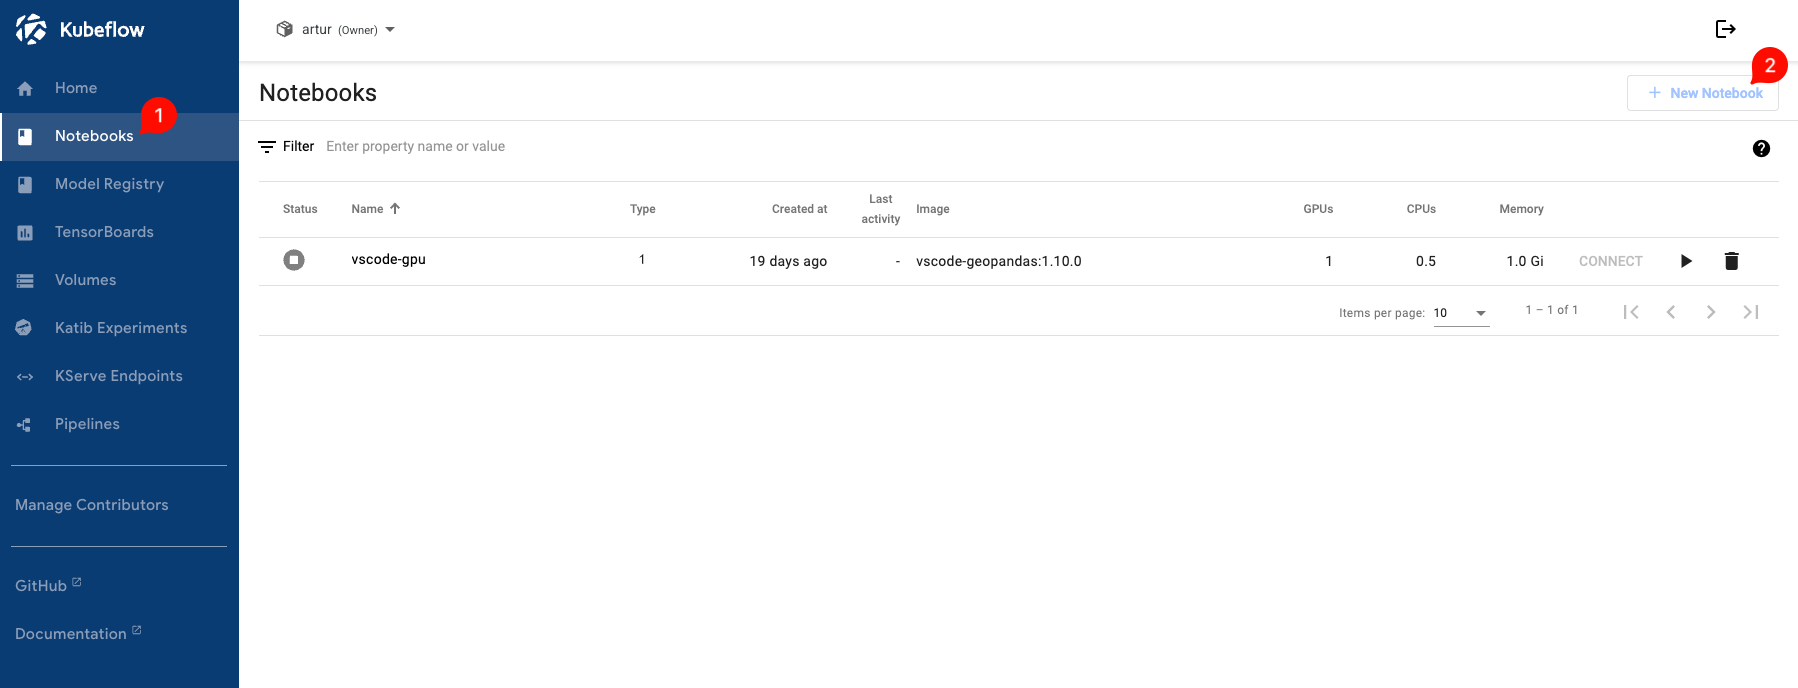
Notebook section in the MLOps Studio dashboard.
Click New Notebook to create a new environment.
Configure the environment
After clicking New Notebook, make sure to set at least the following parameters:
name of your notebook environment,
environment type,
image,
number of GPUs,
GPU vendor.
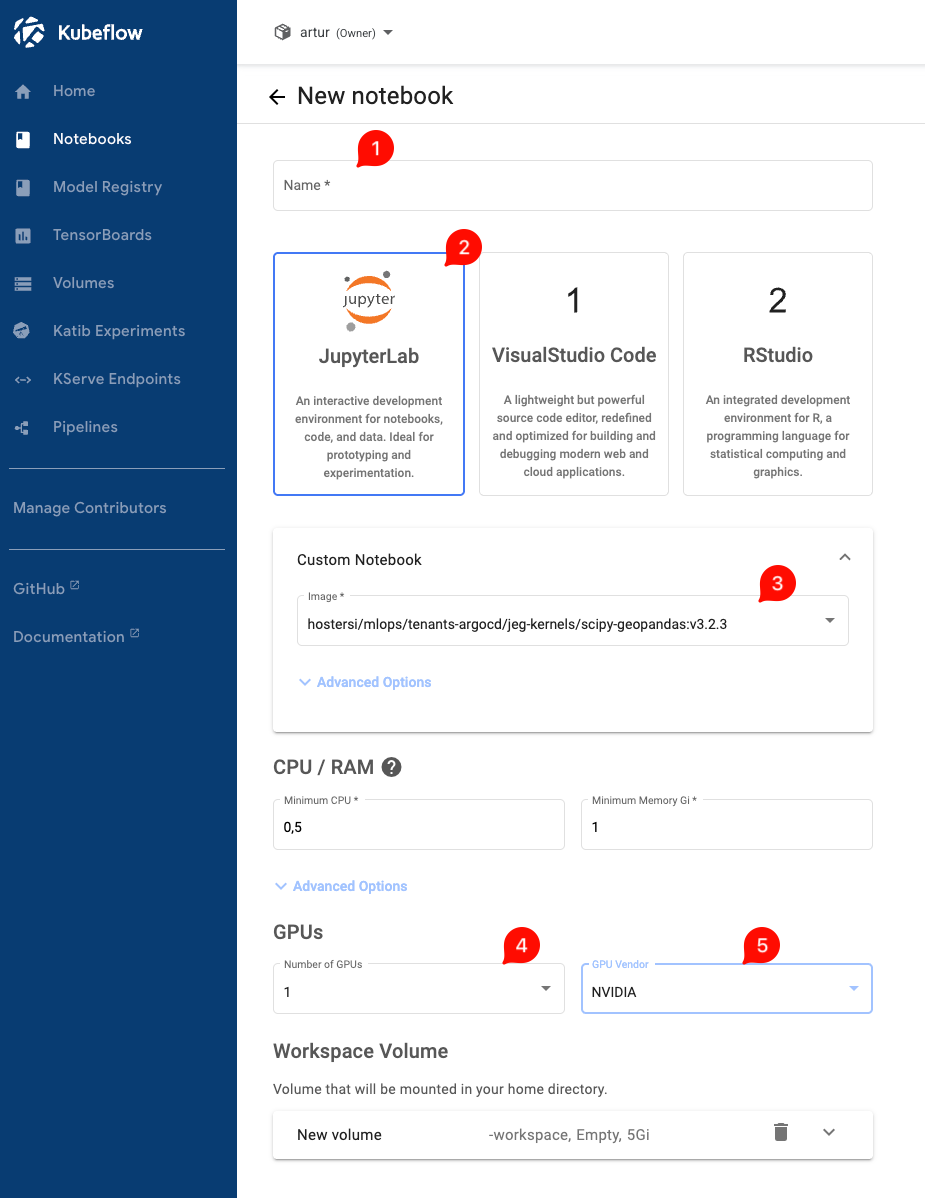
Notebook creation form.
Choose an image that contains the libraries required by your workload whenever possible.
If your workload depends on geospatial or machine-learning libraries, select an image whose name indicates support for the required packages.
Connect to the environment
Once the environment is created, click Connect to start working.
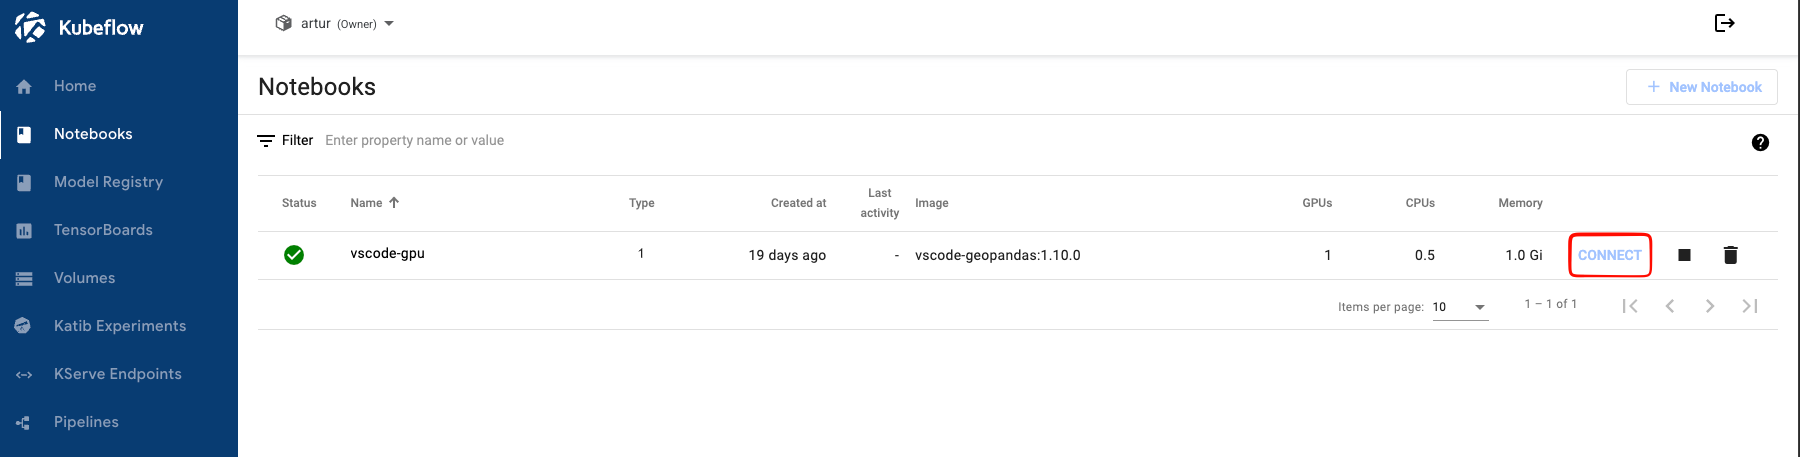
Notebook list with the option to connect to the created environment.
After connecting, you will see a browser-based development environment that you can use to write and execute code.
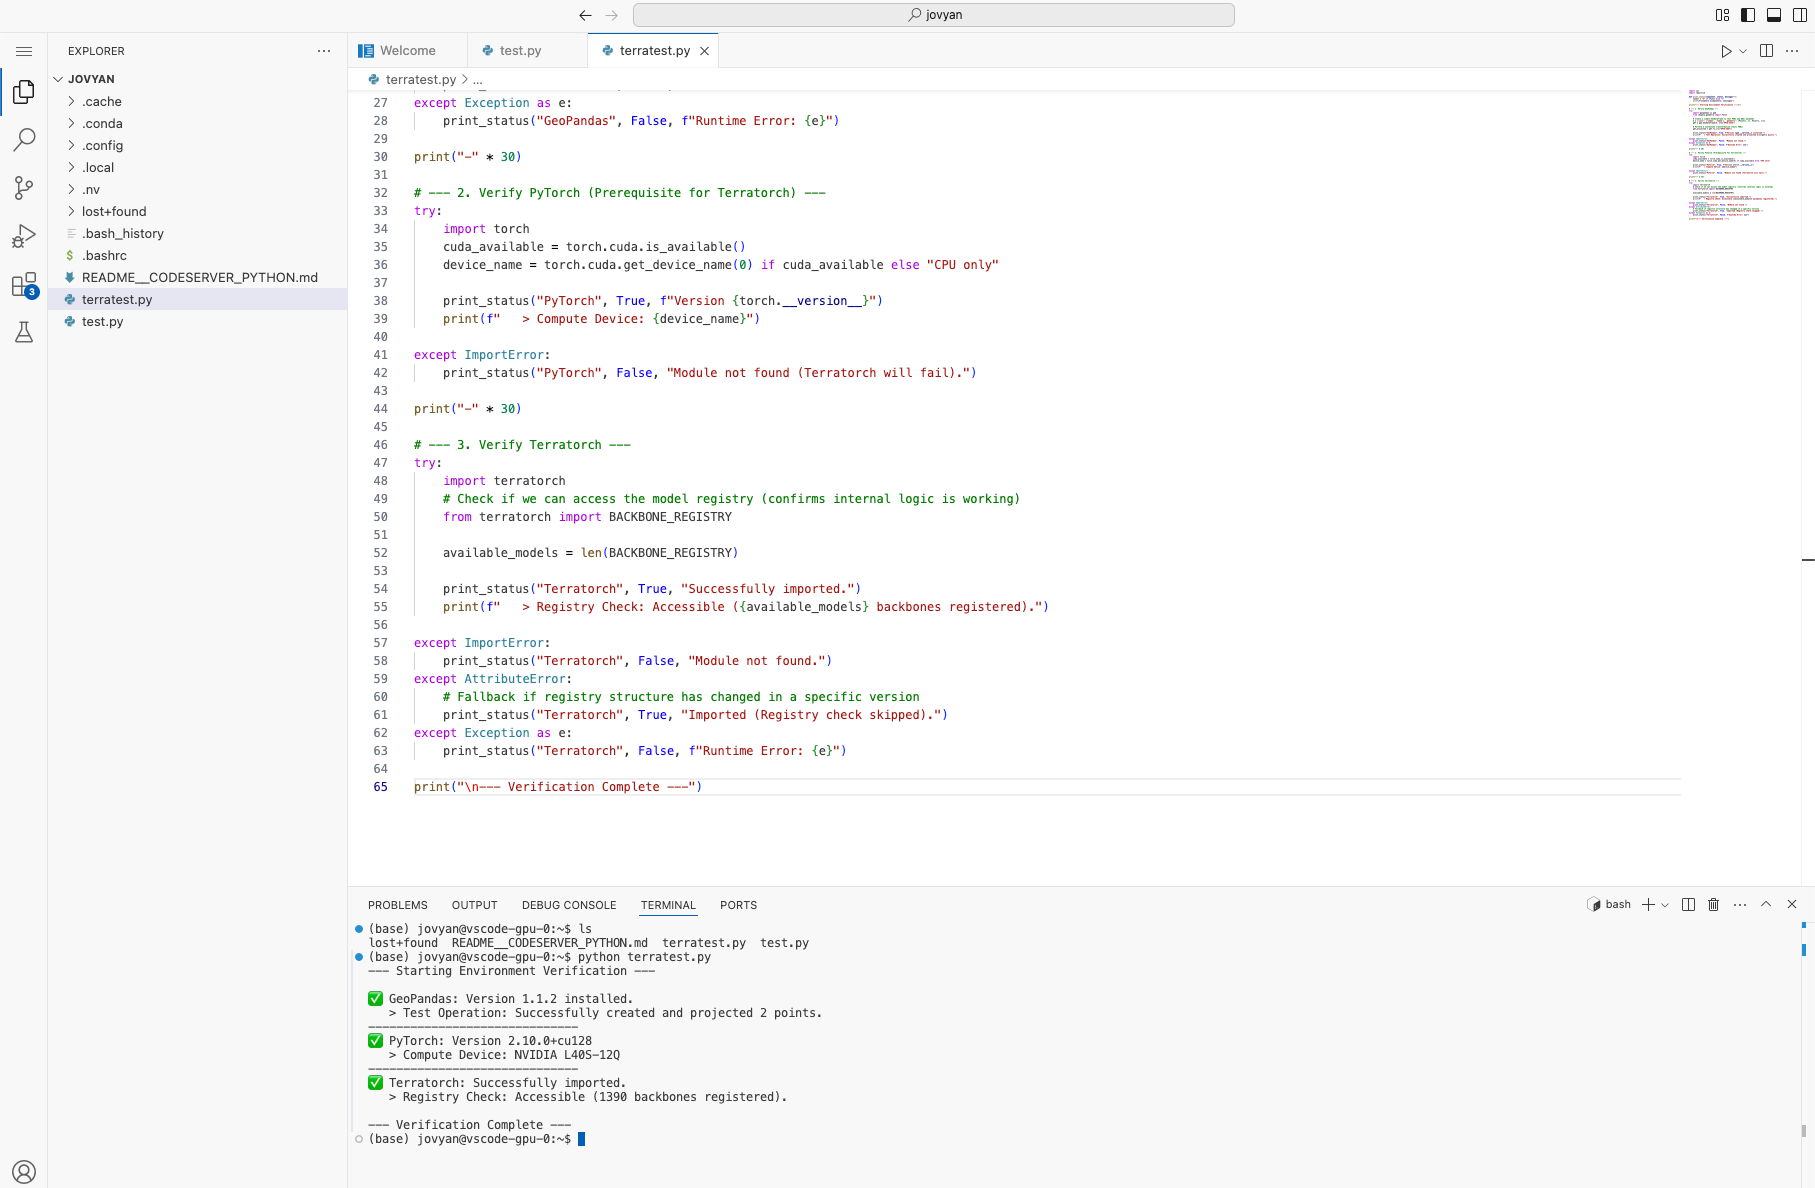
Browser-based development environment.
Notebook culling
Warning
Idle notebook servers are automatically stopped to conserve resources and keep capacity available for other workloads.
Currently, notebook servers are stopped after 60 minutes of kernel inactivity.
Activity in a terminal, editor window, or remote IDE session may not always count as notebook kernel activity. When working in a notebook environment, run code through the notebook kernel when you want the session to remain active.
Run Python code
Use the browser-based environment to create or upload your Python code.
You can run code directly from the interface. You can also open a terminal inside the environment and run commands from there.
Anything executed in the terminal runs inside the container.
Install additional packages
If you need additional Python packages, install them from the terminal.
For packages that should remain available after restarts, install them with:
pip install --user PACKAGE_NAME
Replace PACKAGE_NAME with the package that you want to install.
For example:
pip install --user geopandas
Test required libraries
After installing or selecting an image with the required libraries, test that the workload can import them.
For example:
import geopandas as gpd
import torch

print(gpd.__version__)
print(torch.__version__)
print(torch.cuda.is_available())
This gives you a quick confirmation that the environment is suitable for the workload.
What to do next
After testing the workload interactively, you can keep using the environment for development or prepare the code for repeatable execution as a training job.