Notebook Servers
Notebook servers provide interactive development environments for building, testing, and running machine learning code in MLOps Studio.
A notebook server can provide a Jupyter-based environment, a Visual Studio Code-based environment, or another image prepared for a specific development workflow. The server runs inside your MLOps Studio namespace, while its workspace volume stores your code, notebooks, and other working files.
Prerequisites
Before creating a notebook server, make sure that you can access MLOps Studio and that you have access to the namespace where the notebook will run.
No. 1 MLOps Studio workspace access
You must be able to sign in to MLOps Studio and open the dashboard.
No. 2 Namespace access
You must be added to the namespace where you want to create or use a notebook server. See the relevant part of
Start a notebook server
To start a notebook server, open the MLOps Studio dashboard for the namespace where the notebook should run, then open Notebooks and click New Notebook.
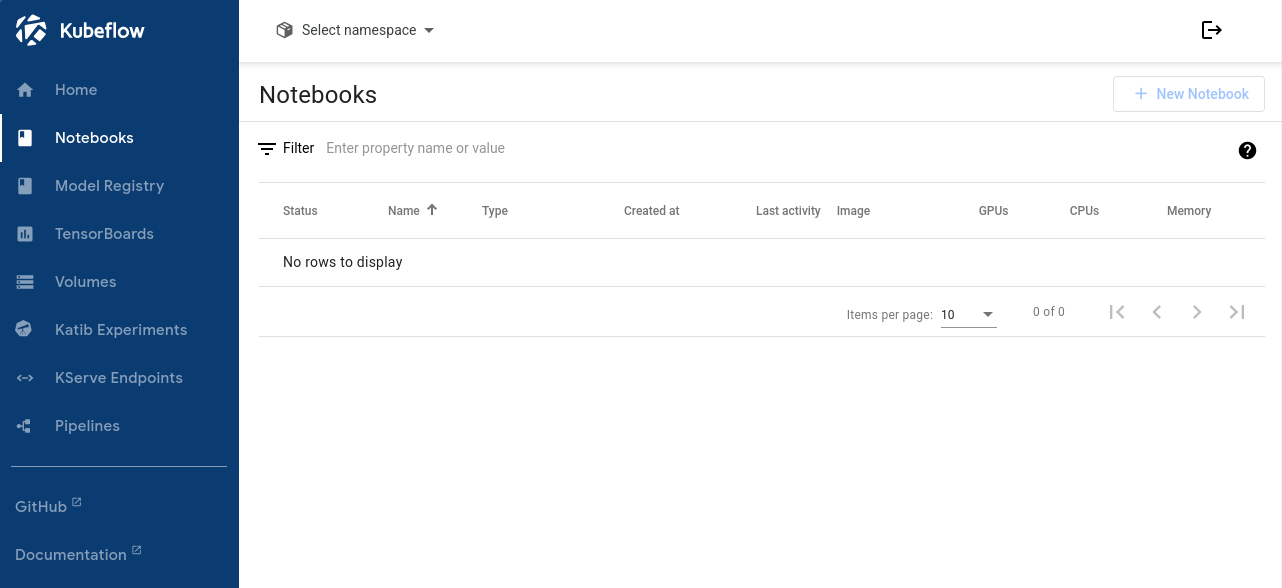
Notebooks page with the New Notebook button
Select the notebook type
You can choose from three notebook types:
JupyterLab – an interactive development environment for notebooks, Python code, data analysis, and experimentation.
Visual Studio Code – a browser-based development environment based on Visual Studio Code.
RStudio – an integrated development environment for R, a programming language for statistical computing and graphics.
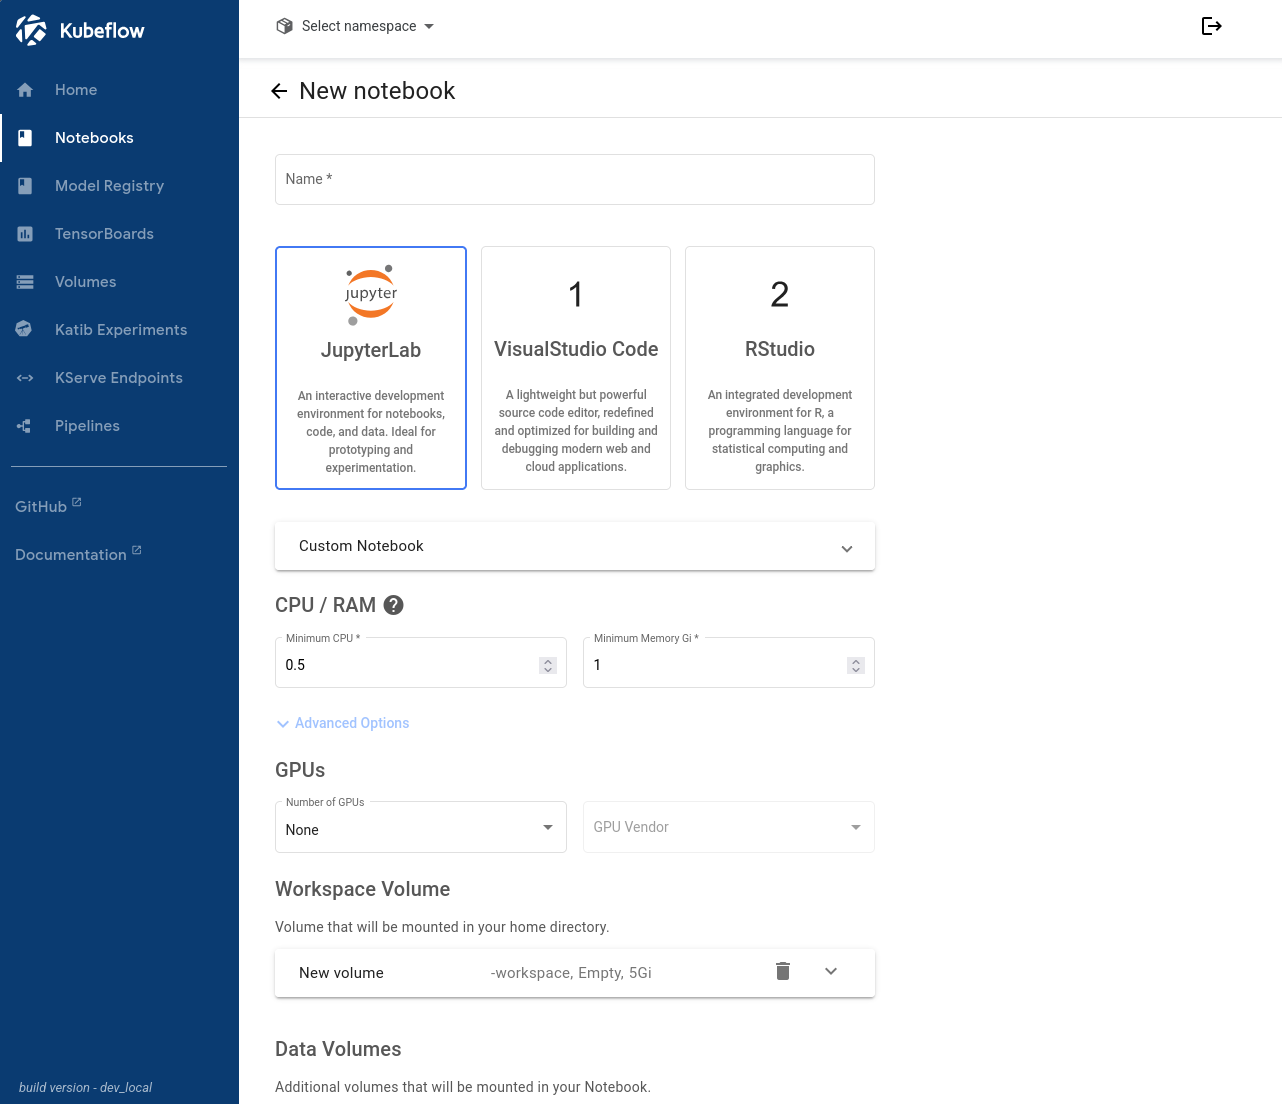
Notebook type selection: JupyterLab, Visual Studio Code, or RStudio
Select a JupyterLab notebook image
When you select JupyterLab as the notebook type, an additional image selection field becomes available.
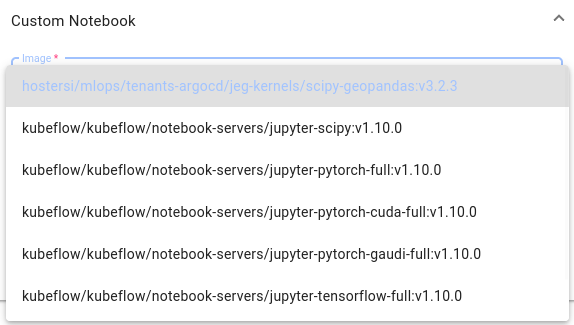
Selecting a JupyterLab notebook image
The selected image defines the software environment that will be available inside the notebook server. It determines which Python version, libraries, machine learning frameworks, GPU libraries, and system tools are preinstalled.
The exact list of available images may differ between sites and platform versions.
The available images may include:
jupyter-scipy A general-purpose JupyterLab image for Python-based scientific computing. Use it for notebooks that need common data science libraries such as NumPy, SciPy, pandas, matplotlib, and similar packages.
scipy-geopandas A JupyterLab image prepared for geospatial and scientific Python workloads. Use it when working with geospatial data processing, vector data, GeoPandas workflows, spatial joins, shapefiles, GeoJSON files, or similar geospatial tasks.
jupyter-pytorch-full A PyTorch image for machine learning and deep learning workloads. Use it when your notebook needs PyTorch but does not require GPU-specific CUDA acceleration.
jupyter-pytorch-cuda-full A PyTorch image with CUDA support. Use it for GPU-accelerated PyTorch workloads when your namespace has GPU resources available and the selected site supports CUDA-capable GPUs.
jupyter-pytorch-gaudi-full A PyTorch image prepared for workloads that use Intel Gaudi accelerators. Select this image only when your environment provides Gaudi accelerator resources and your workload is prepared to use them.
jupyter-tensorflow-full A TensorFlow image for machine learning and deep learning workloads based on TensorFlow and Keras.
Choose the smallest image that contains the tools required for your workload. General-purpose images are usually sufficient for Python notebooks and data analysis. Framework-specific images are better suited for machine learning workloads that already depend on PyTorch, TensorFlow, CUDA, or accelerator-specific libraries.
Note
The image name may include a version tag, for example v1.10.0. The tag identifies the prepared image version. If you need reproducible results, use the same image and version when recreating the notebook server.
There is also a field for using a custom image. Custom images are useful when your project requires a prebuilt environment with specific packages, system libraries, or internal tools. Creating and maintaining custom images is outside the scope of this article.
For Visual Studio Code and RStudio, there is only one image for each, so there is nothing to choose from.
Configure notebook resources and storage
After selecting the notebook type and image, configure the runtime resources and storage for the notebook server.
CPU and RAM
Use the CPU / RAM section to define the compute resources available to the notebook server.
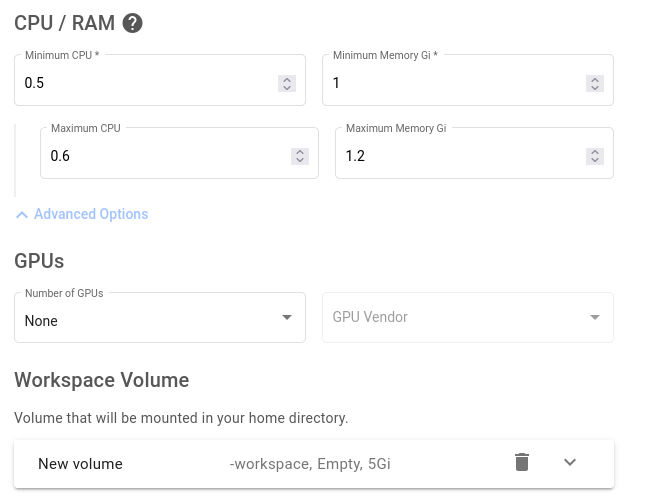
CPU, memory, GPU, and workspace volume settings for a notebook server
The Minimum CPU and Minimum Memory values define the resources that are reserved for the notebook server.
If you expand Advanced Options, you can also define Maximum CPU and Maximum Memory values. These values set the upper limit that the notebook server can use when additional capacity is available.
For lightweight testing, small values such as 0.5 CPU and 1 GiB of memory may be enough. For regular development work, data processing, package installation, or IDE-based workflows, use a larger configuration.
GPUs
Use the GPUs section only when your workload needs GPU acceleration.
If you do not need GPU acceleration, leave Number of GPUs set to None. This keeps GPU quota available for workloads that actually require it.
If GPU resources are available in the selected namespace and site, you can choose the number of GPUs and the GPU vendor. Select a GPU only when the notebook image and the code you plan to run can use GPU acceleration.
Workspace Volume
The Workspace Volume is mounted in the notebook user’s home directory.
Use it to store notebooks, scripts, configuration files, and other working files that should remain available after the notebook server is stopped or restarted.
By default, the form creates a new workspace volume. In the example above, the volume is created as an empty 5 GiB volume. You can keep this default for simple notebooks or adjust it if your work requires more persistent storage.
Data Volumes
The Data Volumes section is used for additional volumes that should be mounted into the notebook server.
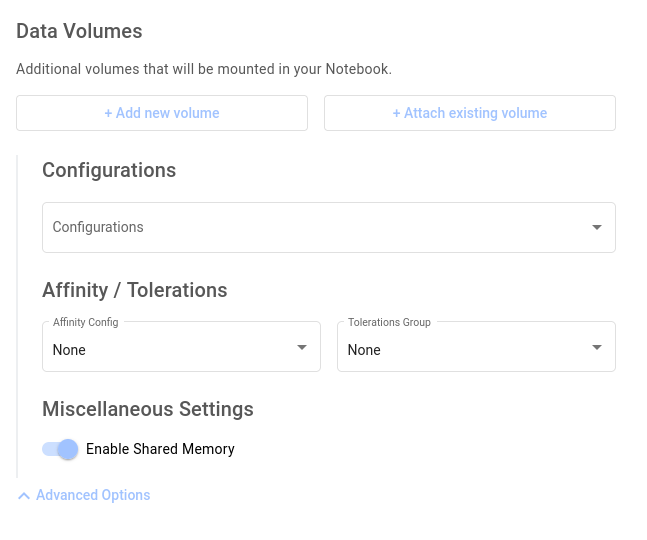
Data volume, configuration, affinity, toleration, and shared memory options
Use Add new volume when you want to create an additional volume for the notebook.
Use Attach existing volume when a volume already exists and should be mounted into the notebook server.
Additional data volumes are useful when you want to separate working files from datasets, share data between notebook servers, or attach storage that was prepared earlier.
Additional options
Use the remaining fields only when they are relevant to your workload or when your platform administrator tells you to use a specific setting.
Configurations – applies a predefined notebook configuration, if such configurations are available in your environment.
Affinity Config and Tolerations Group – control where the notebook server can be scheduled inside the Kubernetes cluster. In most cases, leave both fields set to None. Use them only when your environment provides predefined scheduling rules, for example for specific node groups or hardware types.
Enable Shared Memory – enables additional shared memory support inside the notebook container. This can be useful for workloads that rely on multiprocessing, parallel data loading, or machine learning frameworks that use shared memory. Leave it enabled unless your environment or workload requires otherwise.
Launch the notebook server
After configuring the notebook type, image, resources, storage, and optional advanced settings, click Launch.
Starting a notebook server may take a few minutes because MLOps Studio has to create the underlying pod, attach storage, and start the selected notebook image. When the notebook becomes available, open it from the Notebooks page.
Resource sizing for IDE workflows
Resource selection is especially important when the notebook is accessed from a local IDE.
Visual Studio Code Remote Tunnels run additional processes inside the notebook environment, including VS Code Server. These processes share CPU and memory with the Jupyter kernel, Python runtime, terminal sessions, package imports, and MLOps Studio-related tools.
For regular Visual Studio Code-based work, use at least 2 CPUs and 4 GB RAM.
A smaller notebook with approximately 1 CPU and 2 GB RAM can be sufficient for basic commands, short Python snippets, and lightweight notebook work, but it provides limited headroom. Configurations such as 0.5 CPU and 1 GB RAM are not suitable for Visual Studio Code-based notebook workflows and may result in slow response times, reconnects, or interrupted sessions.
Notebook culling
Warning
Idle notebook servers are automatically stopped to conserve resources and keep capacity available for other workloads.
Currently, notebook servers are stopped after 60 minutes of notebook kernel inactivity.
Activity in a terminal, editor window, or remote IDE session may not always count as notebook kernel activity. When working through an IDE, make sure that code execution uses the notebook environment as intended.
Package persistence
Packages installed only into the default environment may be lost when the notebook server is restarted.
To make Python packages persist across notebook restarts, install them for the notebook user:
pip install --user PACKAGE_NAME
Replace PACKAGE_NAME with the package you want to install.
You can also install packages into a user-writable location on a persistent volume, if your notebook image and project setup support that approach. The workspace volume persists across notebook server restarts.
Actual launching of a notebook
Having clicked on LAUNCH button, the screen changes to a list of notebooks. If there is something wrong, a warning sign will appear on the left and the button for connecting to the serve will not be active.
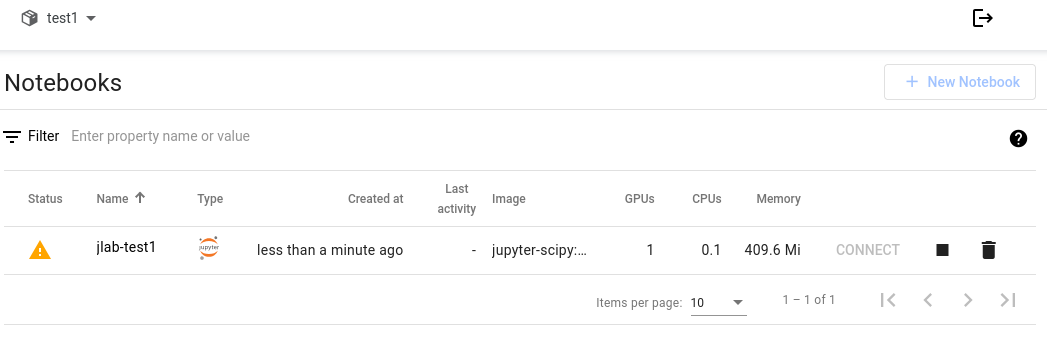
Launching the JupyterLab notebook
Clicking on the warning sign will reveal the problem – usually, the allocation of resources does not fit. In this case, the problem is that too many GPUs were allocated.

Resources clash
The easiest way to create a JupyterLab notebook is to just specify 2 CPUs and 4 GiB for memory.

For easy creation of JupyterLab notebook specify 2 CPUs and 4 GiB for memory
Stop a notebook server
Stop notebook servers when you no longer need them. This frees resources for other workloads in the namespace.
Open the Notebooks page in MLOps Studio.
Find the notebook server you want to stop.
Click Stop.
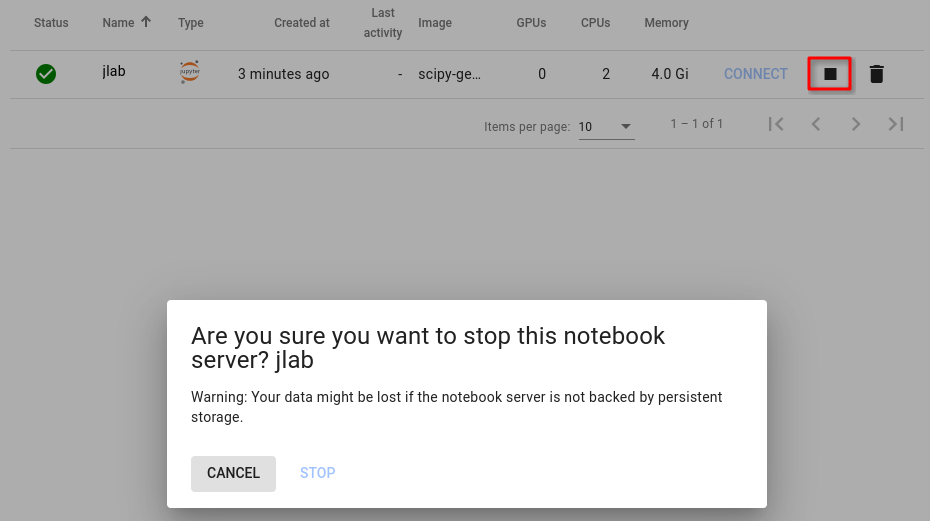
You can stop the server but be careful not to lose the connected data
After the notebook server is stopped, the runtime is no longer available. Files stored on the persistent workspace volume remain available and can be used again when the notebook server is started.
Connecting to the server
Finally, click on CONNECT button to start working in the notebook. A typical JupyterLab screen appears:
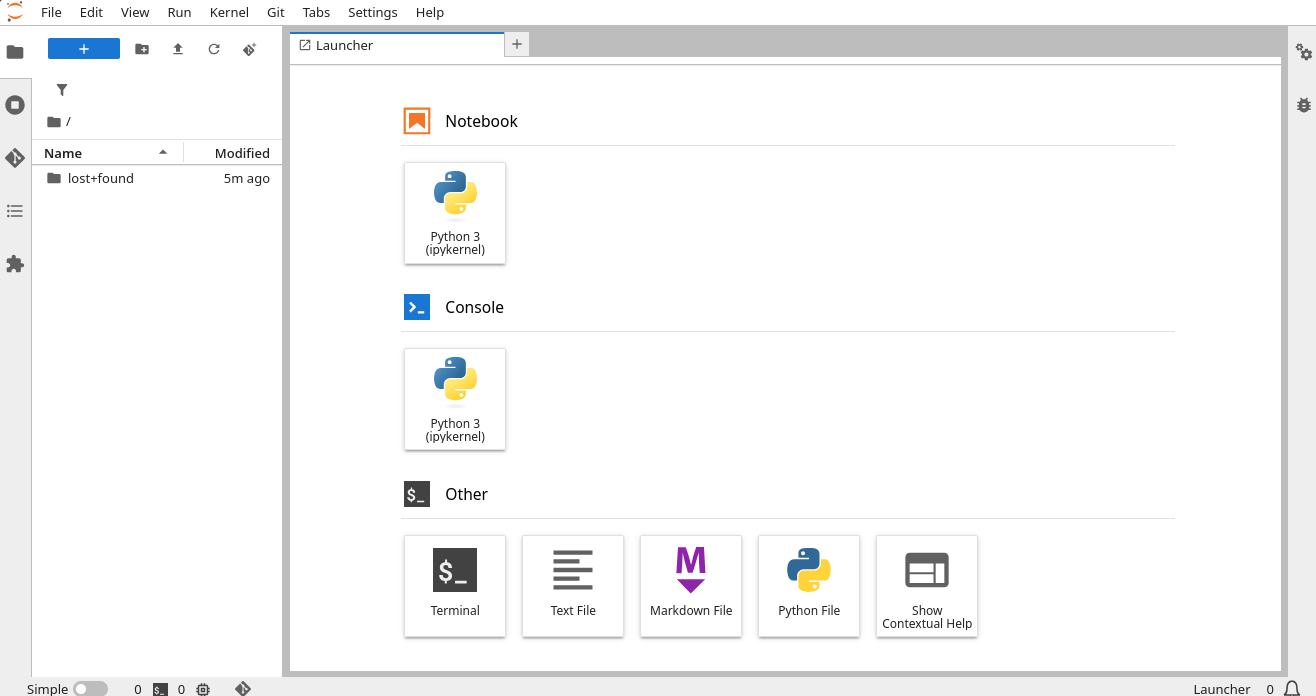
You can stop the server but be careful not to lose the connected data
Using other server types
If you wanted to use other types of notebooks, here is what list might look like:
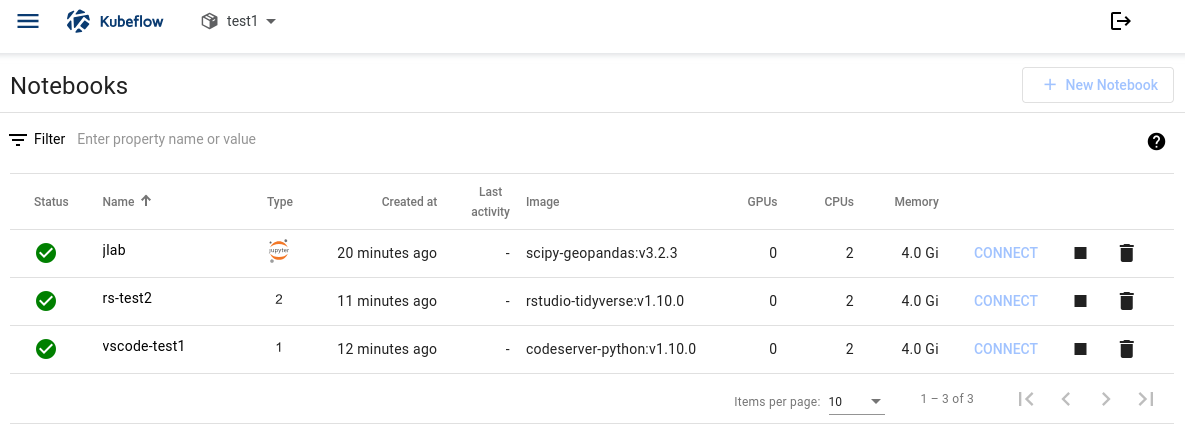
List of notebooks
Click CONNECT for the RStudio editor:
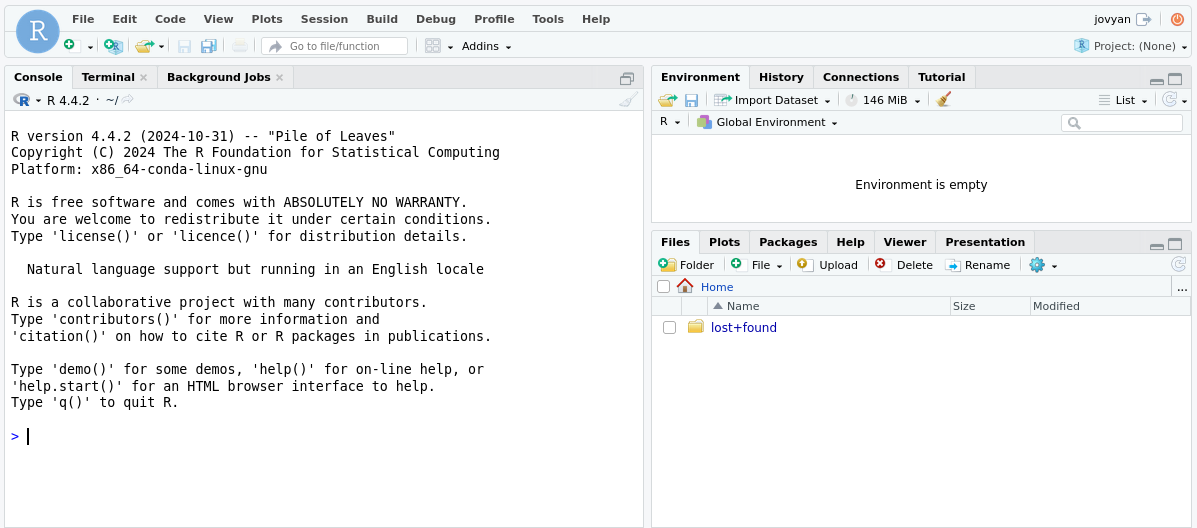
RStudio editor
VS Code for the web interface:
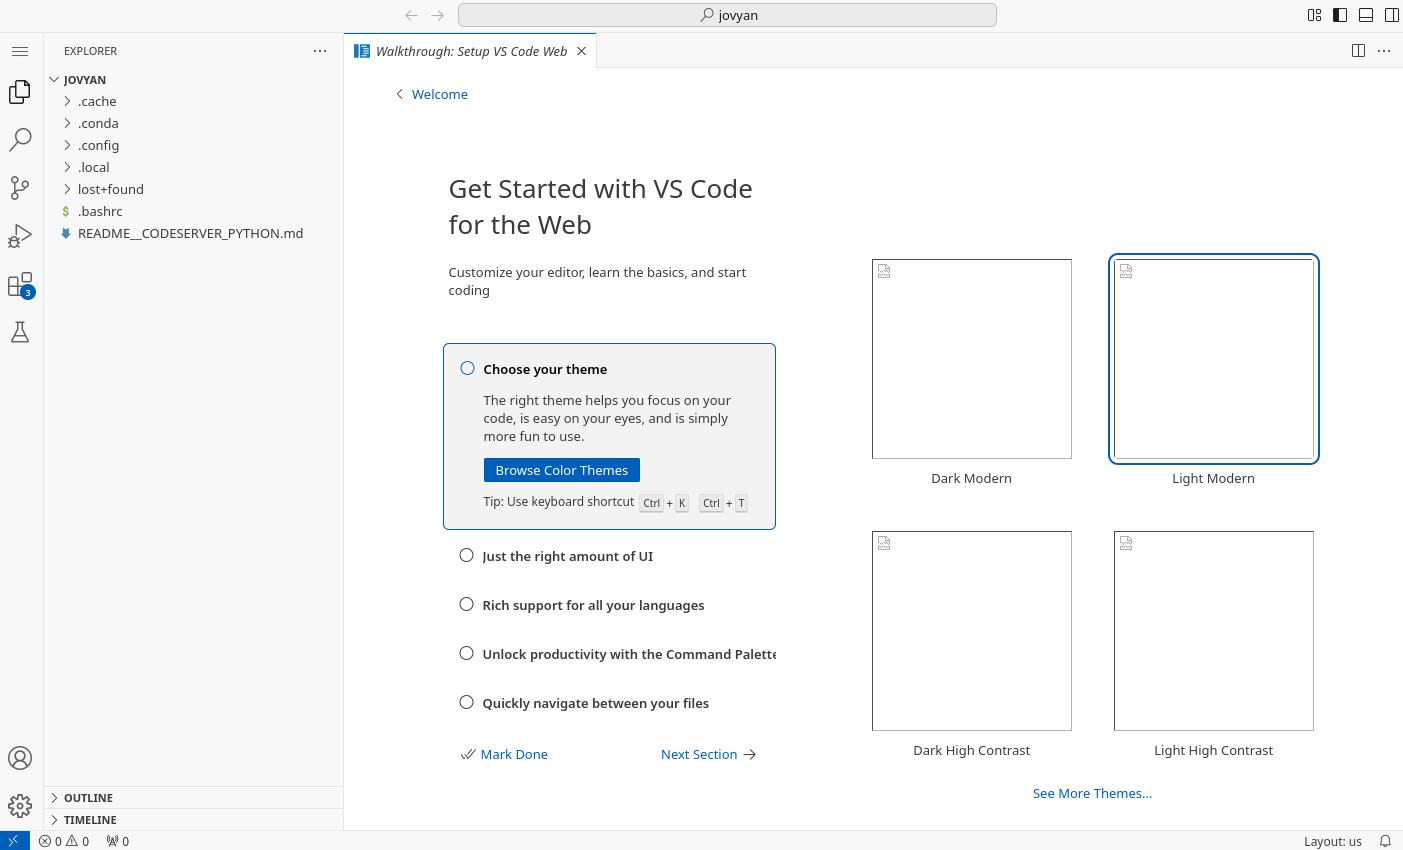
VS Code for the Web
Connecting from IDEs
You can connect to a running MLOps Studio notebook from a local IDE instead of working only in the browser.
Two access methods are available:
Visual Studio Code Remote Tunnels – use this method when you want to connect local Visual Studio Code directly to the notebook environment. It works with both Jupyter-based notebooks and Visual Studio Code-based notebooks.
kubectl port-forward – use this method when you want to expose the notebook service on a local port and connect to it through a remote Jupyter URL. This method is IDE-agnostic and can be used with Visual Studio Code, PyCharm, or another IDE that supports remote Jupyter connections.
For detailed instructions, see:
What to do next
After creating and using notebook servers, continue with related MLOps Studio tasks such as running Python code, connecting from an IDE, managing users in a namespace, or working with MLOps Studio Pipelines.