Run a notebook on JupyterHub
Prerequisites
No. 1 Access to My DataLake Services in general
You need to have access to My DataLake Services in general (have a profile, create a project, invite users etc.).
List of articles about My DataLake Services
No. 2 Access to Hook Services in particular
How to request roles for JupyterHub on My DataLake Services
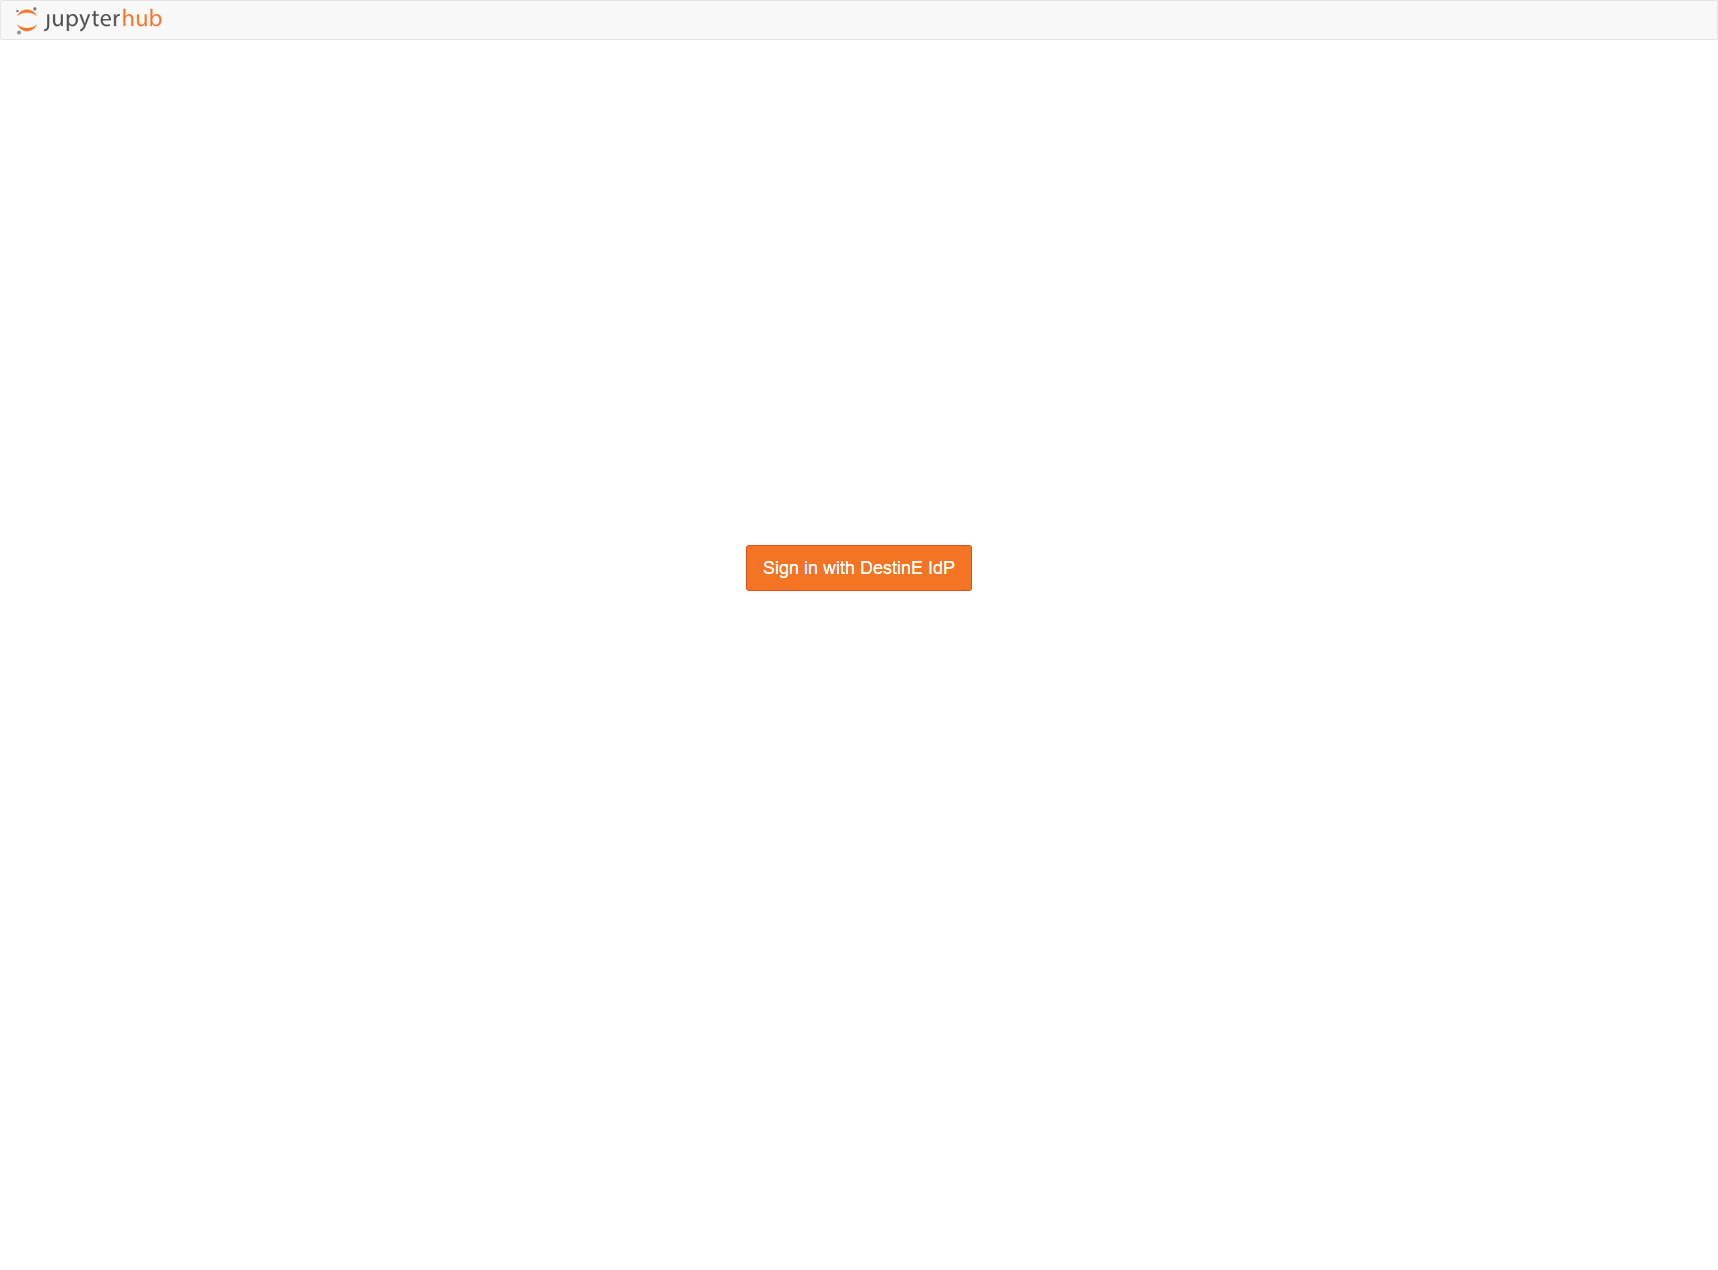
Choose a Web browser of your choice and access the JupyterHub service via
https://jupyter.central.data.destination-earth.eu/
Use the Sign in with DestinE IdP button to login to the STACK JupyterHub service.
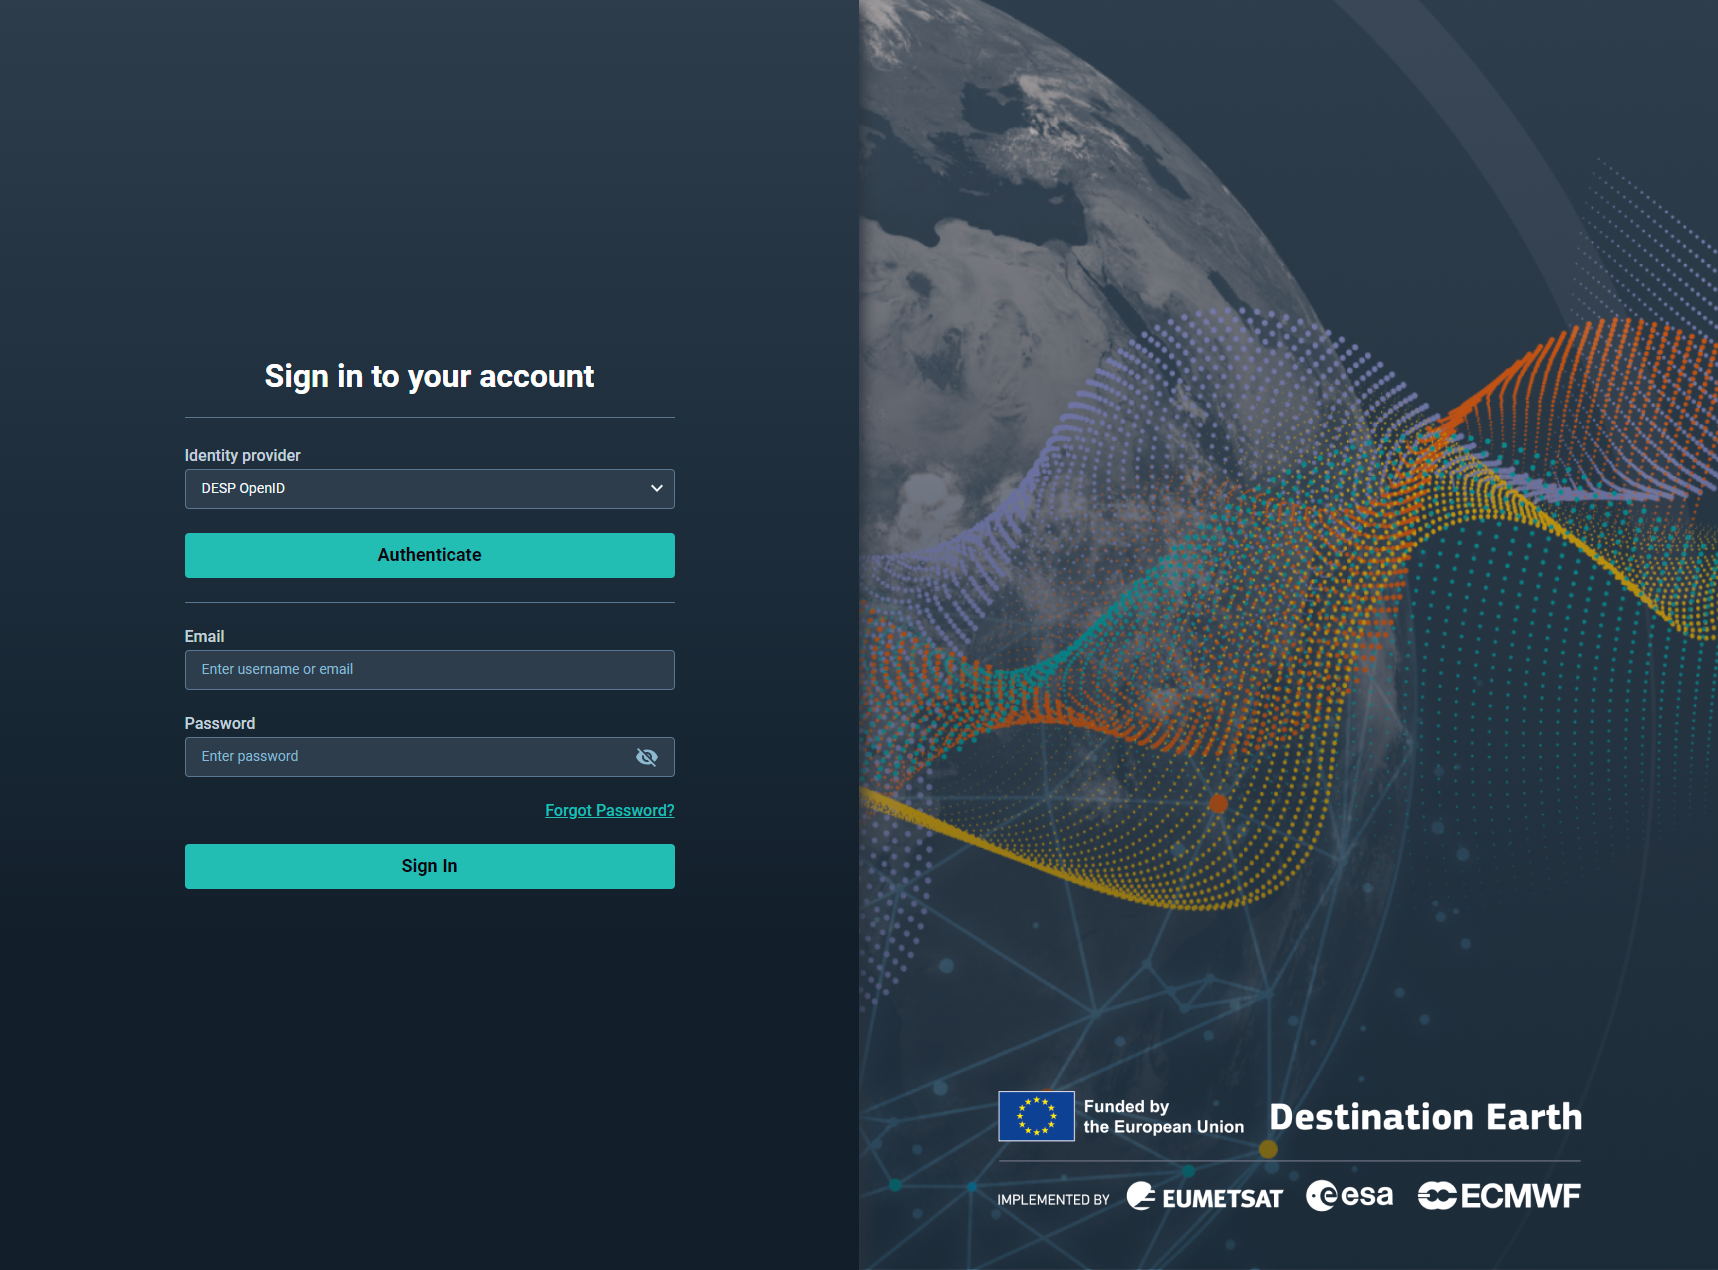
Use DESP OpenID to authenticate with your DESP user credentials. Click the “Authenticate” button to be redirected to sign-in via DESP.
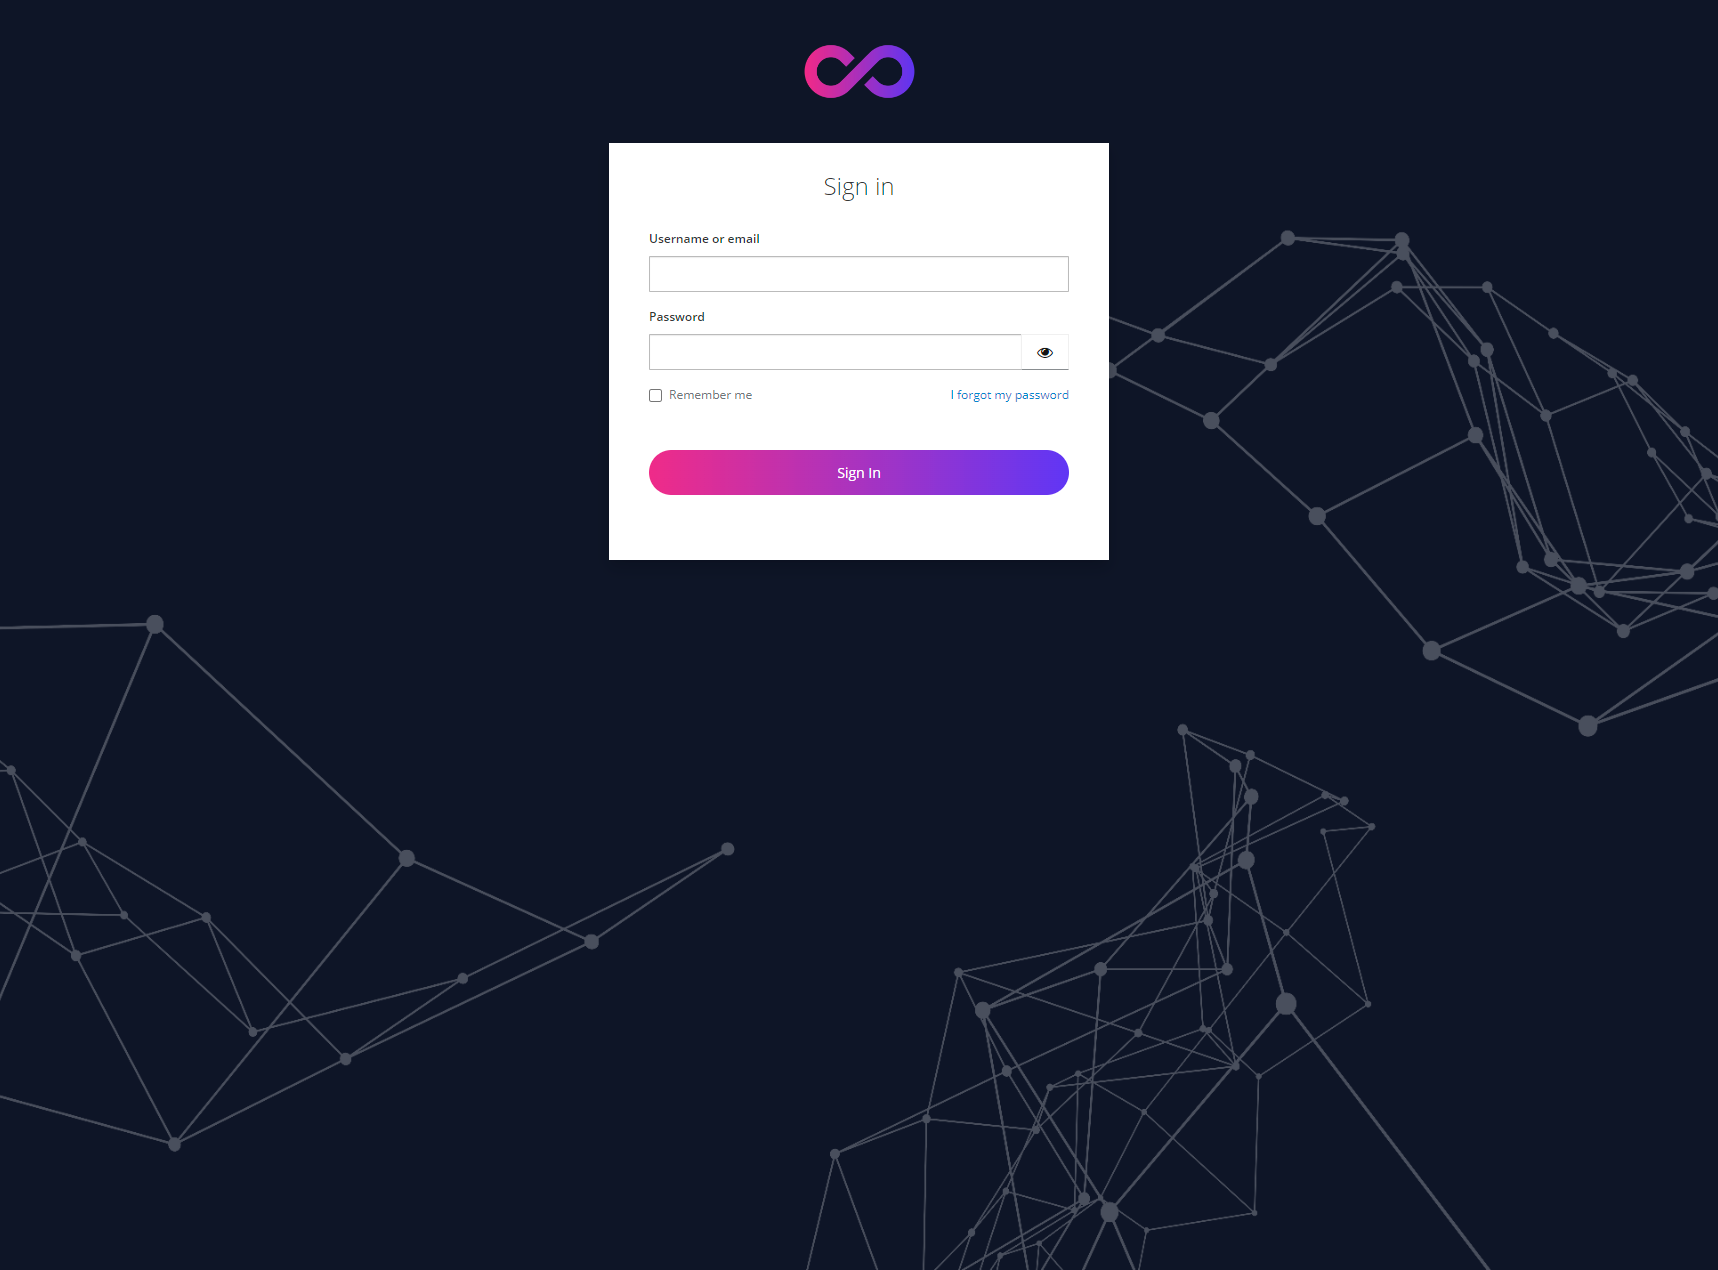
Enter your Email (username) and password and click Sign In. After successful authentication, you will be redirected to the STACK JupyterHub service.
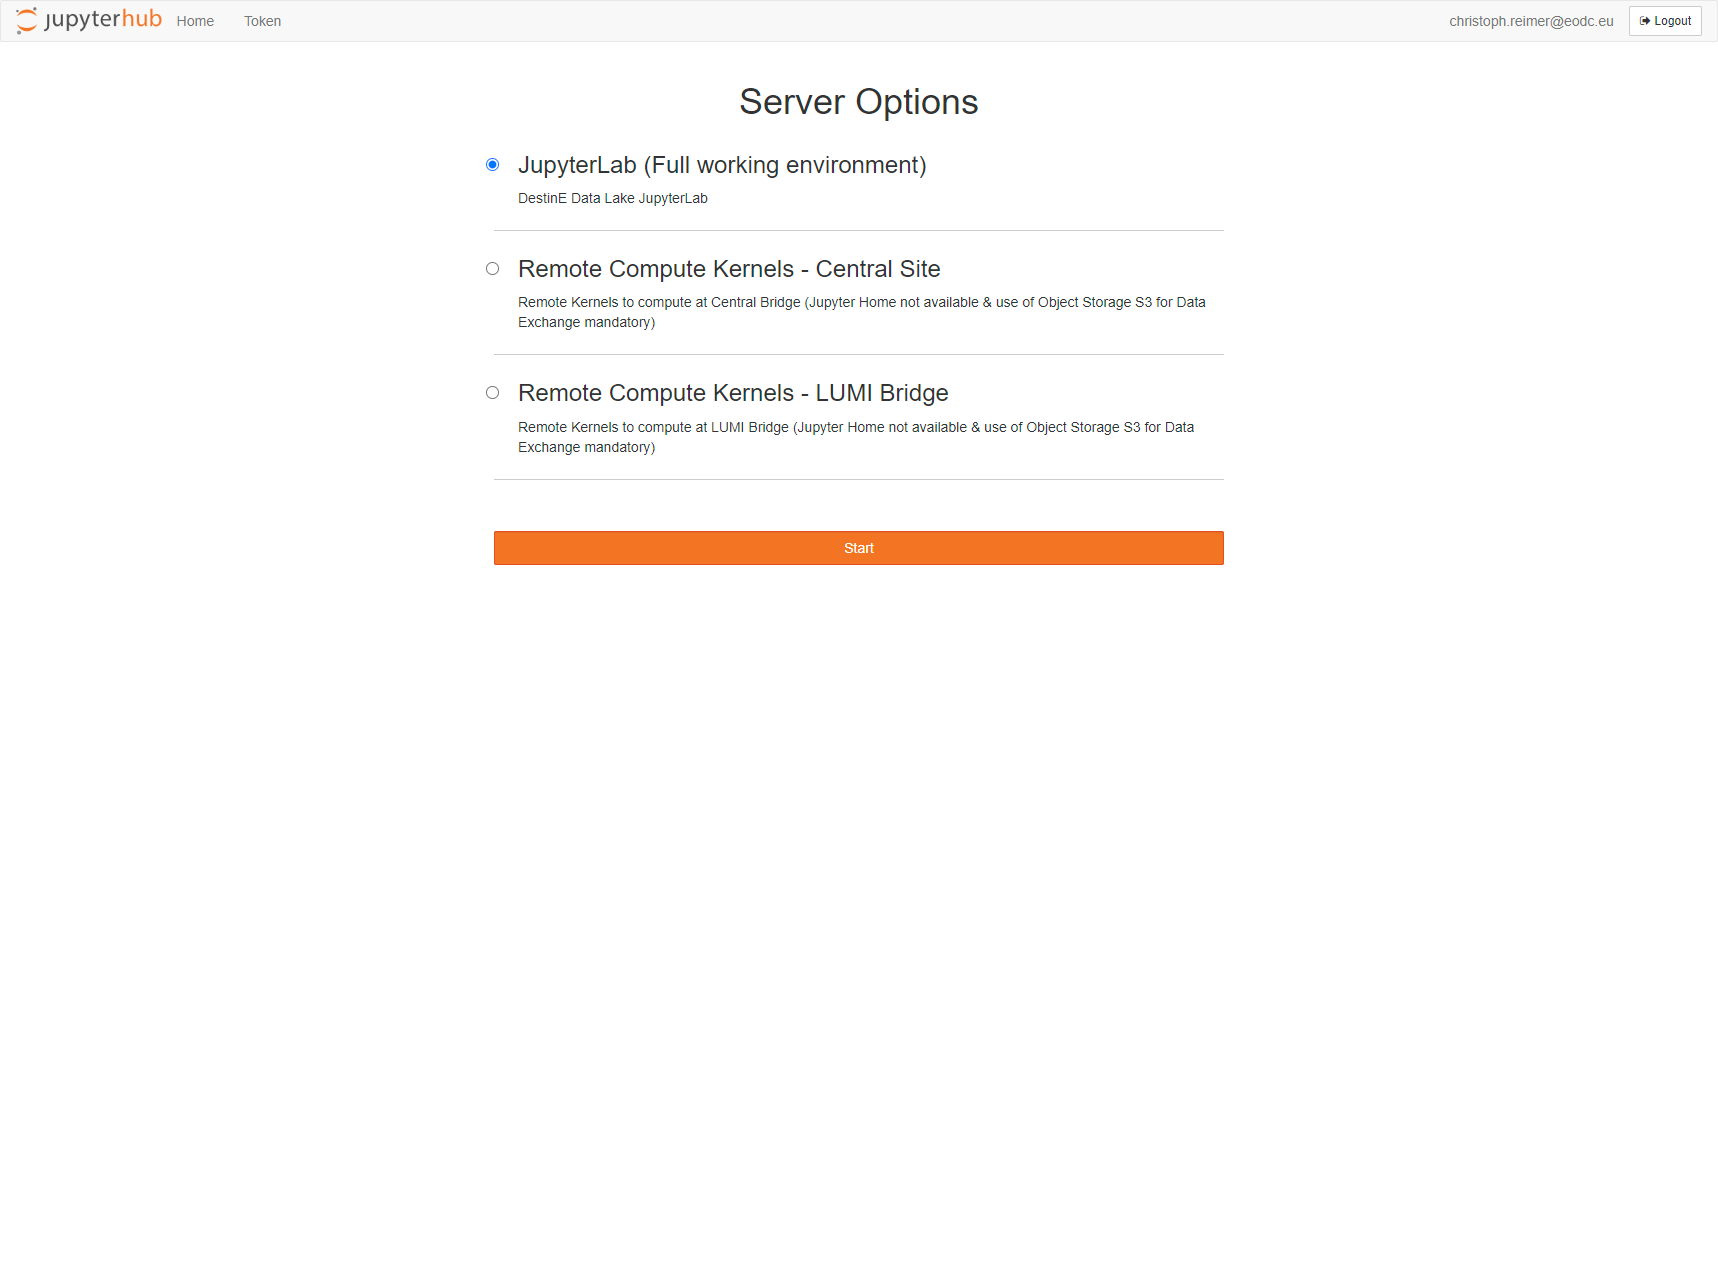
Now you can select one of the given options to run a pre-configured JupyterLab environment.
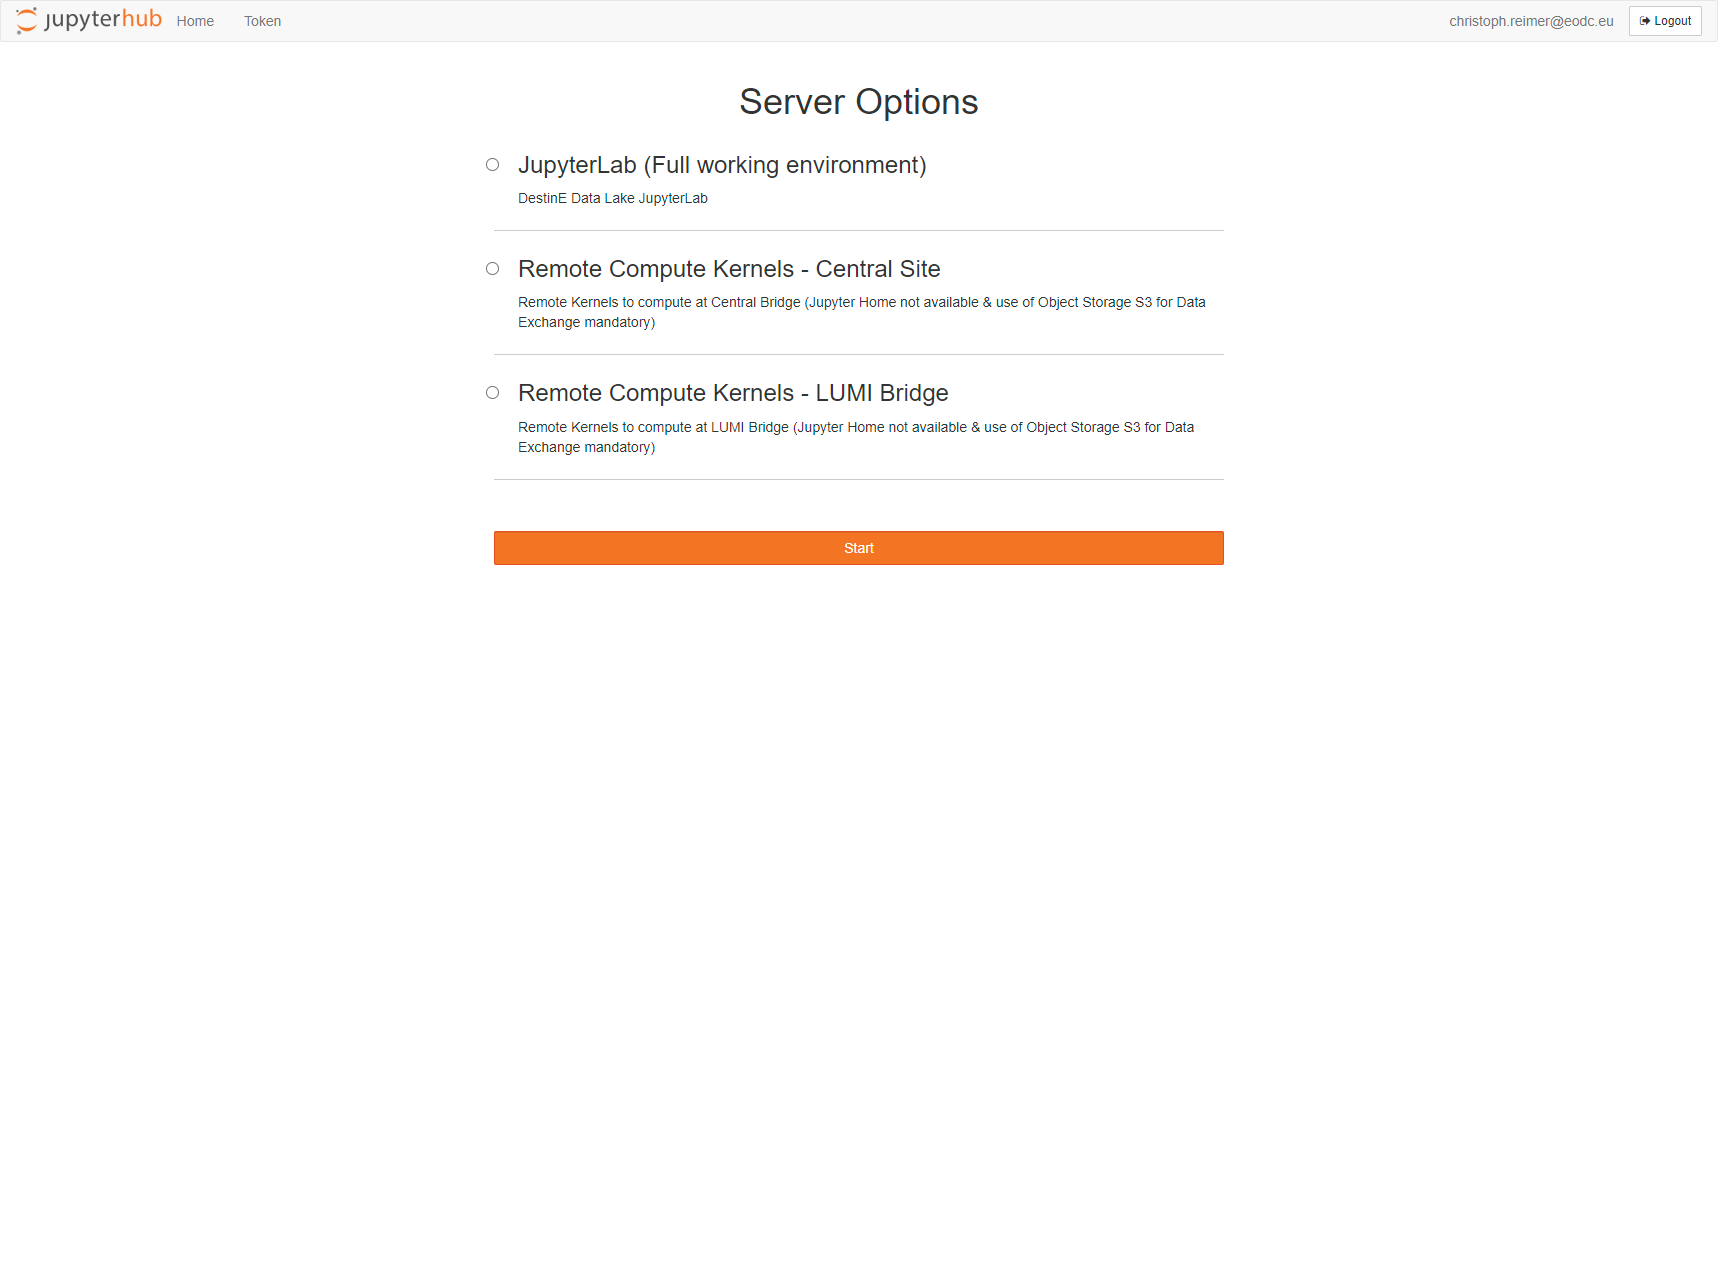
Selecting the first option will create you a fully configured environment with easy access to a users home directory holding example notebooks for further reuse.
A fresh new notebook can be launch via the Launcher application in the spawned JupyterLab. Therefore, click on Python DEDL in the notebook section of the launcher to get a ready to use notebook.
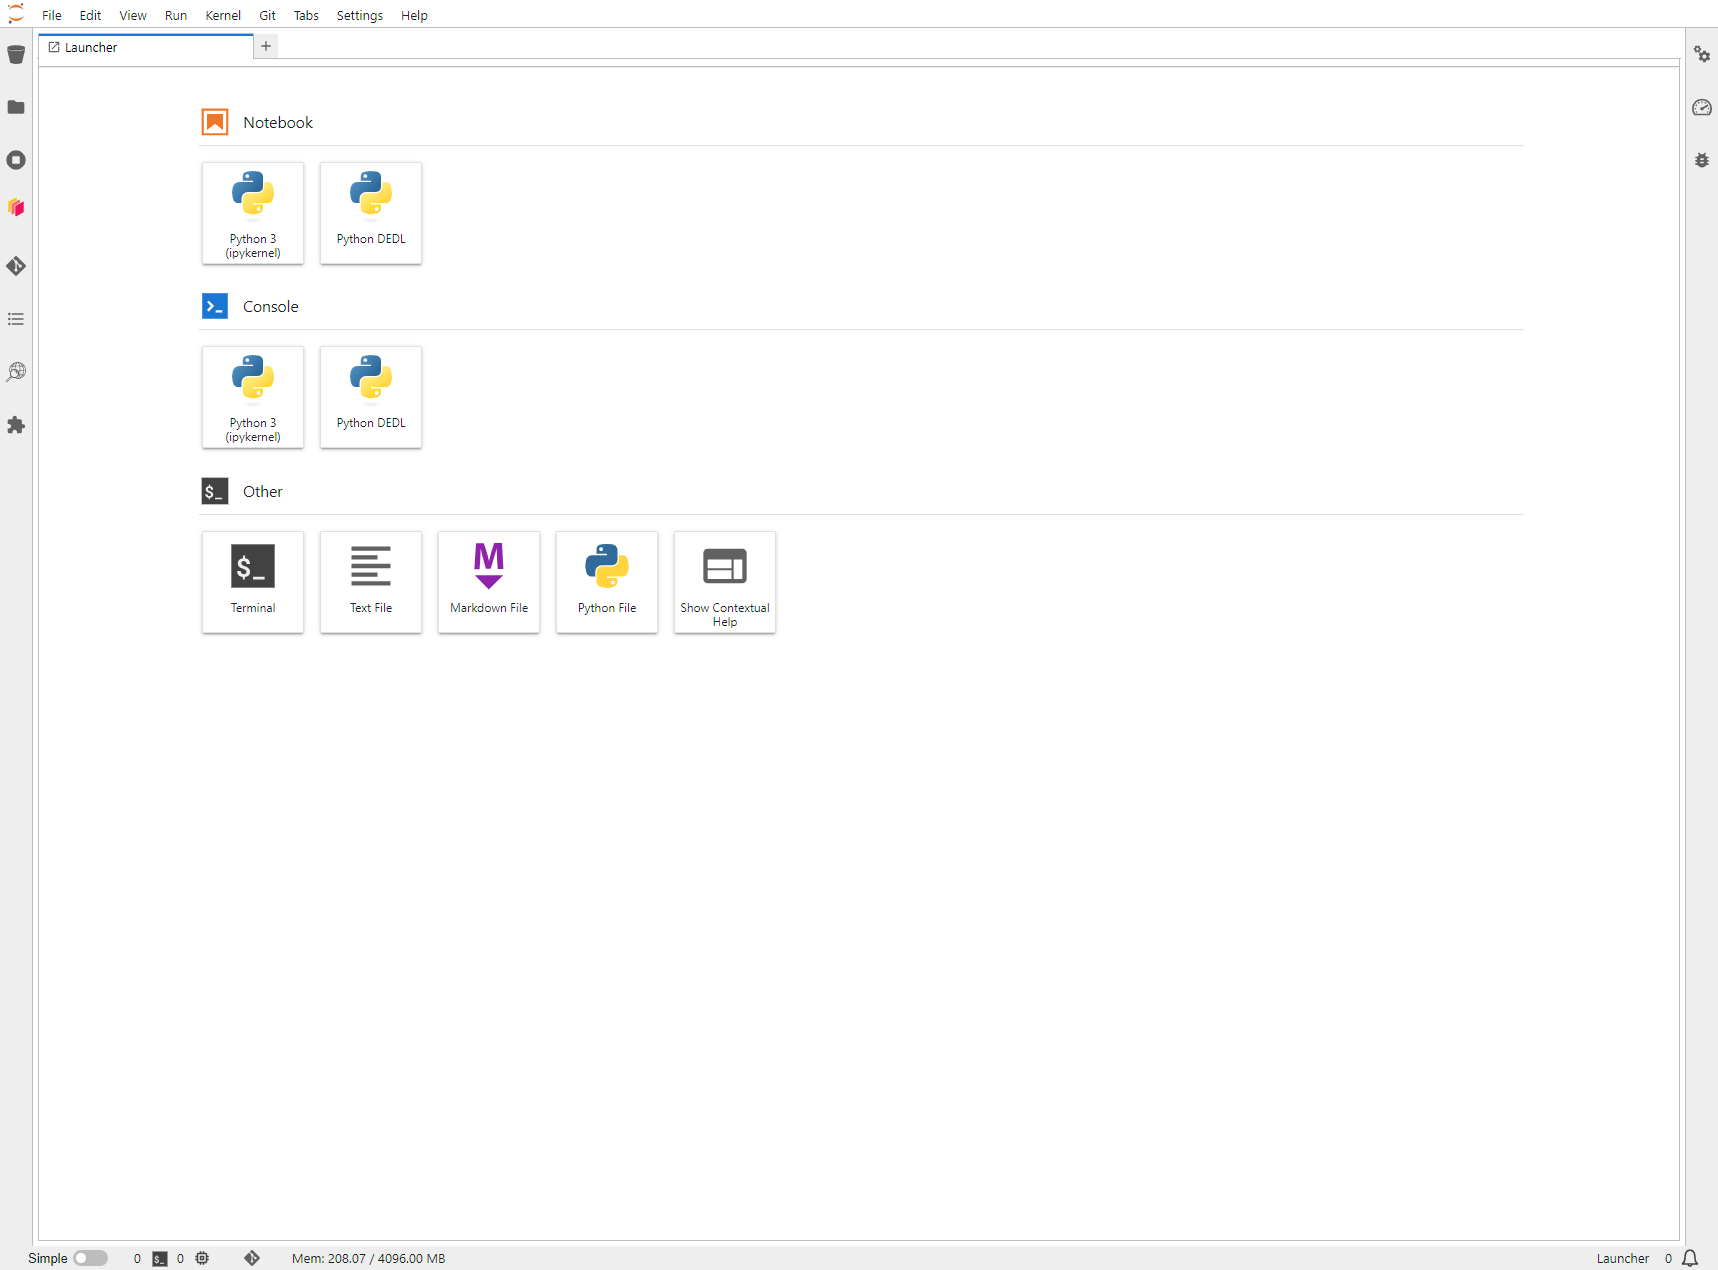
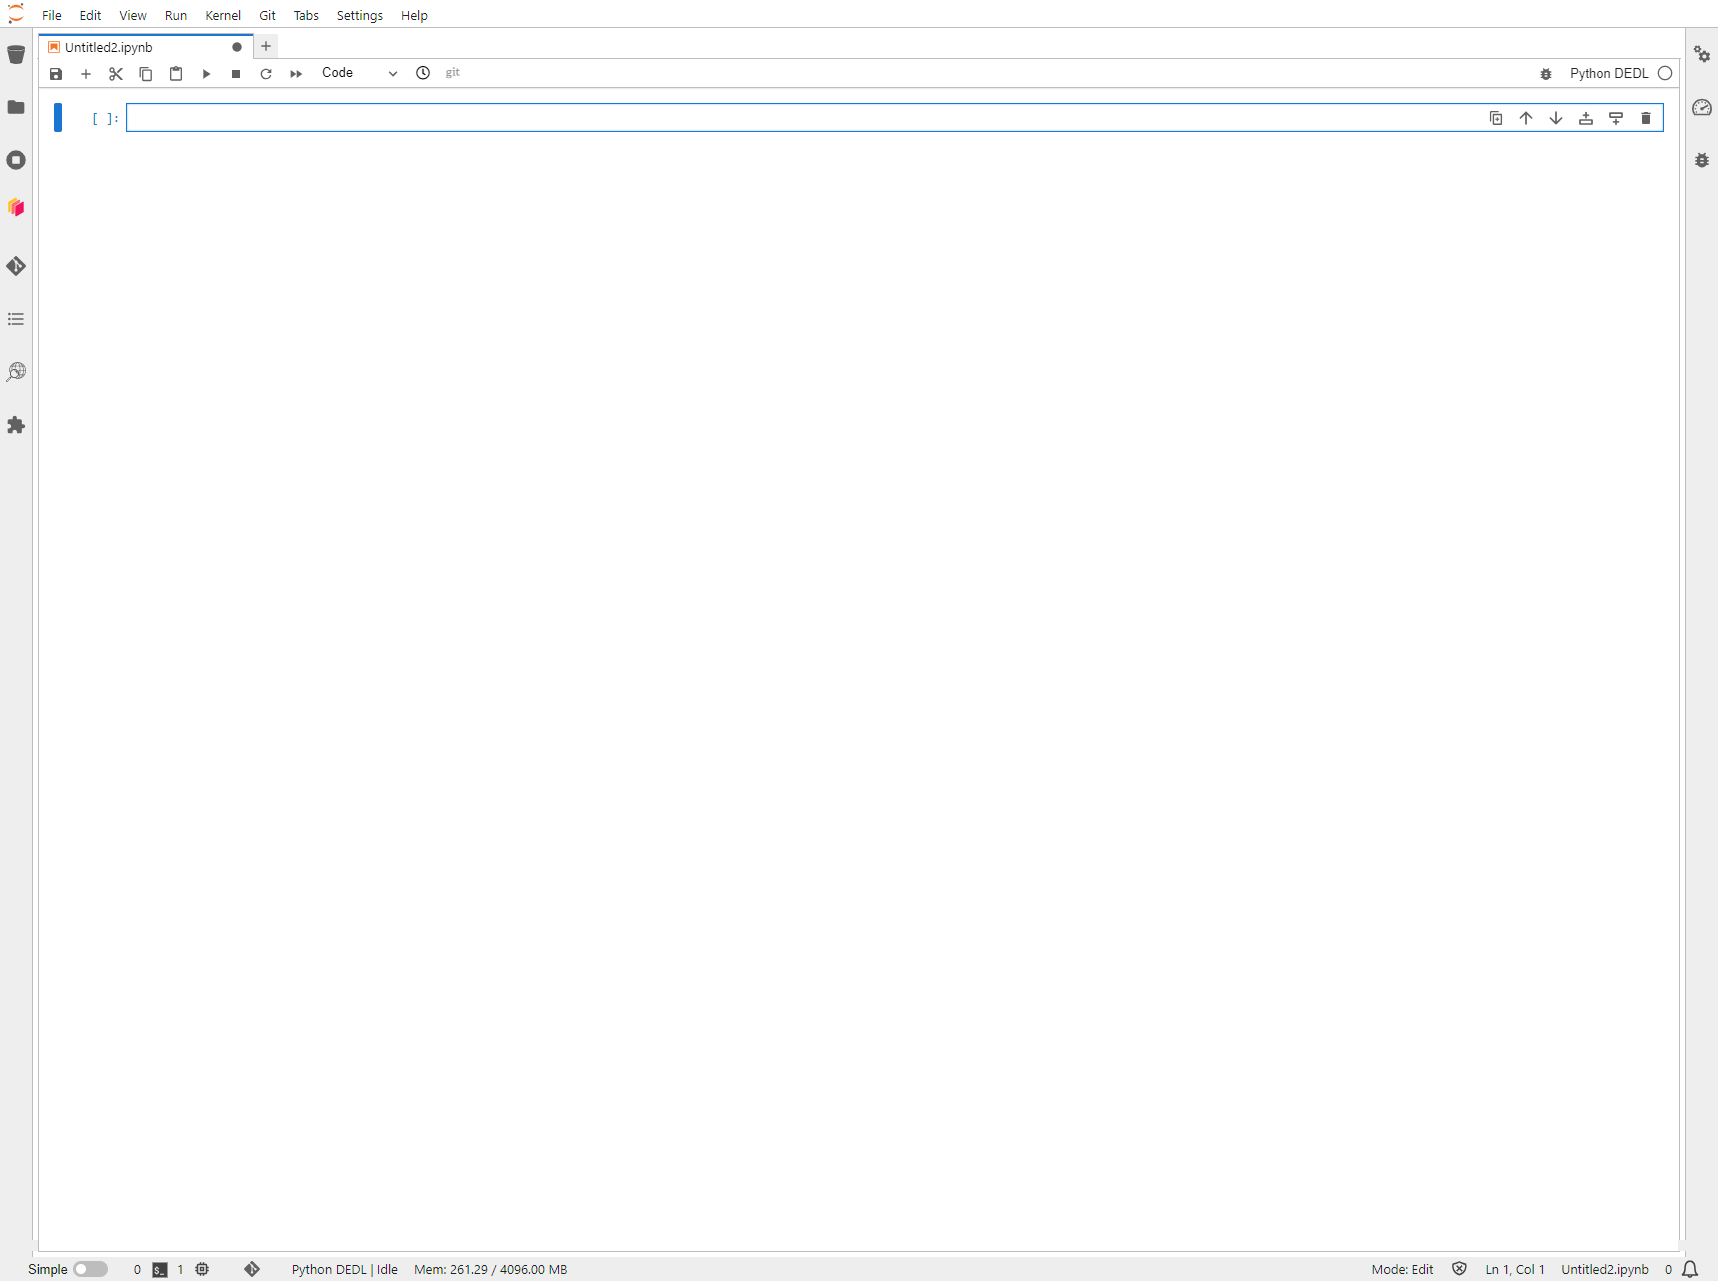
An empty notebook will now be presented, connected to the Python DEDL kernel, containing a set of pre-installed Python packages to utilise the DestinE service offering.
The collection of Jupyter example notebooks on How to use the DestinE Data Lake services can be found at Destination Earth on Github.