How to Mount Object Storage Container as a File System in Linux Using s3fs
Destination Earth cloud allows you to create object storage containers in which you can store your data.
This article will show you how to configure access to such an object storage container on your Linux virtual machine or local computer in a way that its contents can be seen as files and folders in your file system. For this purpose, you will use s3fs.
What We Are Going To Do
Check your credentials and save them in a file
Show general procedure to mount a new object
Perform the mounting with eouser
Create data locally to be mounted remotely
Mount on the local Ubuntu computer
Prerequisites
No. 1 Hosting
To create object storage containers cloud and use them to store your files, you need a Destination Earth hosting account. Depending on the cloud you want to use, the link for the account would be:
You can also use s3 commands from terminal in various operating systems but that is out of scope of this article.
No. 2 A virtual machine and/or local Linux computer
If you want to access data on an object storage container on a virtual machine hosted cloud, you need to create such a virtual machine. If you haven’t already, one of the following articles should help:
How to create a Linux VM and access it from Linux command line
How to create a Linux VM and access it from Windows desktop
In this article, we assume that the VM is called vm1 and was created using the Ubuntu 22.04 image.
You can also configure s3fs for this purpose on your local Linux computer. In this article, we assume that it is running Ubuntu 22.04 LTS.
To edit configuration files, we will use the text editor called nano. If you don’t have it yet, install it using the following command:
sudo apt install nano
No. 3 Have Object Storage container ready
If you want to create a new Object Storage container, follow this guide: How to use Object Storage
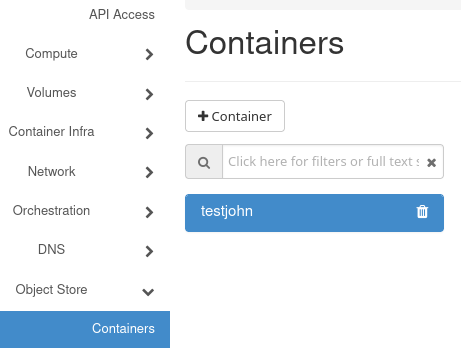
If you chose the name testjohn for your object storage container, it should look like this in the Horizon dashboard:

No. 4 Valid EC2 credentials
The Access Key and Secret Key used for access to s3 containers from Destination Earth are also called the “EC2 credentials”. See article
How to generate and manage EC2 credentials
to learn how to generate them.
That article also contains instructions
how to make the OpenStack CLI client operational as well as
how to access the cloud environment.
Gain access to the cloud from a VM
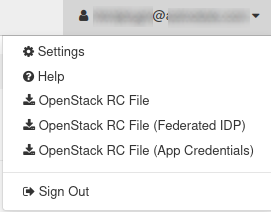
Once in Horizon interface, click on the email address in the top right corner. A menu with options to download RC files will appear:

Click on option OpenStack RC File, which will ask you to authenticate with the password with which you logged in.
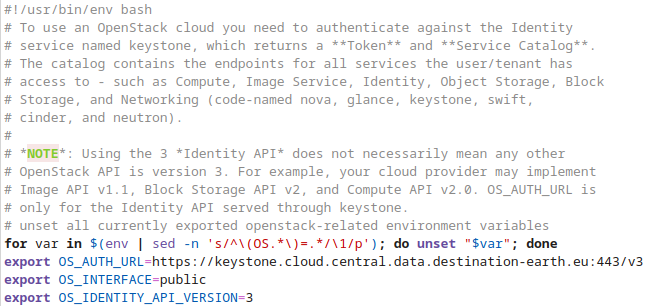
Open the downloaded file in a text editor. This is how it starts:

Copy the entire contents of that file to the clipboard.
To recreate the RC file on the VM, open Terminal program in your operating system and create an SSH connection to the cloud:
ssh -i sshkey.pem eouser@AAA.BB.XXX.Y
File sshkey.pem contains the secret part of the key pair needed to access the cloud. Enter your own IP address instead of AAA.BB.XXX.Y from the above line.
Once the connection is established, create a new file with nano:
sudo nano dedlcentral.sh
The clipboard should still contain the content of the RC file you downloaded from Horizon, so just paste it into nano and save the file with Ctrl-X and Y.
Now execute the file on VM, with
source dedlcentral.sh
Enter the password and the openstack command will become operational in the VM.
Mounting object storage on a Destination Earth virtual machine
Check your credentials and save them in a file
To mount object storage from Destination Earth, you need to obtain your access and secret keys.
If you don’t have them memorized or written down somewhere, execute the following command:
openstack ec2 credentials list -c Access -c Secret -f yaml
The result of your command should look like this:
Access: 3d24683fb4f541368f85d4cb43234a47
Secret: 76f16c4f481f4e469eedfcb3a4465a43
In this example, 3d24683fb4f541368f85d4cb43234a47 is your access key and 76f16c4f481f4e469eedfcb3a4465a43 is your secret key.
In this example, we will store your access and secret keys in a file called .passwd-s3fs in your home directory. The command which we will use will overwrite that file if it exists. You can check if you have such a file by, say, executing the following command:
ls -a ~/.passwd-s3fs
If the file is not found, you should get the output similar to this:
ls: cannot access '/home/eouser/.passwd-s3fs': No such file or directory
To create a file with your credentials, execute the command below. Replace access_key with your access_key and secret_key with your secret key.
echo access_key:secret_key > ~/.passwd-s3fs
For example, if 3d24683fb4f541368f85d4cb43234a47 is your access key and 76f16c4f481f4e469eedfcb3a4465a43 is your secret key, the command will look like this:
echo 3d24683fb4f541368f85d4cb43234a47:76f16c4f481f4e469eedfcb3a4465a43 > ~/.passwd-s3fs
The file you just created called .passwd-s3fs is a hidden file and will therefore not be visible while executing the ls command without any parameters (to avoid clutter). To see this file, you need to add the -a parameter to the ls command.
Change permissions of the newly created file
chmod 600 ~/.passwd-s3fs
Code 600 means you can read and write the file or directory but that none of the other users on the local host will have access to it. They will still be able to override these permissions for example if they, say, they have sudo permissions.
In the next step you will mount your object storage container as a file system.
Perform a test mounting
Confirm whether s3fs is installed on your virtual machine. To do that, execute this command:
type s3fs
You should get output similar to this:
s3fs is /usr/local/bin/s3fs
This output should mean that s3fs is installed and ready to go. If, on the other hand, the output is empty, install s3fs with the following command:
sudo apt install s3fs
Create a folder as mount location for the bucket. For example, to create a folder called directory within your home folder, enter:
mkdir ~/directory
Execute the command below to mount your object storage container - replace testjohn with the name you chose for that container and ~/directory with the location to which you want to mount it. You can also replace other parameters as needed.
sudo s3fs testjohn ~/directory -o passwd_file=~/.passwd-s3fs -o url=https://s3.central.data.destination-earth.eu -o use_path_request_style -o umask=0002 -o allow_other
sudo s3fs testjohn ~/directory -o passwd_file=~/.passwd-s3fs -o url=https://s3.lumi.data.destination-earth.eu -o use_path_request_style -o umask=0002 -o allow_other
sudo s3fs testjohn ~/directory -o passwd_file=~/.passwd-s3fs -o url=https://s3.leonardo.data.destination-earth.eu -o use_path_request_style -o umask=0002 -o allow_other
sudo s3fs testjohn ~/directory -o passwd_file=~/.passwd-s3fs -o url=https://s3.marenostrum.data.destination-earth.eu -o use_path_request_style -o umask=0002 -o allow_other
sudo s3fs testjohn ~/directory -o passwd_file=~/.passwd-s3fs -o url=https://s3.eumetsat.data.destination-earth.eu -o use_path_request_style -o umask=0002 -o allow_other
Explanation of parameters:
- -o passwd_file
Describes path to the file containing credentials.
- -o url
Endpoint address of object storage from Destination Earth cloud
- -o use_path_request_style
Parameter that fixes issues with certain characters (such as dots).
- -o umask
Describe permissions for accessing a container (read-write-execute).
- -o allow_other
To allow other users access to the container.
To verify whether it works, navigate to the directory where your bucket is mounted and list all the data inside.
eouser@vm1:~/directory$ ls -al
total 5
drwxrwxr-x 1 eouser eouser    0 Jan  1  1970 .
drwxr-x--- 6 eouser eouser 4096 Dec 15 11:13 ..
For testing purposes, you can upload a file by moving or copying it to that directory. You can also create a text file, for example called newtext.txt with something as its content:
echo "something" >> newtext.txt
List the content of the directory:
ls -al
The output should contain the file you created, for example:
total 5
drwxrwxr-x 1 eouser eouser    0 Jan  1  1970 .
drwxr-x--- 7 eouser eouser 4096 Dec 15 11:17 ..
-rwxrwxr-x 1 eouser eouser   14 Dec 15 11:17 newtext.txt
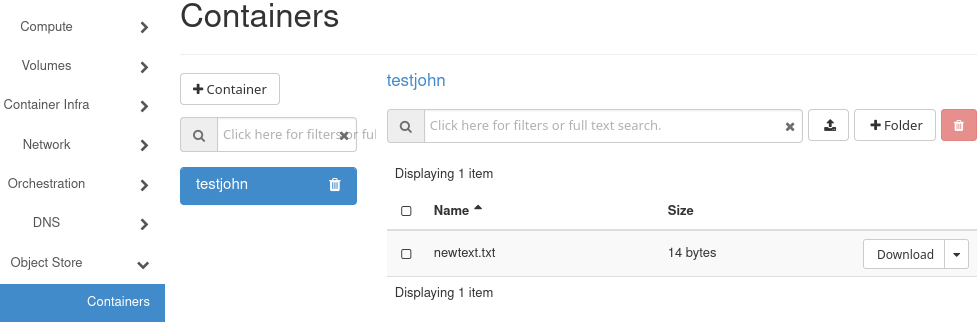
To check whether it actually exists on the server, log in to your Horizon dashboard and click on the Object Store tab:

On the right are the files that are stored inside the bucket.
Configure automatic mounting on startup
This section covers how to configure automatic mounting of your object storage container upon system startup.
First, check the full location of s3fs executable file with this command:
type s3fs
You should get output similar to this:
s3fs is /usr/local/bin/s3fs
Open file /etc/fstab using your favorite text editor. You will need sudo permissions to edit it so if you are using nano, the command will look like this:
sudo nano /etc/fstab
Add the following line to this file – be sure, however, to replace testjohn with the container name that you actually used previously.
/usr/local/bin/s3fs#testjohn /home/eouser/directory fuse passwd_file=/home/eouser/.passwd-s3fs,_netdev,allow_other,use_path_request_style,uid=0,umask=0222,mp_umask=0222,gid=0,url=https://s3.central.data.destination-earth.eu 0 0
/usr/local/bin/s3fs#testjohn /home/eouser/directory fuse passwd_file=/home/eouser/.passwd-s3fs,_netdev,allow_other,use_path_request_style,uid=0,umask=0222,mp_umask=0222,gid=0,url=https://s3.lumi.data.destination-earth.eu 0 0
/usr/local/bin/s3fs#testjohn /home/eouser/directory fuse passwd_file=/home/eouser/.passwd-s3fs,_netdev,allow_other,use_path_request_style,uid=0,umask=0222,mp_umask=0222,gid=0,url=https://s3.leonardo.data.destination-earth.eu 0 0
/usr/local/bin/s3fs#testjohn /home/eouser/directory fuse passwd_file=/home/eouser/.passwd-s3fs,_netdev,allow_other,use_path_request_style,uid=0,umask=0222,mp_umask=0222,gid=0,url=https://s3.marenostrum.data.destination-earth.eu 0 0
/usr/local/bin/s3fs#testjohn /home/eouser/directory fuse passwd_file=/home/eouser/.passwd-s3fs,_netdev,allow_other,use_path_request_style,uid=0,umask=0222,mp_umask=0222,gid=0,url=https://s3.eumetsat.data.destination-earth.eu 0 0
Apart from testjohn, you can also
replace /usr/local/bin/s3fs with the full path of the s3fs executable,
replace /home/eouser/directory with the full location of the place in which you want to mount your container,
replace /home/eouser/.passwd-s3fs with the full location of your password file.
Mount on the local Ubuntu computer
The process of mounting on a local Ubuntu computer should be almost the same as on a VM cloud. Make sure that you have sudo permissions.
The main difference is that Ubuntu computers don’t usually have s3fs preinstalled. If that is the case for you as well, install s3fs with the following command:
s3fs
Otherwise, feel free to choose a location of your password file and location in which you want to mount your object storage container and follow the instructions from the section above, replacing necessary parameters.