How to Prepare and Run Open Data Cube Cloud
Open Data Cube is an open source geospatial data management and analysis software – a software library and set of command line tools to download and analyse Earth observation data. In this article you will:
- Launch an instance
in order to start working with Open Data Cube
- Install Open Data Cube on DEDL cloud
in order to download and analyse satellite data.
What We Are Going To Cover
Create virtual machine for Open Data Cube
Add floating IP to connect to your instance
Connect to the VM using SSH
Run ODC environment
Add a security group for Jupyter Lab (Optional)
Prerequisites
No. 1 Account
You need a DEDL hosting account with access to the Horizon interface:
No. 2 SSH access to the virtual machine
To use SSH to access the virtual machine you created in the cloud, follow article How to connect to your virtual machine via SSH in Linux
Prerequisites
Disclaimer
It is not recommended to change configuration of the PostgreSQL pre-installed on the image.
Step 1 Create virtual machine for Open Data Cube
Start the process of creation of a new virtual machine with commands Compute -> Instances -> Launch instance. Use first option, Details, to define the name of the virtual machine you are making. Let it be CF-Ubuntu 20.04 LTS OpenDataCube.
Move to second option, Source, to choose the image of the operating system you want to use.
Select Boot Source and specify image CF-Ubuntu 20.04 LTS OpenDataCube.

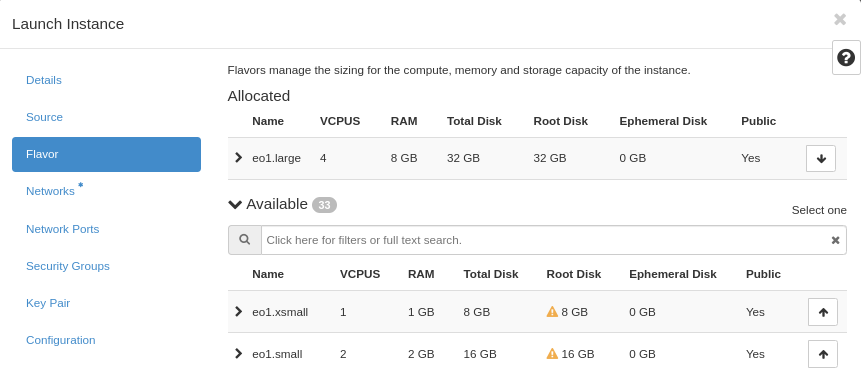
Move to option Flavor and choose the flavor of the machine you are making. If there is a yellow triangle, that flavor cannot be used.
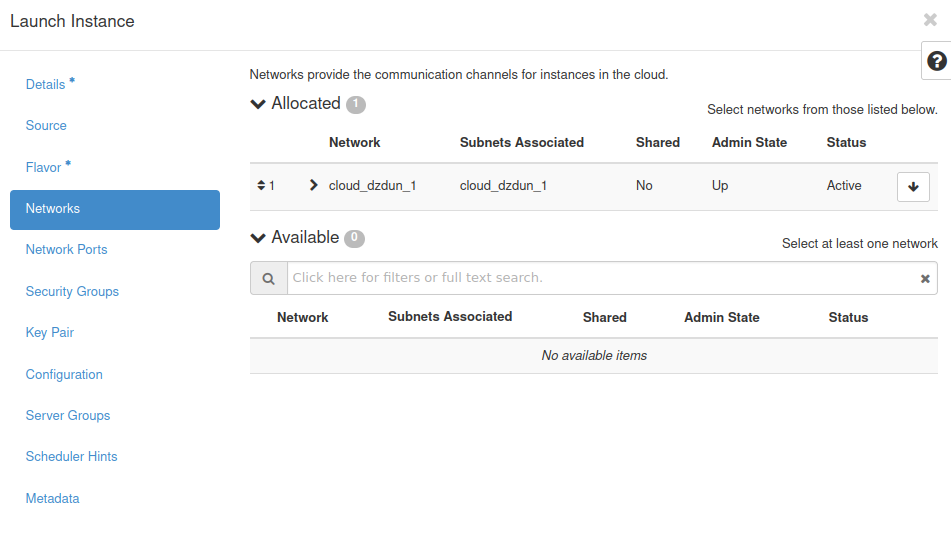
Click on Networks and add network which name starts with <your_default_network_name>_1.
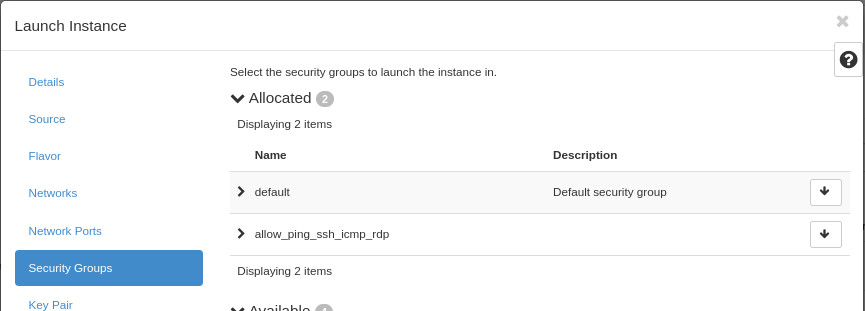
Move to option Security Groups and assign the security group called allow_pin_ssh_rdp. This group will make your instance become reachable via SSH protocol.
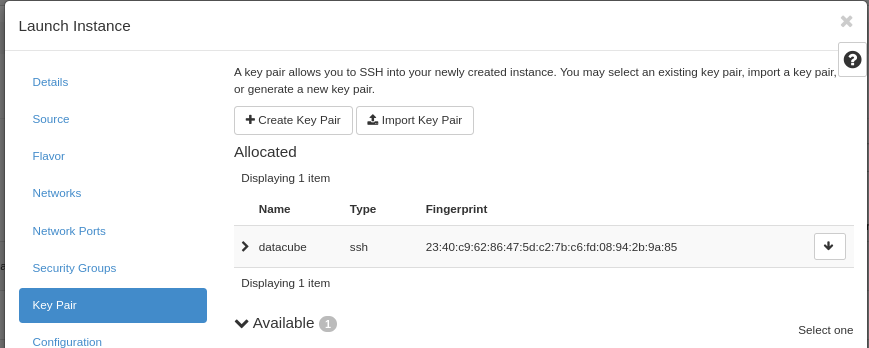
Move to option Key Pair and select a key pair or enter a new one.
If all these steps have been performed, you can start the virtual machine.
Step 2 Add floating IP to connect to your instance
Assign public IP address to your VM
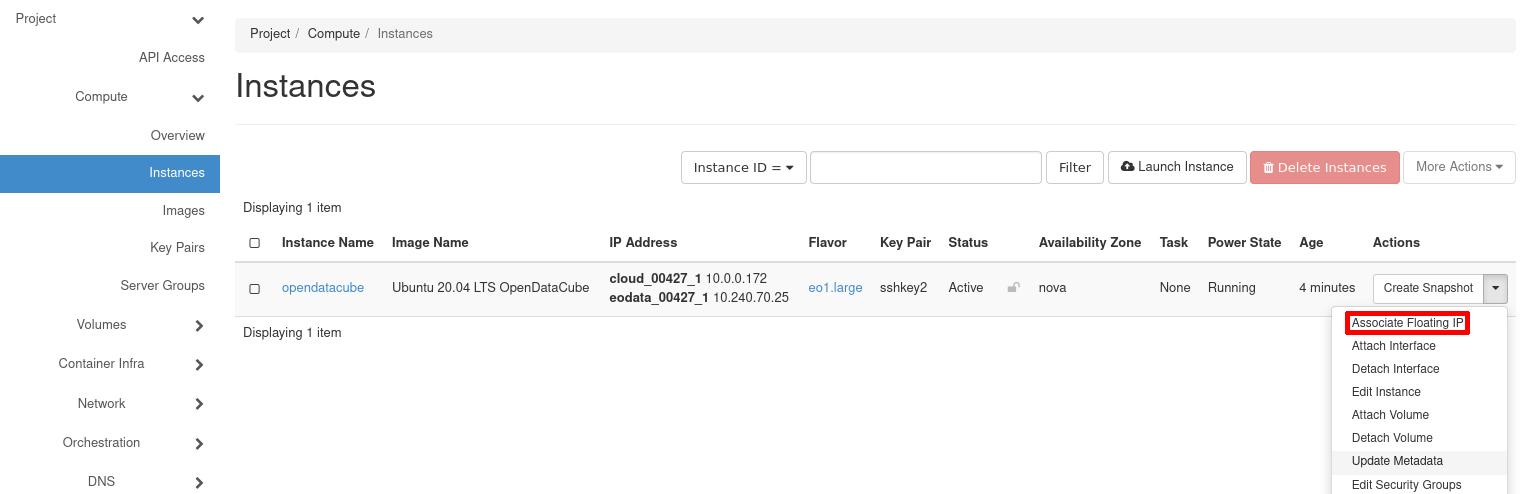
Add floating IP. If none is offered by the system, click on the PLUS button for a new address.
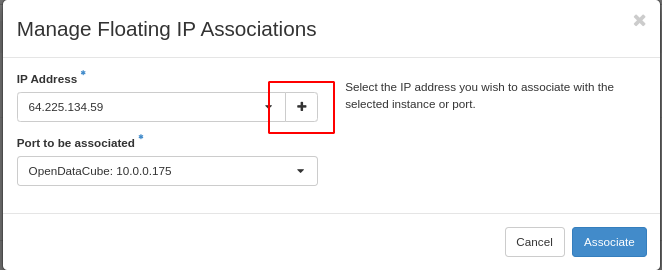
The next step is to connect to the instance via SSH.
Step 3 Connect to the VM using SSH
Use Prerequisite No. 2 to establish the type of SSH access from your local computer to the VM in the cloud.
Step 4 Run ODC environment
Run ready to use conda environment
conda activate odc_env
Perform tests
cd ~
conda activate odc_env;
export DATACUBE_CONFIG_PATH=/home/eouser/.datacube_integration.conf
export LD_LIBRARY_PATH=/home/eouser/anaconda3/lib;
datacube -v system init;
# testy
cd ~/datacube-core
.  check-code.sh
The odc_env environment is ready for work.

After you see such a notification, you can start interacting with ODC. For instance, you can now start indexing products and datasets.
Optionally, you can prepare the ground for using it with Jupyter Lab, later on.
Add a security group for Jupyter Lab (Optional)
To connect Jupyter Lab to the VM you created, there needs to be another security group. Go to Network → Security Group tab and select Create Security Group.
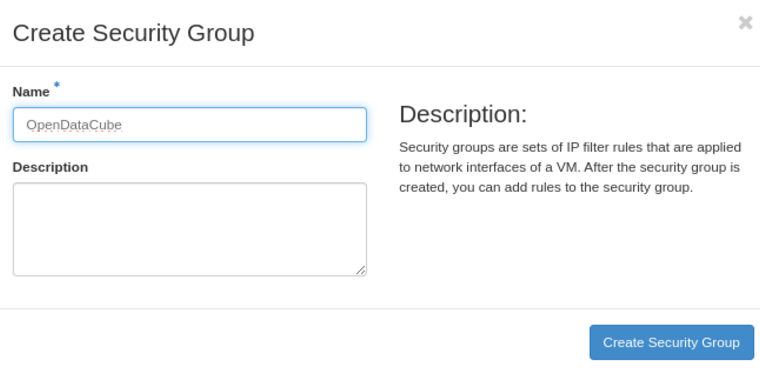
A new group called OpenDataCube is formed:
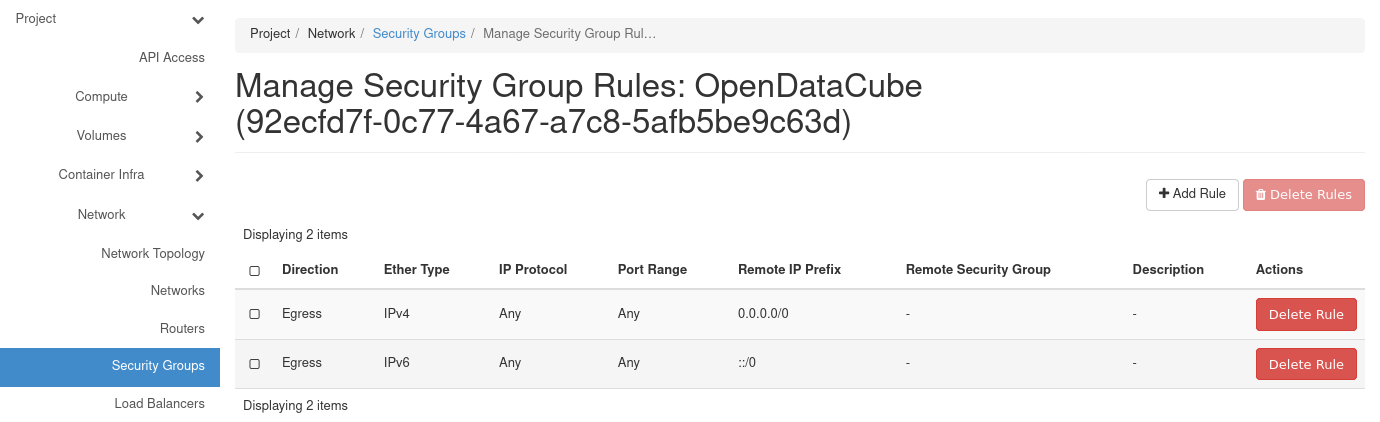
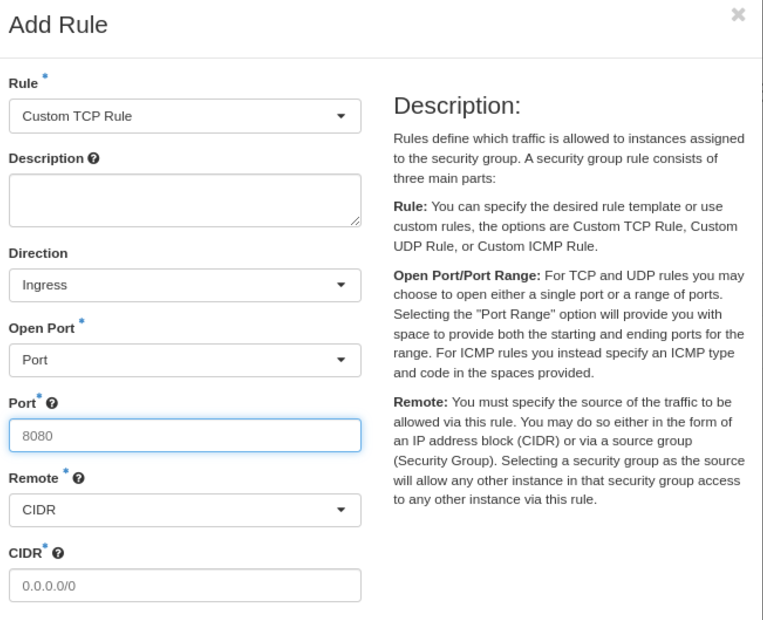
Add Ingress Rule to your security group and open Port 8080. On this port, jupyter-lab will be reachable.
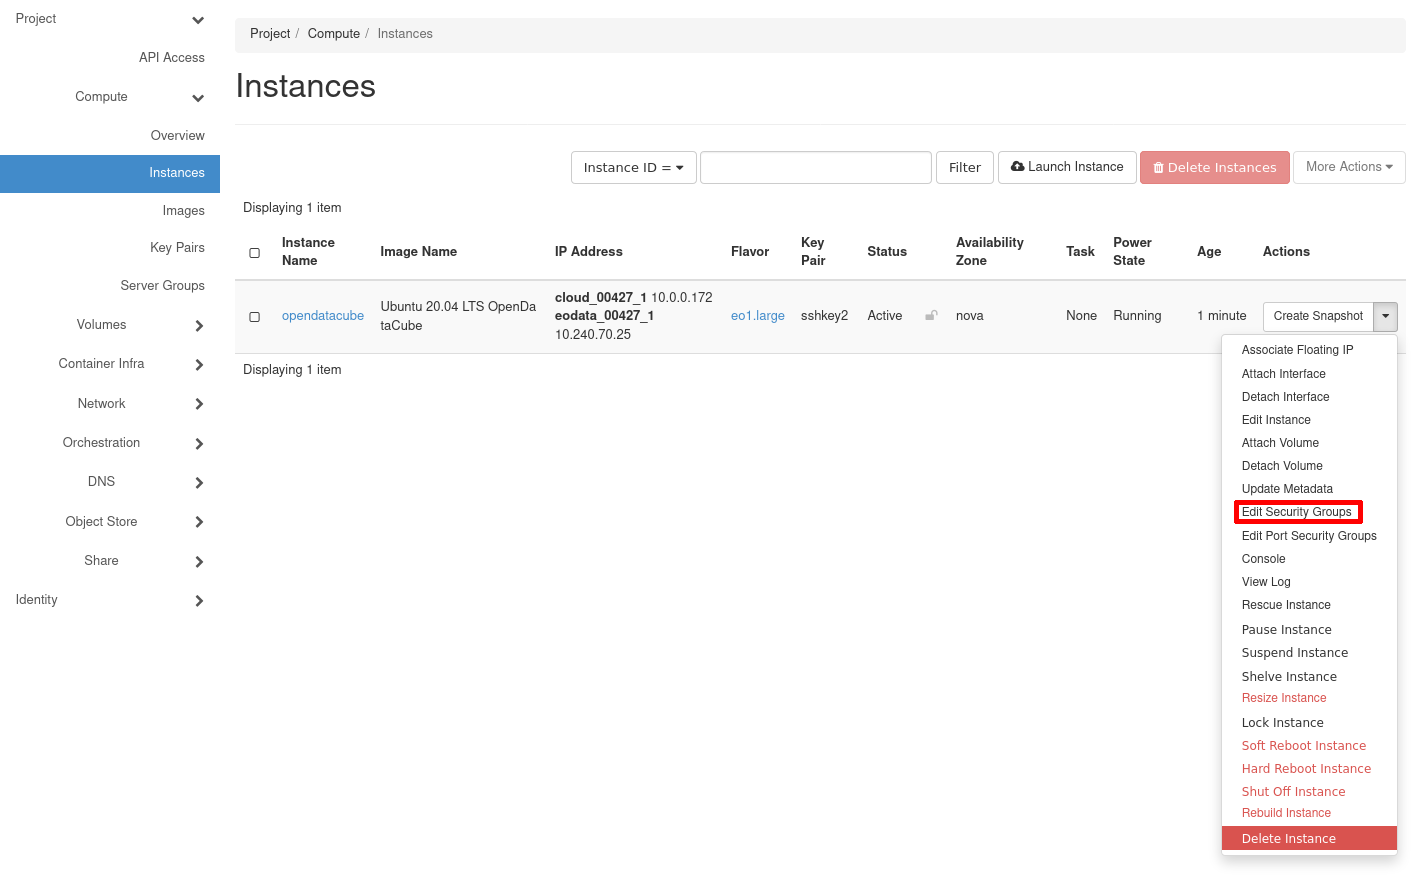
Go to Compute → Instances tab and add your security group to the instance.
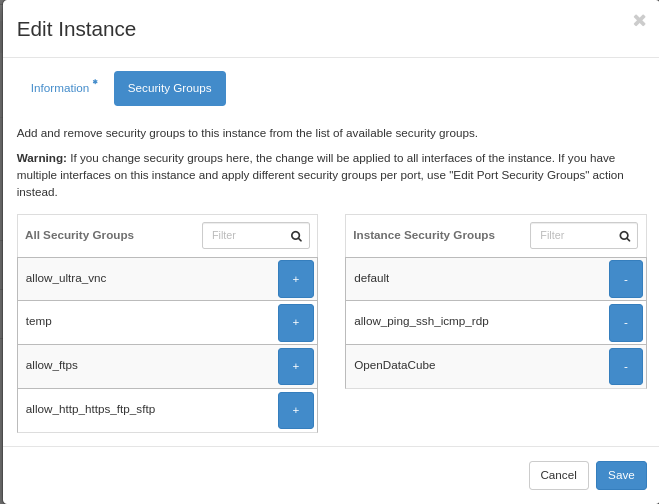
Now your instance is prepared to run Open Data Cube applications from a Jupyter Lab of your choice.